Author Archives: Patrick

Making the Leap to Liveaboards: Hopes and Fears

In about a month, we’re making the leap to become liveaboards at Shilshole. We haven’t decided for how long, but will re-evaluate at one year – it’ll come down to how well we survive the difficult winter months when it’s rainy, cold and dark every day.

There are some big reasons making it worth trying the liveaboard lifestyle, and an equal number of fears / worries we have about it. It’s not right for everyone, but everyone we talk to who has made the jump to being liveaboards loves it and recommends it.

To me “liveaboard” means living on a boat while being tethered to one home port most of the time – either because you have to work a job on land, or perhaps you’re retired but just don’t want to go anywhere. Although last summer we lived on the boat for 3 months, that was cruising – which is living aboard while traveling, an entirely different matter.

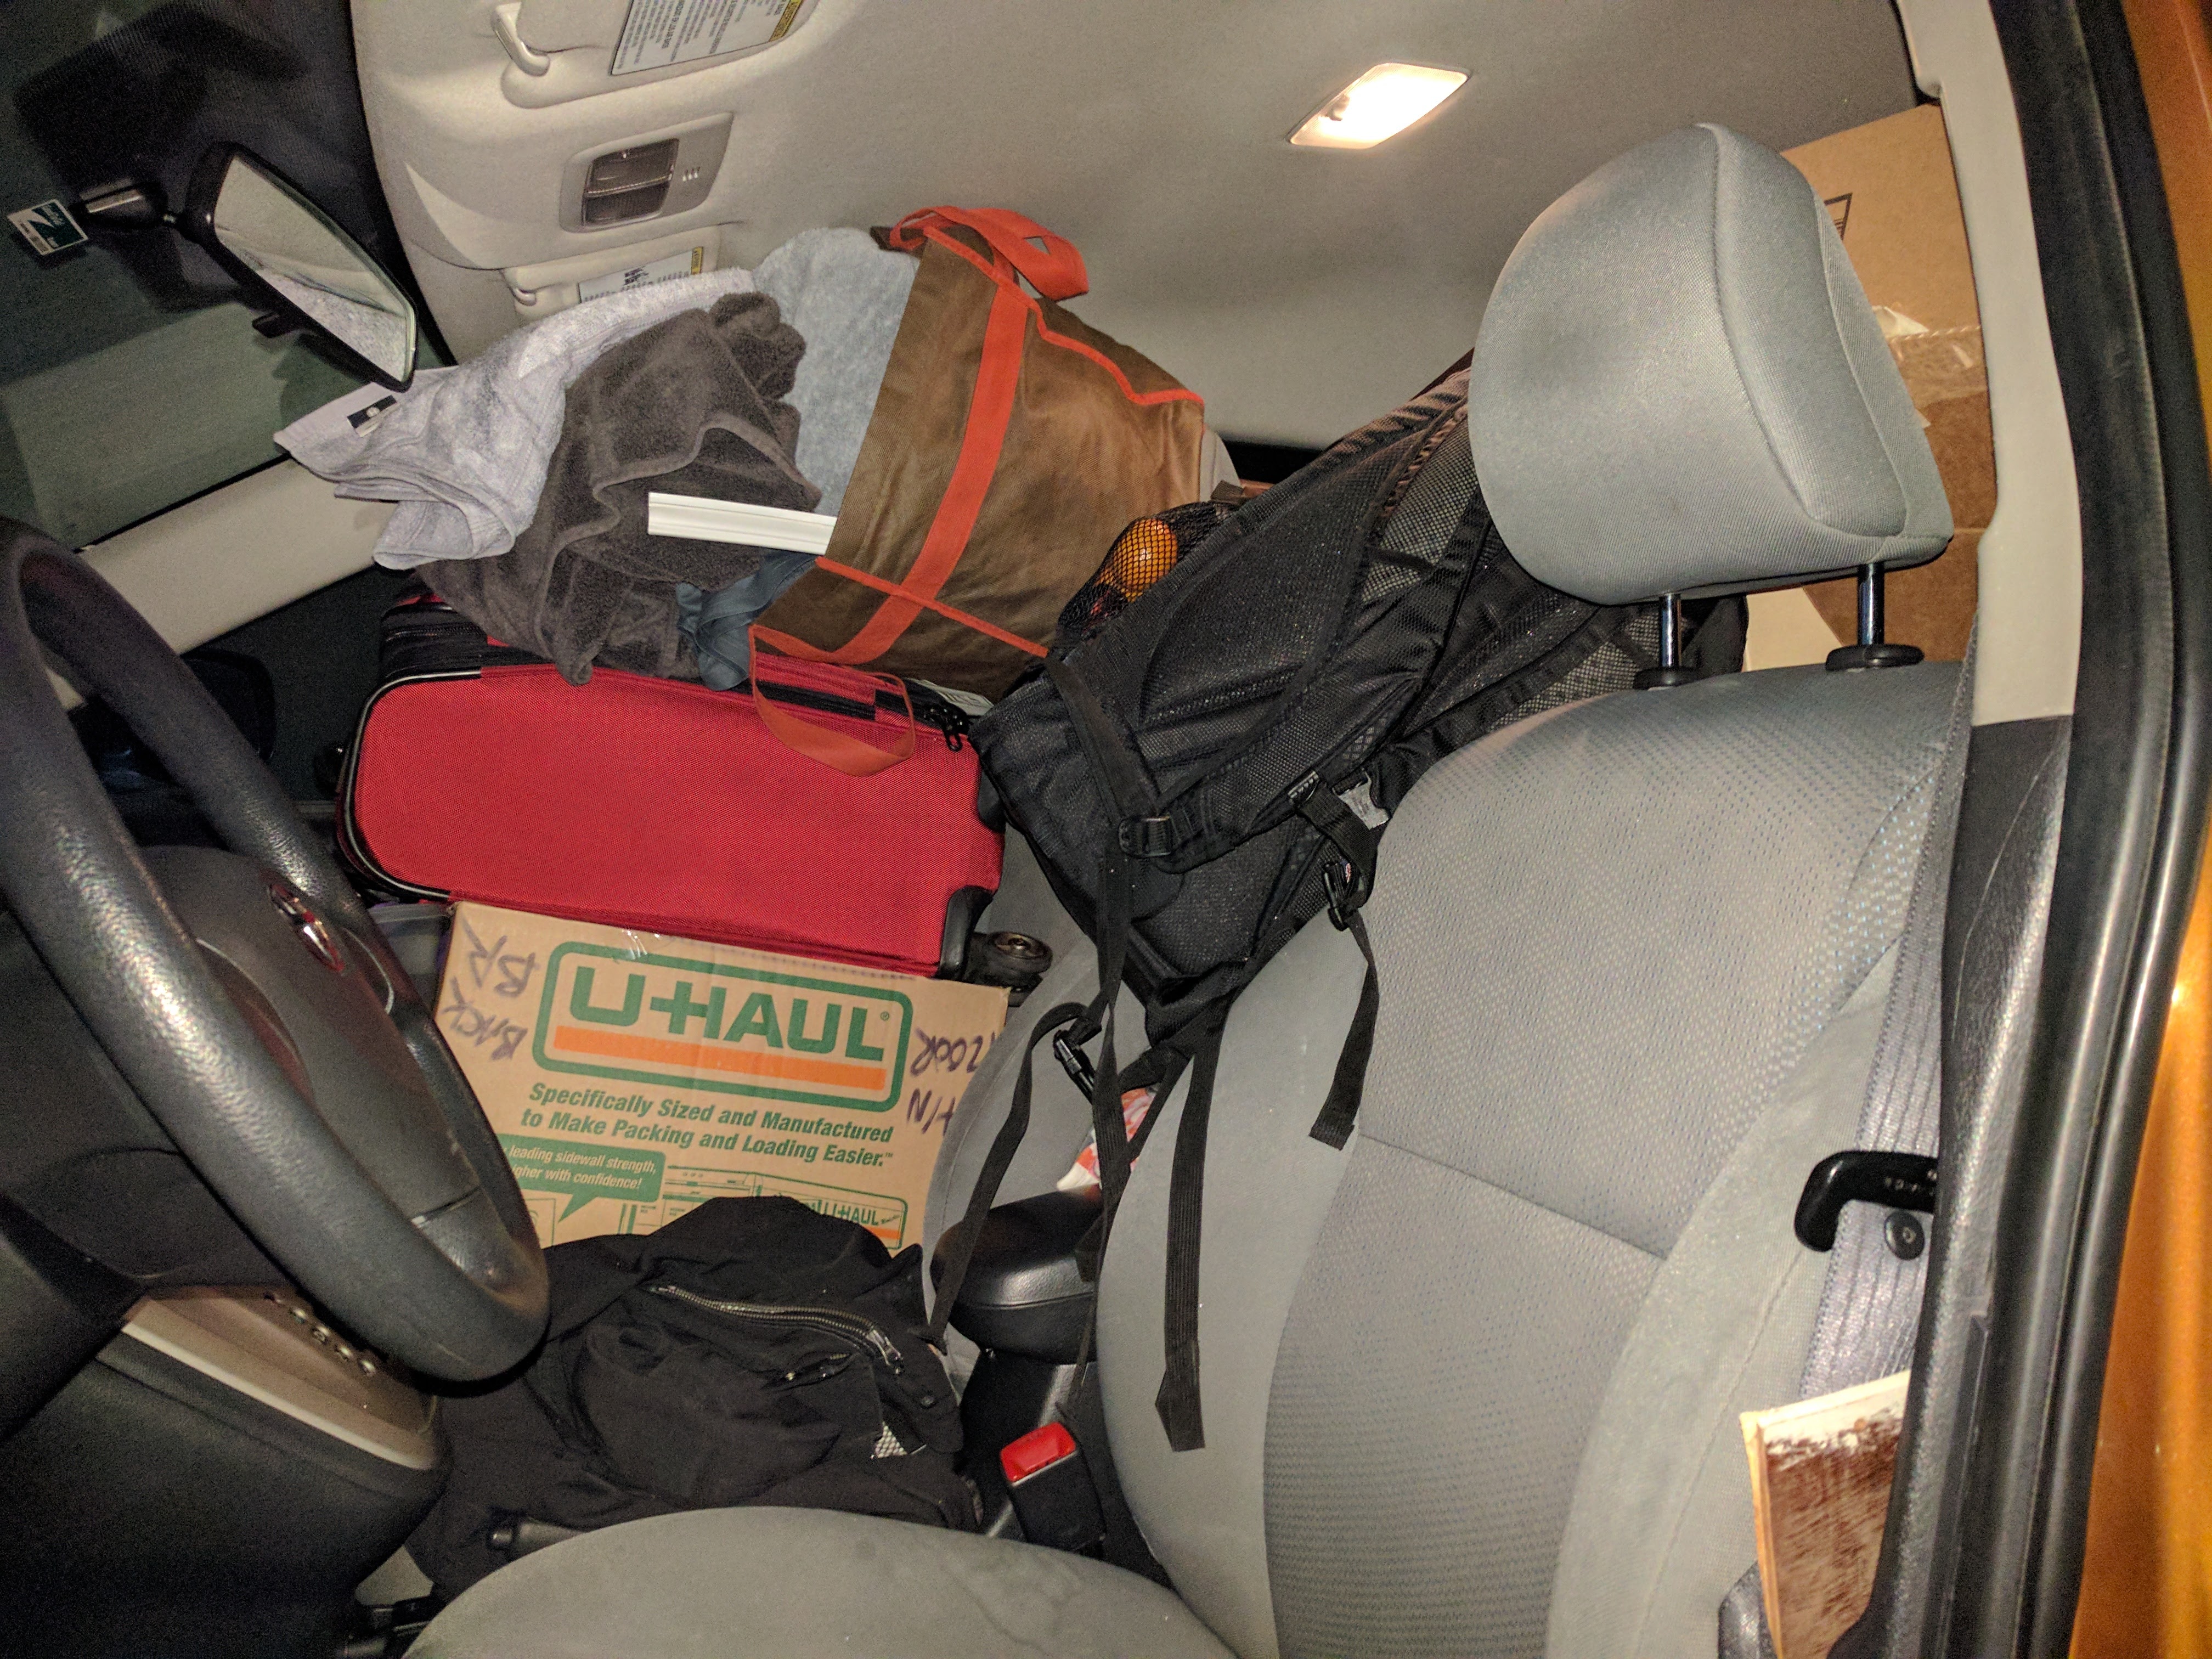
Moving aboard involves lots of full carloads – to both the boat and storage

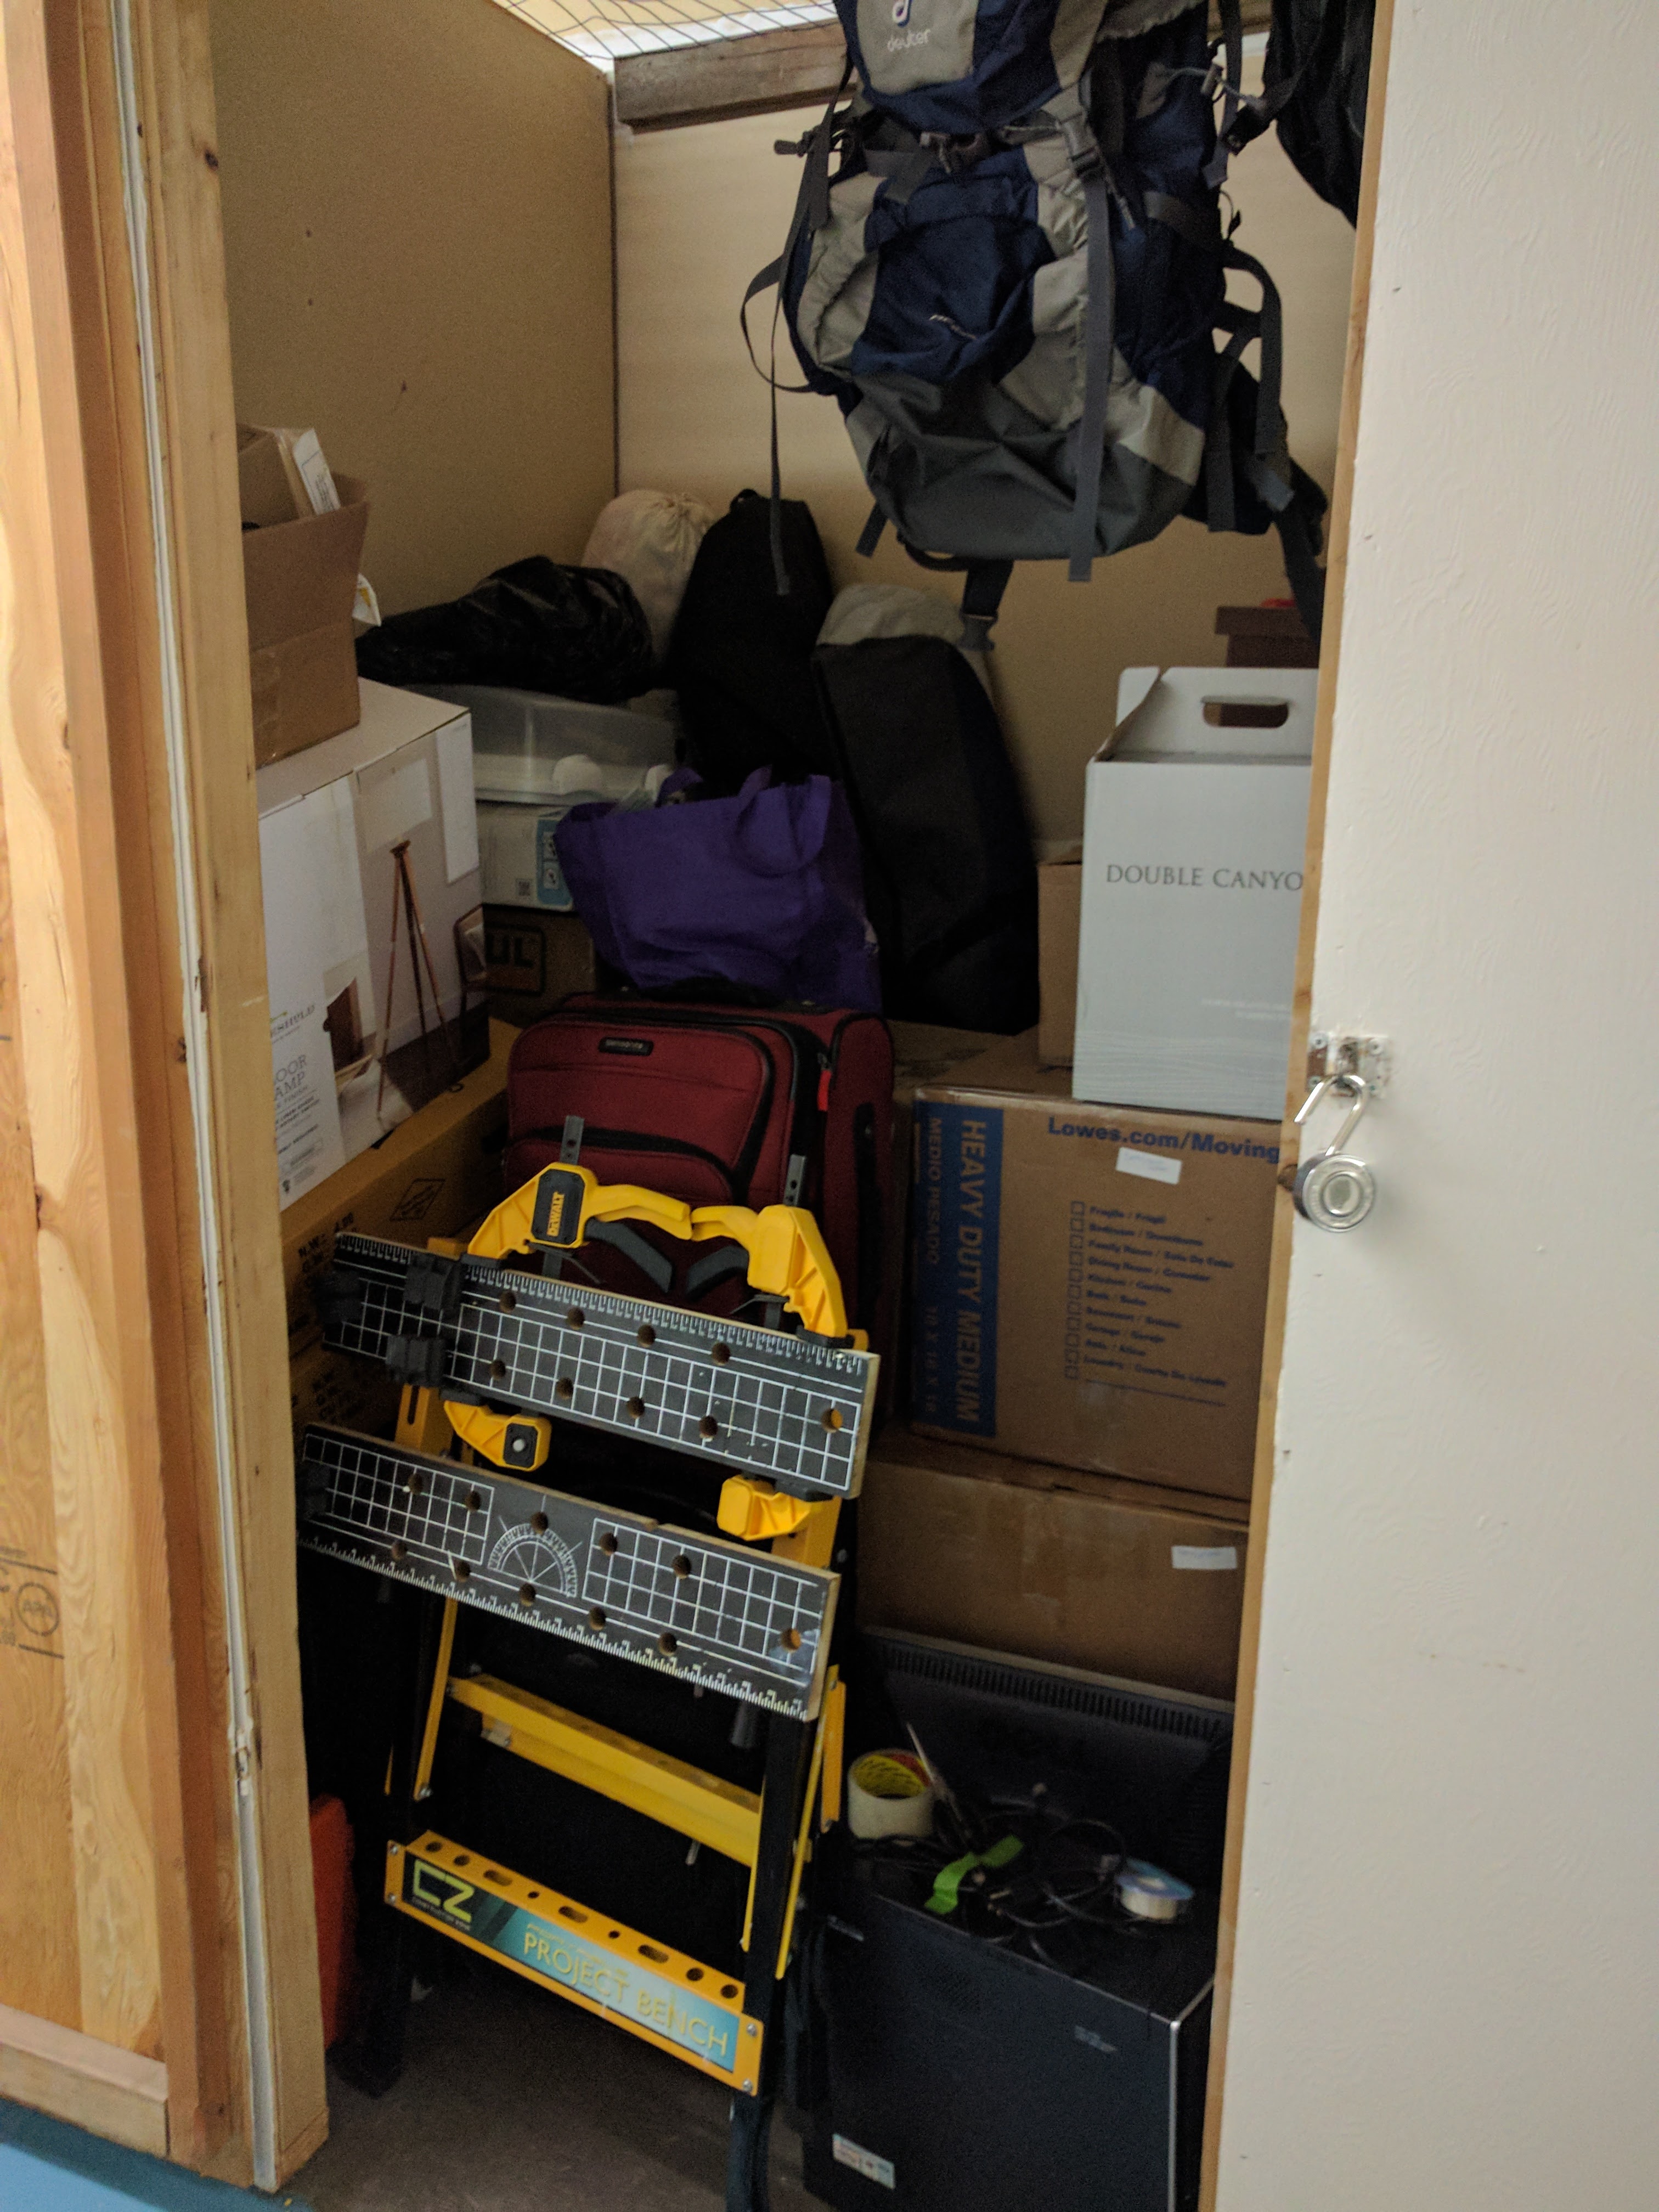
The storage locker already getting pretty full – we need to start stacking higher

The benefits to liveaboard life are clear:

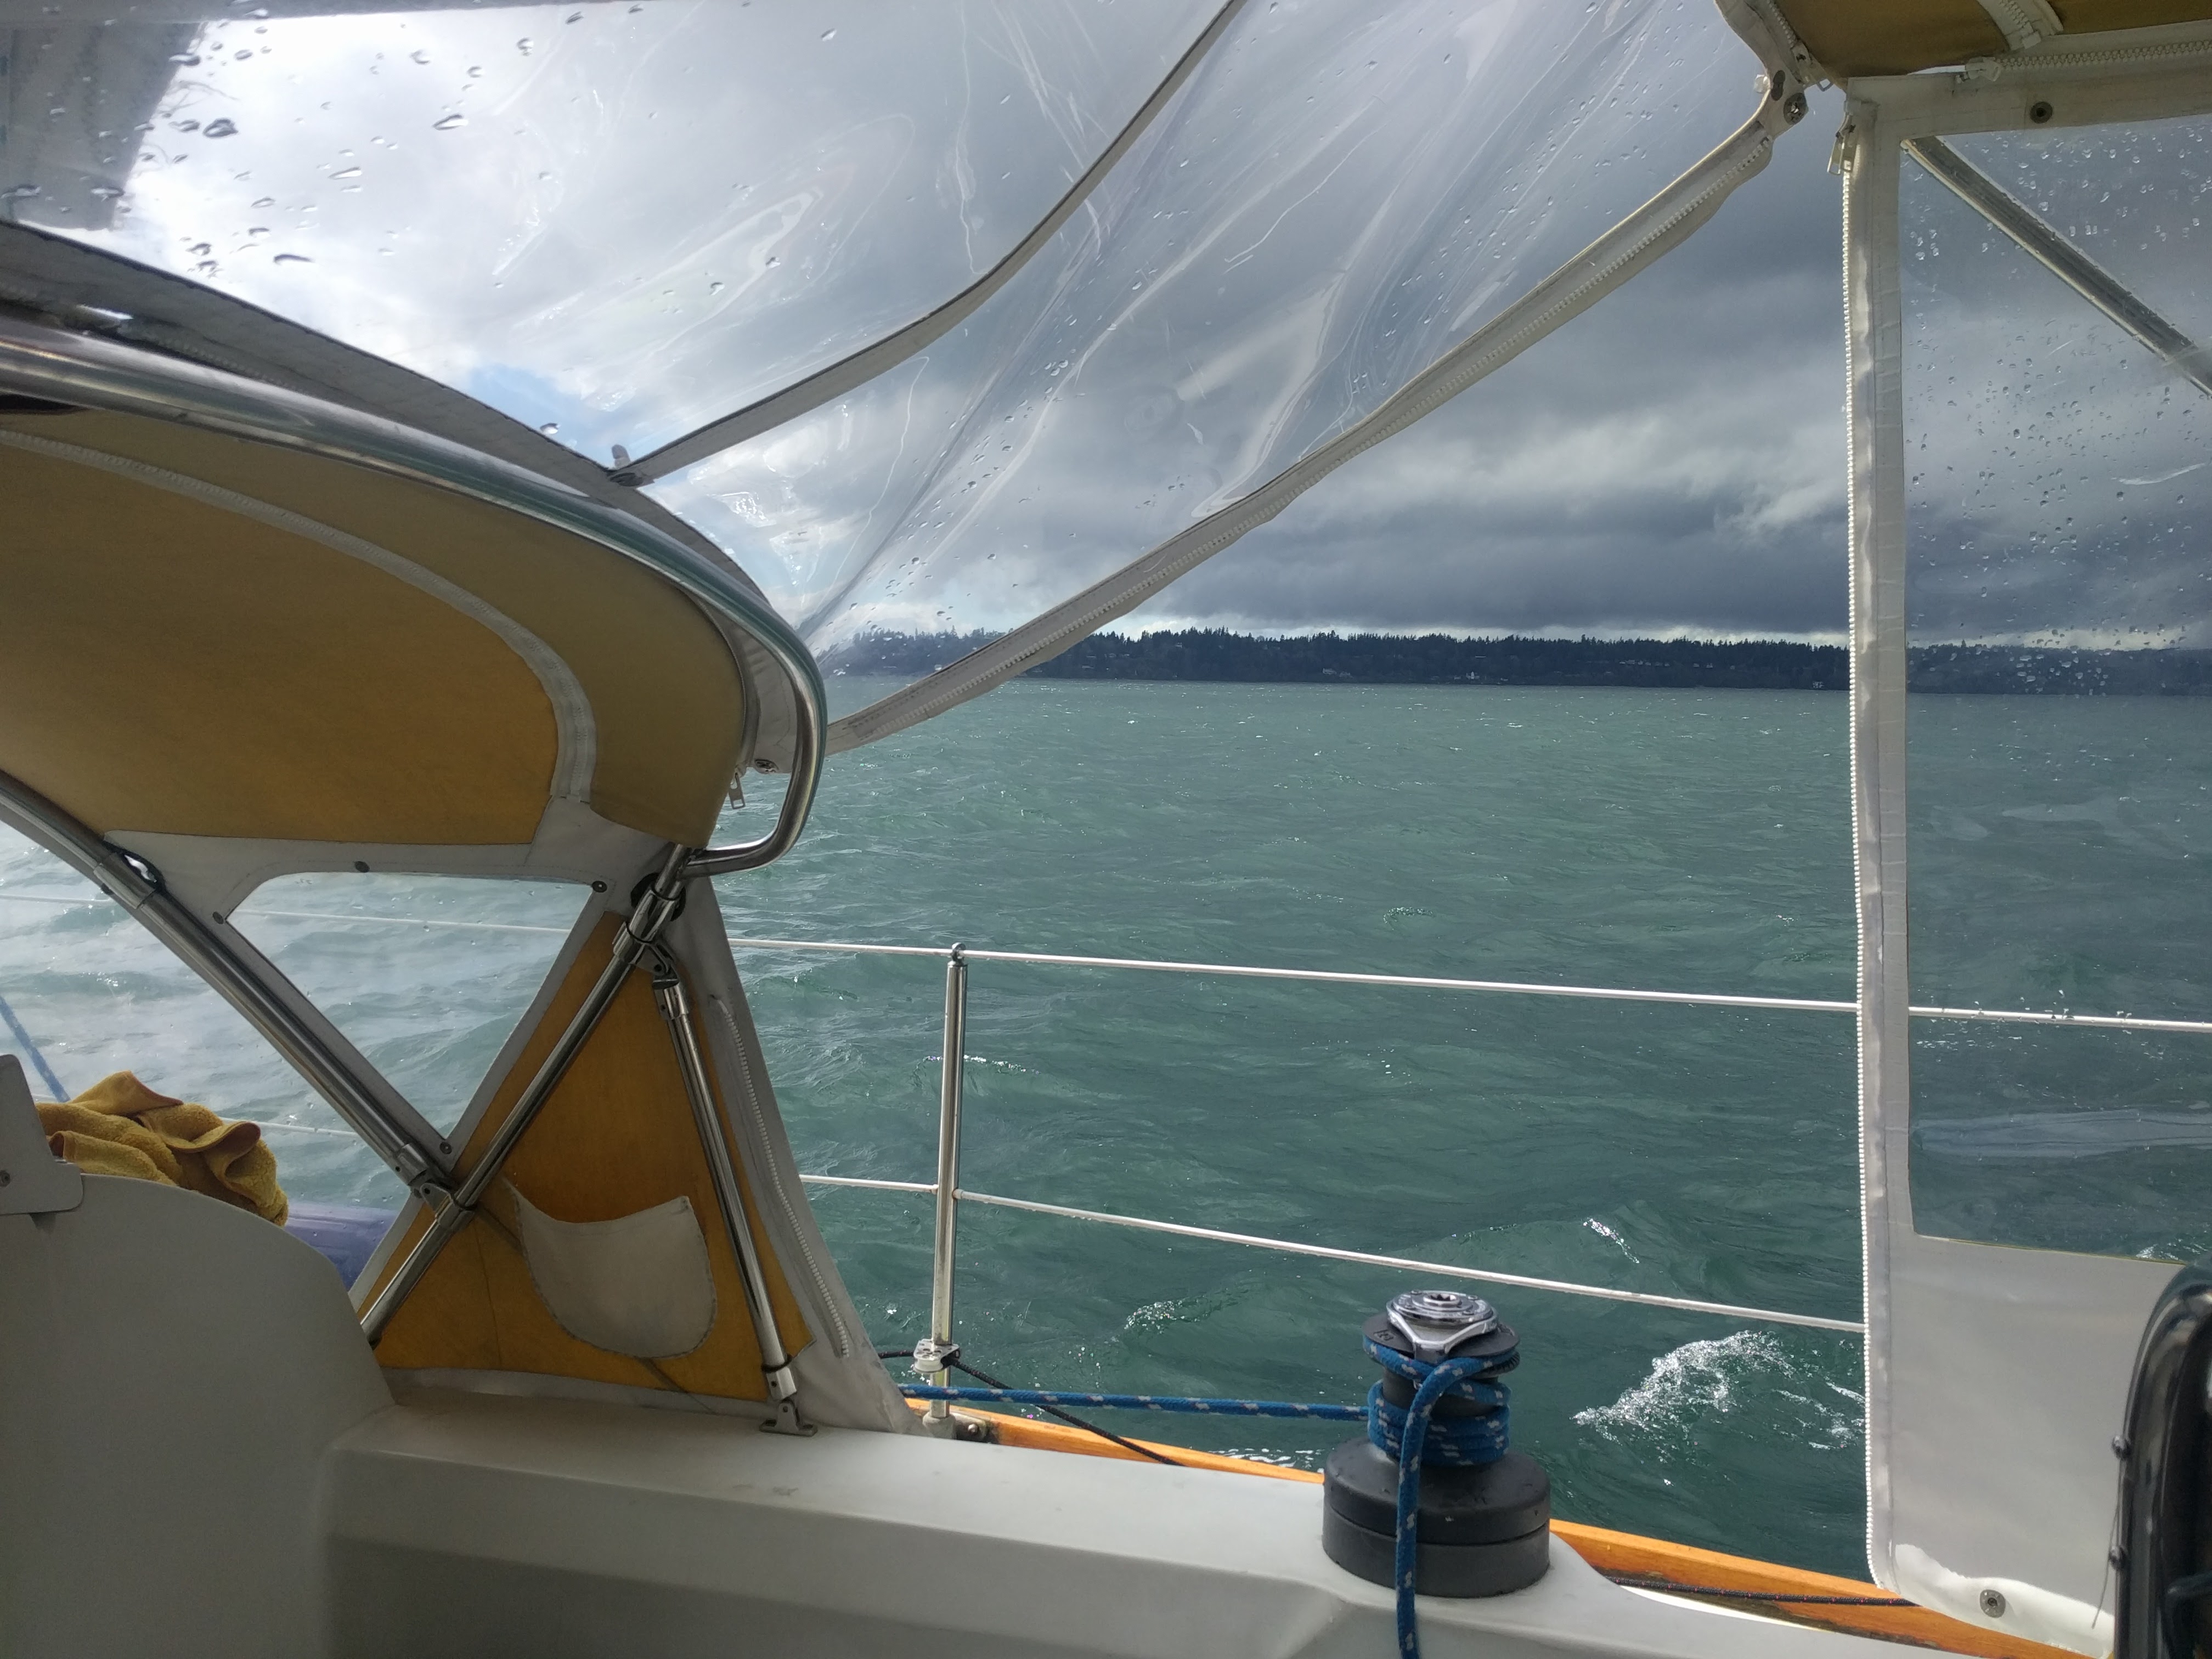
  • Waterfront real estate. Living in a marina, your home is in a beautiful waterfront location with views of the snow-capped Olympic mountains and wildlife (sea birds, seals) passing by your back porch (cockpit).
  • Money. Not many people discuss this, but I think the biggest advantage of living aboard is how much money you can save. With Seattle’s surging real estate market, a nice 1-bedroom apartment in the city can run about $1500-2000. Liveaboard moorage for a 38-foot boat runs about $680. That’s a savings of up to $15,000 per year, which can be put towards cruising, vacations, or paying off debt.
  • Living life in a more Minimalist way – less consumerism, less stuff, less distraction.
  • Efficiency. We’ll no longer need to commute between an apartment and the boat to do project work or go sailing. This saves time and may make certain types of projects easier. We’ll no more have a “boat pile” at home and a “home pile” at the boat.
  • Carbon Impact. Living on a boat is a very earth friendly way to live. On the boat, we use a fraction of the electricity we use at home, a tiny fraction of the amount of water, and produce less consumerist discards (trash/recycling) due to the forcing function of having to live in a minimalist way.

There are also a few fears we have about living aboard:

  • Will it make us end up sailing less? When your boat is your home, it’s more work to get it shipshape for sailing. Not only that, since it’s our only home, we can’t easily go sailing separately – if I want to go out sailing while Natalie is at work, a happy hour, or just doesn’t feel like sailing that day, she won’t have anywhere to return to after the event.
  • Storage – will having massively less space to store stuff be a considerable burden?
  • Will the wet, rainy weather we get for weeks on end (before the summer starts) be tiresome? Will heating be a problem?
  • Commute – my commute gets slightly better (biking between Ballard + Fremont rather than Capitol Hill + Fremont) but Natalie’s gets worse. Getting to downtown from Ballard isn’t easy. She can drive in 20-25 minutes on an early schedule, but then has to pay $30/day for parking. Public transit involves a 1 mile walk followed by 2 buses, totaling about a 1 hour commute. Biking is an option but also takes close to an hour. Any Ballard-Downtown commuters know of better options?
  • When we go cruising now, being on the boat in anchorages is truly special. Will that experience lose its magic when being on the boat is a more routine, everyday occurrence?

As with any change in life, there are some scary aspects, and some exciting aspects.

We’re currently working on massively downsizing – selling possessions on Craigslist and giving carloads full to Goodwill – much like we did last spring before renting our place for 3 months. But this time we’re also selling our condo, which means getting rid of all our furniture too. We have a small storage locker we’re using for keepsakes, winter clothes, ski gear, etc.

When you can’t agree on whether something that hasn’t been used in a long time is worth keeping, put a note on it marking a discard date – if you still haven’t used it in X amount of time, then clearly it wasn’t really needed

It’s strangely liberating to get rid of so much stuff. You don’t realize how much you have until you do it. Further, you don’t realize how much of a disposable purchasing society we live in. People buy so much stuff they don’t really need that it means possessions are not treasured, and Goodwill gets piles of barely used stuff every single day. Some things are impossible to sell on Craigslist because they’re not valued.

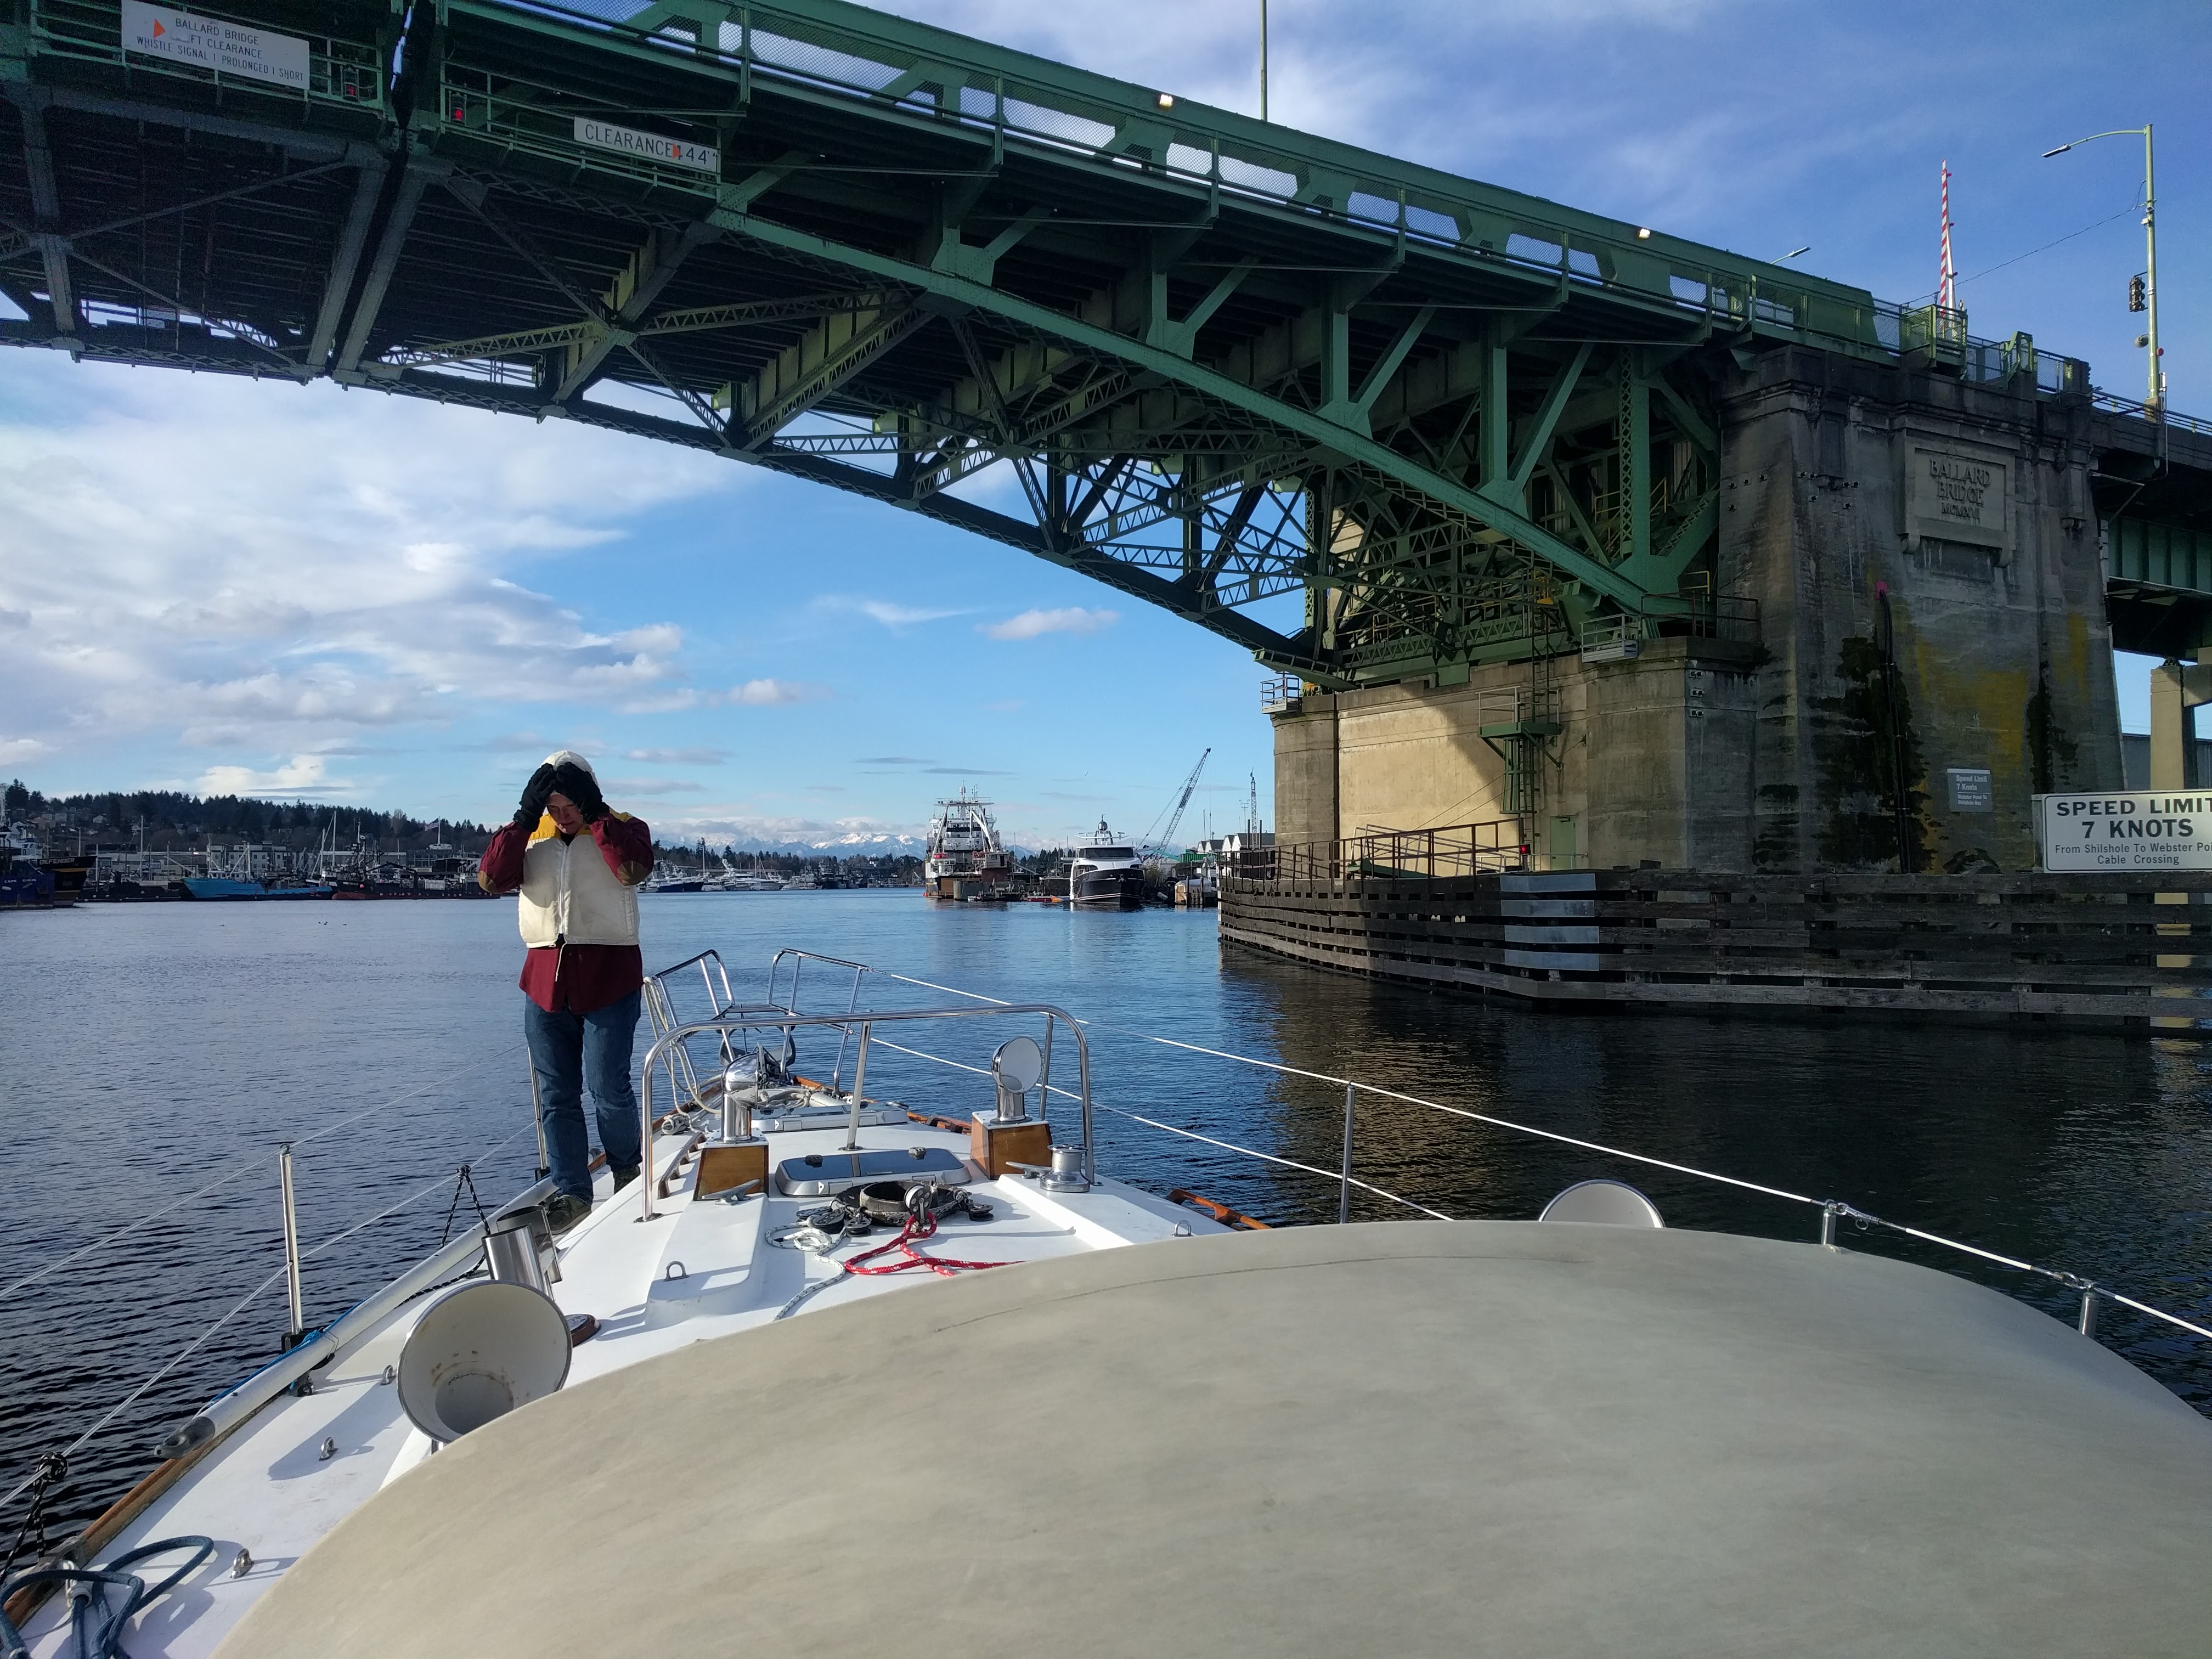
Despite a lot of work, we’re still getting out sailing about twice a month!

Fishing in Puerto Vallarta

“Fish on!” was called out across the boat. It was my turn in the fighting chair – 9th in a lineup of 9 on our charter in the Bay of Banderas. Everyone else had caught yellowfin tuna, so I was expecting that was what was on the line. But immediately it was clear this was something very different. The line on the spool started running – fast. The spool was at max tension, but it did nothing to slow this fish as it dove deeper and deeper. The two Mexican crew running the boat looked at each other and started speaking in Spanish, too fast for me to understand. El marlin negra – black marlin – is what they think was on the line.

Black marlin can grow to 10+ feet in length and hundreds of pounds – a whole different story than the 20-40 lb 3’ yellowfin tuna. The captain stopped the boat and they told me to go slow, a long fight was on my hands.

The fish kept running – 100 feet, 200 feet, maybe 300 feet of line spooled out. The line was going straight down, and was so tight you could play piano notes on it. As he kept running we started worrying the spool was going to run out of line. Finally he stopped and I worked hard to bring that line back in. It was a full body work-out pulling the rod up and then coming down, cranking the spool hard, repeated again and again.

Then the fish started running again, careening way off to the side, and the line started running out – losing 100-200 feet or so of my progress. At times I could only stop and rest, shaking my numbed arms to bring some life back into them. I was out of breath and drenched in sweat. This was more of a workout than I imagined fishing could possibly be.

Eventually I passed the torch to the next in the line-up – Natalie – and she fought the fish for a while. In the end, four different people took a turn, but as we were transferring to the 4th person, the marlin (we think) snapped the lead on the line, and we came up empty handed. It sure would’ve been great to see what it was. But, the experience was worth it in itself, and we had some delicious yellowfin tuna for dinner that night.

Continue reading

Choosing a Non-Skid Paint

Recently we passed the 2 year anniversary of owning our boat – two years since Feb 14 2015. It’s amazing to think how far we’ve come in that time – with many major projects completed (a rerig, rudder removal + steering system repair, rebedding lots of deck hardware, etc), plus two major summer cruises (lower west coast of Vancouver Island, and Seattle to the Broughtons and Back), along with lots of weekend sails in between those.

Somehow that 2 years feels like much longer.

One project we still haven’t completed is redoing the nonskid on the deck. In some areas the old non-skid was literally worn away – it was so smooth behind the helm that when sailing upwind our feet would gradually slide down the floor until we wedged them against something. So before leaving for our 3-month sail last spring, we painted the cockpit with KiwiGrip. That was a great help – but there are still more areas to do.

It would seem that choosing the best non-skid paint would be simple, but it’s not. Any time there are 5 or more product choices available for one purpose in the boating world, it’s a good sign there’s no clear winner. If it were a simple answer with a clearly superior option, there would only be 1 or 2 products, not 5-10.

There were three things we wanted from a non-skid paint:

  • The non-skid part (not slip and slide around on it)
  • Look reasonably nice
  • Not hurt our butts or bare feet when we sit or stand on it.

Continue reading

Rerig Completed! The Ups and Downs of a 3 Month Boat Project

Since I started the rerig planning three months ago, two of the suppliers I considered have gone out of business – Navtec (news broke on SailingAnarchy) and Hall Rigging USA (announced on SailingScuttlebutt), both in Rhode Island. Both still have foreign operations, but shuttered their US operations while I was waiting for our rigging to be produced by BSI. Despite significant delays from BSI, it could’ve been even worse if I had decided to go with Navtec or Hall – I could still be waiting!  

At the same time it’s sad news for their employees and the sailing community, because the US sailing industry has two fewer suppliers now. Navtec’s equipment and inventory is going up for auction (“by order of the secured creditor”), featuring an impressive array of very advanced machinery. Quite sad, but if anyone wanted to pick up where Navtec left off, all the equipment and more is there.

Completing the Rerig – Success!

As we hoisted the sails last Sunday, I quickly scurried about the deck checking the mast – is it leaning to port, to starboard? Is anything about to go horribly wrong?  Amazingly, everything was perfect – my at-dock tune was good enough that no tuning was needed under sail.

As we sailed out of the protection of West Point and Discovery Park into a 20 knot southerly, the boat heeled more and the mast still looked good – no fall off to leeward or bends at the lowers or intermediates. And the mast rake was good (some weather helm but not too much) and forestay tension was good (no sag).

It was a huge relief to have successfully finished a rerig. After nearly two months (plus one month of planning), it felt really good to be out sailing again.

img_20170217_142915

Heading out of the large Locks.

img_20170216_161808

The entire rod rig (not counting D2s which were replaced last year), coiled into a circle weighing about 40 lbs.

Continue reading

Rerig Part 4: Stuck Navtec U-Bolt Chainplates

It’s been a long road to finishing our rerig. Going on 5 weeks now with the mast out, I’ve started to get very antsy to go sailing. Being patient is always the hardest part of any project that takes the boat out of commission (ex, haulouts). After 2 weeks, most projects had been finished and it was just a matter of waiting for BSI to produce the rod.

The downside to rod, as mentioned in Part 1, is it generally can’t be made locally / onsite and therefore takes longer to get. That downside is apparent now in the delays with BSI producing the rod – even though we gave them the end fittings order 5 weeks ago, and final measurements 3 weeks ago, they still haven’t started producing the rigging.

In contrast, a couple weeks ago two new Selden masts arrived in the yard for brand new boats going to the Seattle Boat Show, with wire rigging ready to go, and those masts were fully rigged and stepped in a week.

I wouldn’t change my decision to go to rod – it’s worth it for keeping the mast tang system the same – but if we were buying a new boat someday, I would probably try to avoid rod or would consider it negative points for a boat being considered. It’s a wonderful material, but for a cruiser, availability and ease of access are more important.

Navtec U-Bolt Chainplates

The hardest part of the rerig however (other than the waiting) has definitely been pulling the chainplates for inspection. More specifically, pulling the Navtec U-Bolts above the chainplates.

C&C’s with rod have a somewhat uncommon chainplate system (O’Day’s and Ericsons also have a similar system). At the deck there are six big ½” U-Bolts (one for each shroud) that go through the deck to a thick aluminum backing block. That backing block has a recessed cup on the upper side which is used to capture the head of a stainless steel tie rod. The tie rod then goes down to connect with traditional chainplates inside the boat, attached to a fiberglass bulkhead inside some cabinetry.

img_20170122_132904

img_20170122_124107

Totally inadequate lever arm for pulling 1/2″ U-Bolts

It’s actually a pretty great design, because the chainplates are completely dry and pristine – I have no concerns about those since they never see water. And the U-Bolts likely do a better job of sealing out water at the deck level than traditional chainplates do. This is because they have a cover plate which fits tightly with the deck, and then the legs of the U-Bolts are flanged (they have a “lip”) so that they are wider than the holes in the cover plate – they overlap it and fit quite snugly.

The downside is they’re really hard to get out. The SS U-Bolt legs interact galvanically with the aluminum backing block, producing pasty white powder which basically locked the U-Bolt into the aluminum block.

Continue reading

Rerig Part 3: Now the Projects Really Begin

Warning: This post is pretty technical.  In the last week a lot has gotten done – assembled the wire forestay, a new Harken furler, removed the spreaders, cut out a seized clevis pin, got out a second seized clevis pin for a masthead sheave, ran new VHF coax cable through the mast, sanded and painted the mast collar, and did a whole bunch of cleaning.

Assembling a Hayn HiMod Swageless Fitting

I decided to use a Hayn HiMod swageless fitting for the forestay lower connection so that I could measure / cut the forestay to length, not have to get a wire swaged on site, and have a fitting that could be inspected or shortened in the future if needed.

hayn-stud

Hi-Mod components: threaded stud, cone, and crown ring. (The body, not shown, is already on the wire)

hayn-pullingwire

Unlaying the compact strand wire around the core

haynhimodcone

Hi-Mod cone installed on the core

haynhimodinterior

Cone and crown ring installed in the fitting

Project Time:

  • 1 hour – planning, reading and watching YouTube videos.
  • 1 hour – measuring, re-measuring and cutting forestay.
  • 1 hour – assembling Hi-Mod.

Tips:

  • The 7mm compact strand wire (distributed by Alps) was quite difficult to unlay. Since the strands are so tightly compacted together, it’s hard to pick them apart. Standard flat head screwdriver tips were too thick. A thin paint scraper works well, or perhaps my mini screwdriver set (like an eyeglass kit).
  • The big debate with HiMod’s is whether to use sealant or not. Hayn says not to, in their instructions. They’re saying it’s not necessary but you can use it if you want to (they say it’s ok to use in this PDF). I wish there were a more scientific analysis of this.
    I decided to use sealant for a couple reasons: Brion Toss, the rigger in Port Townsend, recommends using sealant in HiMods. And the HaveWindWillTravel sailors on YouTube had their HiMods show rust after just a few months in Florida. They believe it was from metal dust that got on their wire after cutting it with a grinder. That’s a plausible explanation, but perhaps sealant also would’ve helped prevent their issue.
  • Sealant is hard to inject into a Hi-Mod however. The body of the fitting is already on the wire. And the standard injection nozzle that comes with 3M adhesive tubes doesn’t fit in between the wire and the body. A typical syringe doesn’t fit either (the tip isn’t long enough to get past the threaded part of the body). I didn’t want to gunk up the threads, since those are supposed to be secured with Loctite, not 4200 goop. The best option was injecting sealant into the wire strands alongside the cone. I didn’t get sealant squeezing out the top at the end, so maybe didn’t use enough, but it should still be effective.

Continue reading

Rerig Part 2: Pulling The Mast

As the Ballard Locks attendant checked our lines, he remarked “Where’s your mast?” I replied “Oh, I knew we forgot something! We’ll have to turn around.” This was actually all part of the plan – an hour ago we had passed under the Ballard Bridge – without raising it! We had left our mast at Canal Boatyard for the next phase of the rerig.

Seeing the mast come out of the boat was a bit unnerving – but it all went really well. It took only 30 minutes to pull the mast, thanks to two days worth of prep work – but that work had actually been pretty fun. We were lucky that nothing was seized or really difficult to get apart. It was mostly a matter of unscrewing bolts, straightening cotter pins, removing the sails and boom, and doing one last climb up the mast to attach the crane’s sling.

Our least favorite part actually was going through the Ballard Locks – that’s pretty much always nerve racking. The small locks got filled by a 70’ motorboat, so we had to wait an hour for the big locks, maintaining position in strong currents between the locks and the lowered railroad bridge. Then on the way back west, the Argosy cruise came up behind us and got priority on the small locks, adding another long wait.

Passing under the Ballard Bridge with no mast

Passing under the Ballard Bridge with no mast

Prep Work

Most of the work of pulling a mast is in the prep work. For us this took about two days (only two 5-6 hour days though). For our boat the steps included:

  • Drop genoa and fold. Remove main sail and fold.
  • Remove the boom – including disconnecting the rigid boom vang, reefing lines, lazy jacks and main sheet.
  • Stow halyards on mast.
  • Remove cabin table that is sandwiched around the mast.
  • Loosen and raise the mast boot.
  • Disconnect mast partners (stainless steel bolt attaching the mast to the deck).
  • Disconnect mast wiring.
  • Attach tag lines to the mast base and furler. (this proved to be unnecessary).
  • Straighten all cotter pins in clevis pins at deck level of stays that you’ll need to release.
  • Mark (tape) the turnbuckle positions so we know the tuned length if we need to remeasure in the yard.
  • Loosen turnbuckles until the rig is moderately slack.

Continue reading

How to Rerig a C&C with Rod Rigging – Part 1

The time has come to replace the standing rigging on our 33-year-old C&C. C&C’s like ours have Navtec rod rigging – which lasts much longer than wire rigging, but it doesn’t always give clues when it’s about to fail. While we could probably push it a few years longer (and know many sailors doing exactly that), the type of sailing we do (lots of upwind, and fairly remote areas like the west coast of Vancouver Island), plus some issues noticed in my rig inspections motivated the decision to do it now.

We’d rather do it now than wait and regret it later (when the mast comes down, and I don’t mean with a crane!). A dismasting can be dangerous (even lethal if someone gets hit in the head by the mast), so it’s not a risk worth taking. Racers do it (push their boats to smaller margins of safety, which is why racing boats have more dismasting than cruising boats) – but they’re in a very different situation. A dismasting with a crew of 6, in a populated area, is pretty different from a dismasting with a crew of 2 in a remote area.

So better safe than sorry. But a rerig is a pretty expensive and time consuming project. So it’s no wonder people delay it as long as possible.

First it’s important to note I’m not doing this completely on my own. I got advice from a number of riggers and other sailors (to whom I’m very grateful), and am working with a local rigger for a few of the key parts (ordering and inspection).

mastphoto

Rod vs Wire

Most C&C’s have Navtec rod rigging instead of the more common stranded wire rigging. Rod rigging is awesome when you don’t need to replace any of it. It’s strong, long lasting, highly corrosion resistant, lightweight (less weight aloft improves boat handling) and has low stretch (which makes the boat sail a bit better, and you don’t have to tune it very often).

But rod is a huge pain if you need to replace it, or want to switch to wire. It’s expensive (especially in the fittings – tangs, stemballs, and turnbuckles), can’t be sized and swaged onsite (with wire you can cut it to length and use swageless fittings, right at the boat), and there are only a small number of rigging shops in the US that can even make rod rigging (it requires expensive rod heading machines and dies).

So switching to wire could make some sense, especially since our boat is more of a cruiser than a racer. But there would still be some tricky parts to work out – how to change the mast tangs for wire, and how to rework the spreader tips for wire. All this extra work, plus the risk the boat might not handle as well, or might have reduced resale value, steered me towards choosing to stay with rod.

rig-turnbuckledetail

The original C&C rig plans I have, thanks to a prior owner’s forethought.

Which Kind of Rod?

With the decision to stick to rod, I assumed Navtec would be the manufacturer. Later, I was surprised to discover there’s a big competitor to Navtec making just as much rod or more: BSI, based out of Denmark (with a US factory in Rhode Island).

Continue reading

Ghost Boats: The Surprising Truth of Most Boats in Marinas

When you spend a lot of time around boats, you get to noticing some peculiar things about marinas. They’re like parking lots for boats – but imagine if the cars in the parking lot never moved!

Since I got my start in boating from the Seattle Sailing Club (SSC), I figured most boats get used every week – after all, all the SSC boats did (for the most part). Or if not weekly, at least monthly right?  No? Hmm. The surprising truth I eventually discovered is that most boats get used not at all, in the 8 months between September and June. And even in the 2-4 months of summer (the definition of summer depends on who you talk to), most get used weekly or monthly, but a few still don’t get used at all.

Sunset at Fisherman's Terminal.

So for a while now I’ve struggled to make sense of this. We’re so fortunate to live in an area where it’s possible to cruise year-round – we don’t have to haul out and winterize our boats like people do on the northern east coast and Great Lakes.

Weather

There are two big reasons people don’t sail much in the PNW winter:

  • Rain, cold, and challenging wind storms.
  • Short daylight hours. At its worst, it gets dark at about 4pm (before true sunset, due to the dark, heavy cloud cover we have much of the winter). This rules out weekday sails for people who work during the day.
weathernoaa

A NOAA marine forecast in December

These are big reasons, and I totally understand why it deters many people. Some years we have powerful weather systems moving through as frequently as every two days, and some of them you really don’t want to risk being out in – 40+ knot winds with short steep waves and cold sideways rain.

Last winter we had a 40 day period without a single rain-free day. Typical weather forecasts show a chance of rain every day of the next 10 days, every week. Yet, it usually doesn’t rain all day, and there are often short windows of nice weather in between each front.

Continue reading

Summarizing 3 Months of Cruising – Part 2 of 2

In Part 1 of this post, we summarized our route, trip stats, and the wind and weather conditions we experienced. In this part we’ll describe the sailing a bit more, wildlife, and what went wrong (or didn’t) with our boat.

As inevitably happens on a 3 month trip, some equipment breaks or starts acting up – it’s Murphy’s Law of the sea. But while cruising we quickly learned to focus on only the things that actually matter. You get good at prioritizing really quickly. We had to conserve our energy because most of it went towards sailing the boat during the day.

Now back on shore, some of the problems we worry about in day-to-day life seem trivial in comparison. I heard a Clipper racer recently said:

I think I’m doing this because life has become too easy.”

That’s a good way of explaining the difference between shore life and life at sea. While cruising, the challenges are real, and have a direct connection with your safety, health, or comfort. Long-term sailing makes you realize how easy, cushy and soft our lives have become in modern times.

img_2989

img_3406

Sailing Tactics

As the wind levels mentioned previously show, if we didn’t sail in 4-10 knot winds, we would’ve done very little sailing. We found our sailing became very tactical this year. It was like a constant chess match with the wind – trying to make sure we left anchor at the right time, were sailing with the wind if possible, didn’t sail ourselves into wind holes, and watched for puffs of better air on the water.

We used the spinnaker, our storm staysail, and nearly every reefing configuration we have for the main and genoa.

But what was more important than which sails we had was having patience and flexibility. The patience to wait for wind, and the flexibility to not sail to a schedule were the two key factors that enabled us to sail more.

We averaged 5 gallons of diesel per week. We have a 16 gallon diesel tank plus up to 10 gallons in jerry cans, so we had enough we could’ve gone a month without filling up in theory – but never risked going below 50%. About 2-3 times per week we sailed onto or off of anchor. It’s not often possible to do that, but when it was we liked to just for fun – it was good practice of a new sailing skill, and gave us confidence we’d still be okay if our engine failed going into an anchorage.

Continue reading