
The annual* haul-out is something I’ve come to dread. Haul-out projects are usually the toughest type of boat work there is. Especially mechanical jobs, where you’re trying to get 32-year-old salt water corroded parts apart.
This year’s haul-out was a roller-coaster of emotions. Despair, frustration, anger. And some bright moments of relief and happiness.
I’m jealous of all the boats hauling out just for painting (we don’t need it yet) – yes painting is also difficult, sweaty, dirty work – but painting is never as discouraging as being stuck hammering on the same part for 2 hours.
* (Haul-outs don’t necessarily need to be annual – but right now we have enough work that they are)
It was all the more trying because the three weekends we worked hauled out had phenomenal sailing conditions for Seattle – sunny, warm, and windy – a rare combo for the PNW.

Rudder Drop
This year I decided to do a “quick rudder drop” (this means removing your rudder from the boat) to seal up some minor leaking we had around the rudder post which allows water to get into the rudder. The quick rudder drop turned into a massive project, touching every part of the steering system and requiring sourcing specialized replacement parts.
A rudder drop, on a boat that hasn’t done it in a while (if ever), is as they say opening a giant can of worms.
The Boatyard
I had planned to hire mechanical help for dropping the rudder, but once we were hauled out we gradually realized the yard manager not only didn’t have any mechanical help available at that time, he didn’t want to put them on a difficult job like a rudder drop.
We had scheduled the haul-out a month in advance, discussed the work we wanted done, and gotten an estimate. I’m not sure if this is common at yards, and I do like saving $100/hour, but showing up only to be told we were mostly on our own was a surprise. A more experienced person likely could’ve solved some of the rudder drop problems much faster. We did get some help with fiberglass work and the seacocks, but also got multiple “scare tactics” used on us (like telling us that problems could be much worse than they actually were) which I suspected were used as an attempt to get customers to pay more.
The yard manager helped with some tools and advice, but I got the feeling we weren’t a priority unless we were willing to pay many thousands in labor like some of the other boats there. He said there was a 30 day wait on mechanical labor, yet in the 2 ½ weeks we were there we saw big expensive boats come in after us, get hauled, get immediate yard mechanical assistance, and get relaunched in less than a week.
We had decided to give this yard a try against the advice of several other boaters. Needless to say we should’ve listened to them (and our gut instinct), and won’t be going back here.
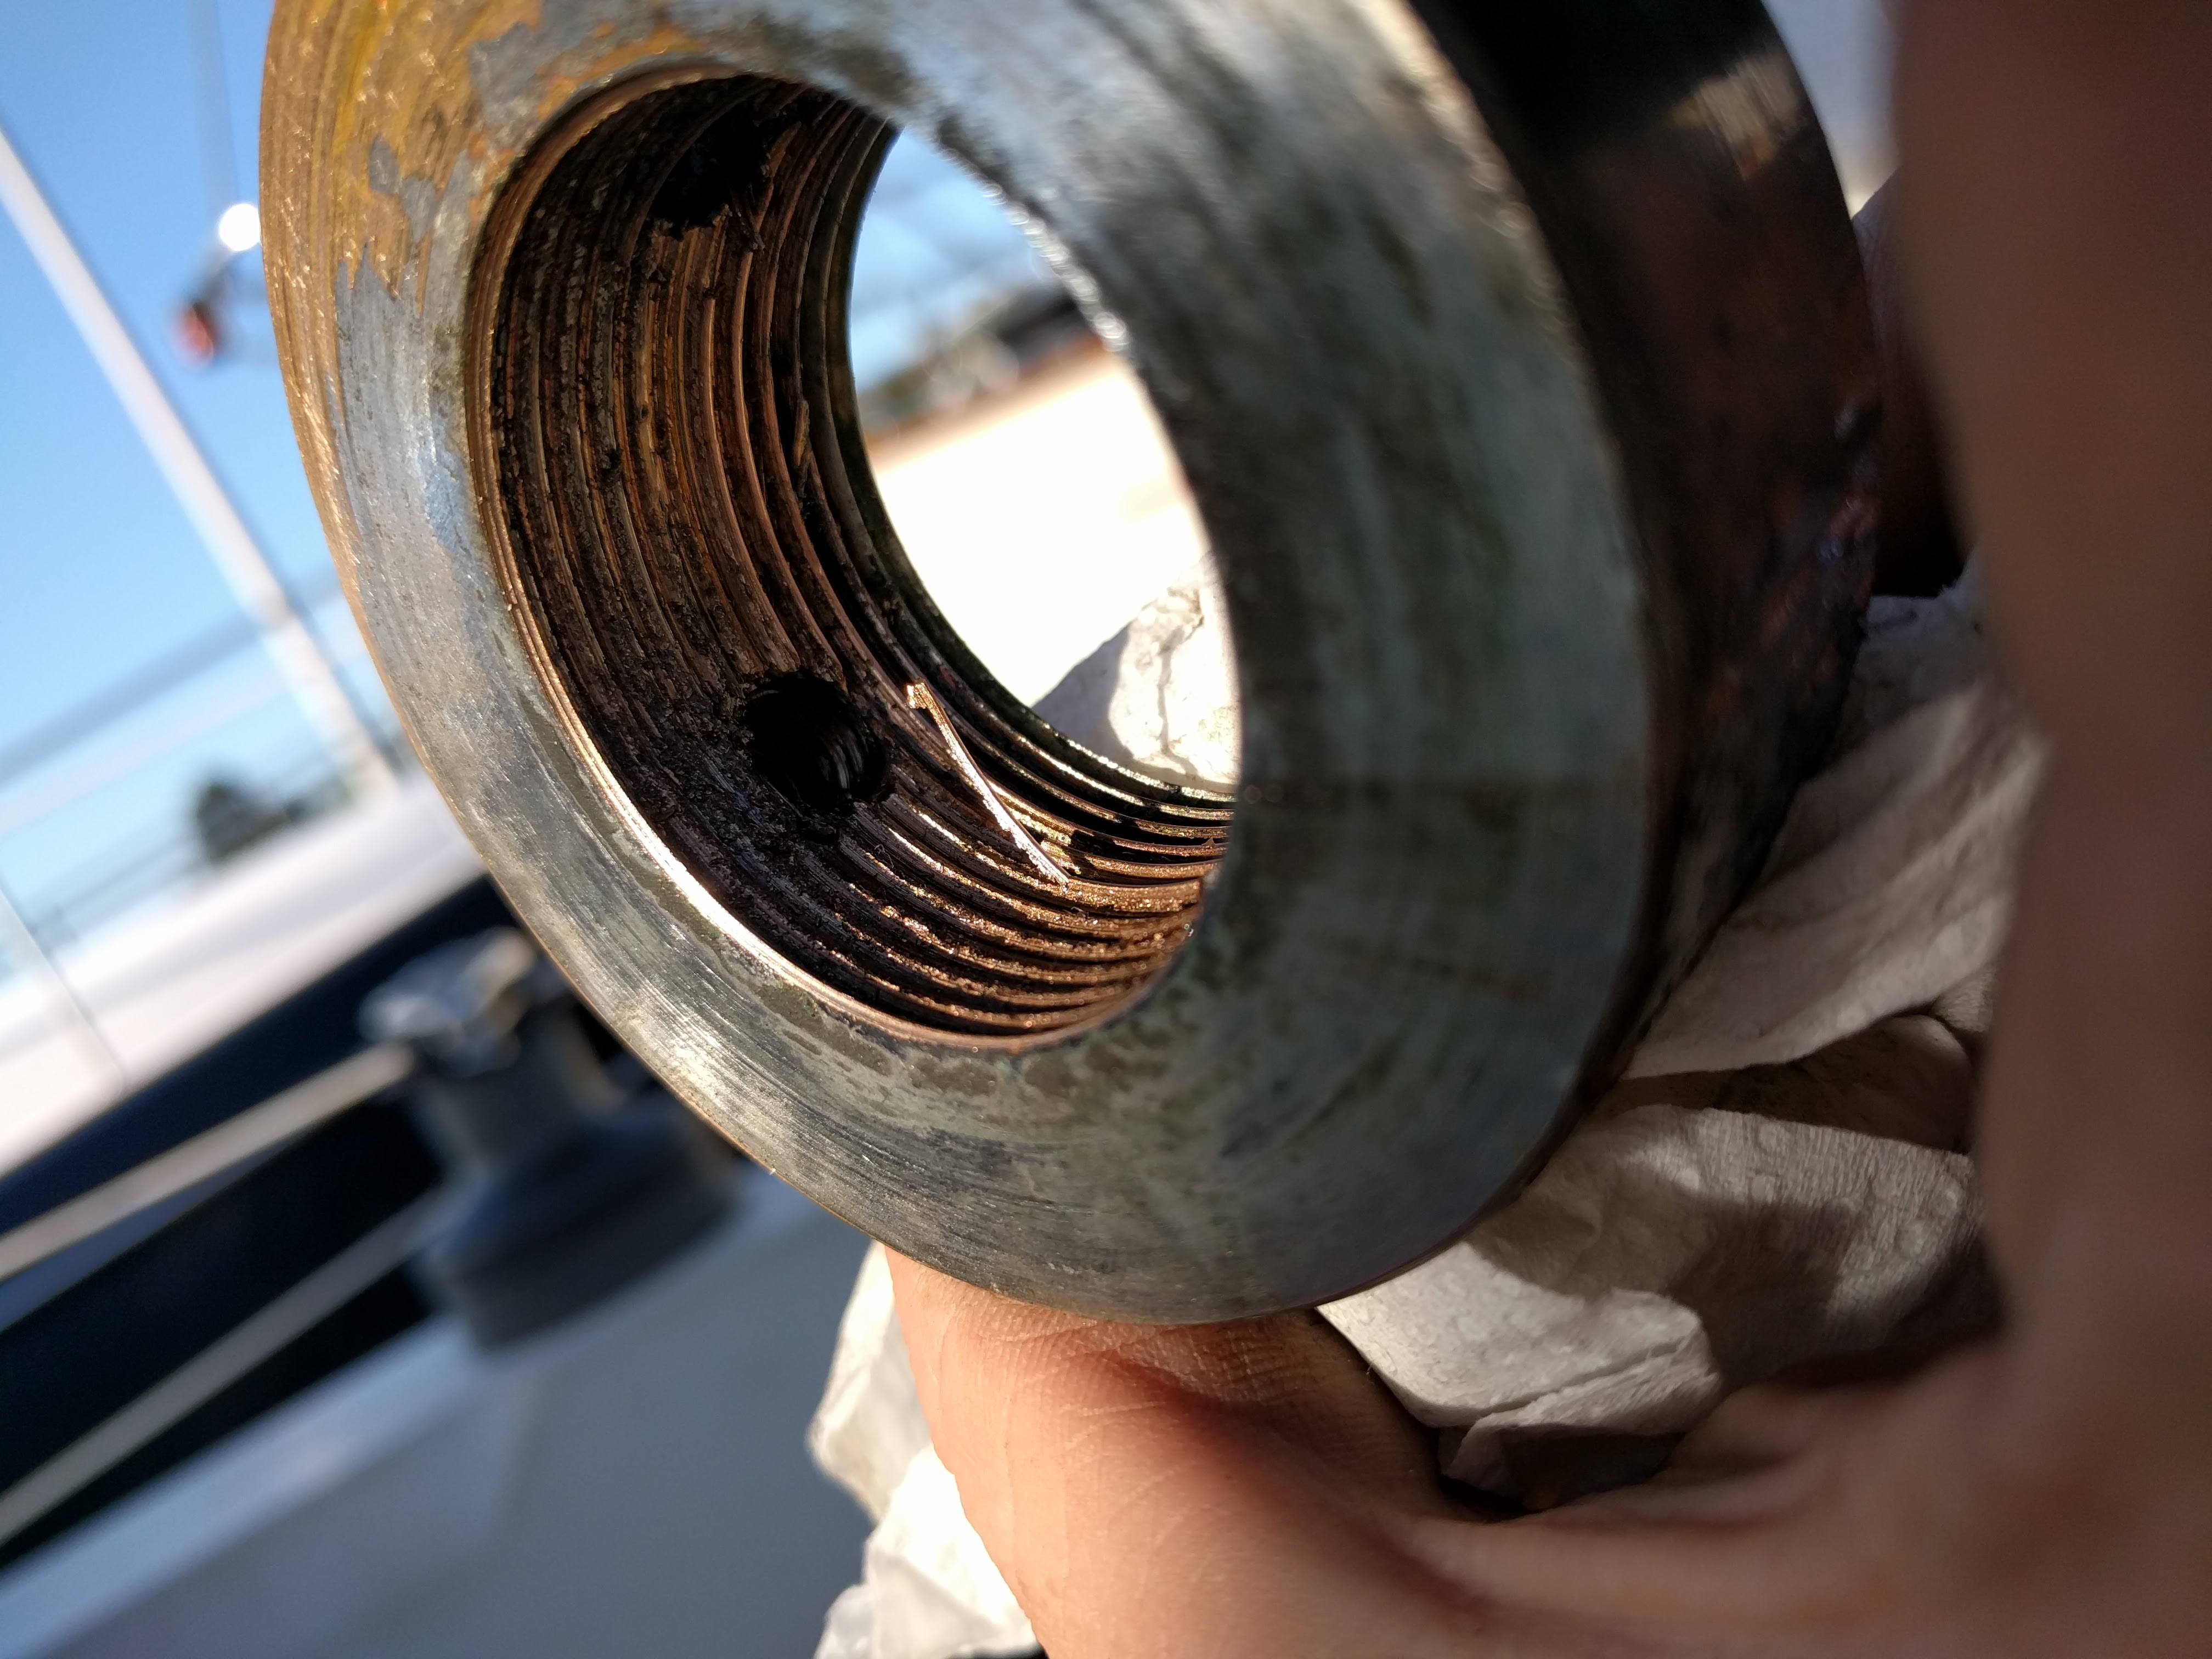
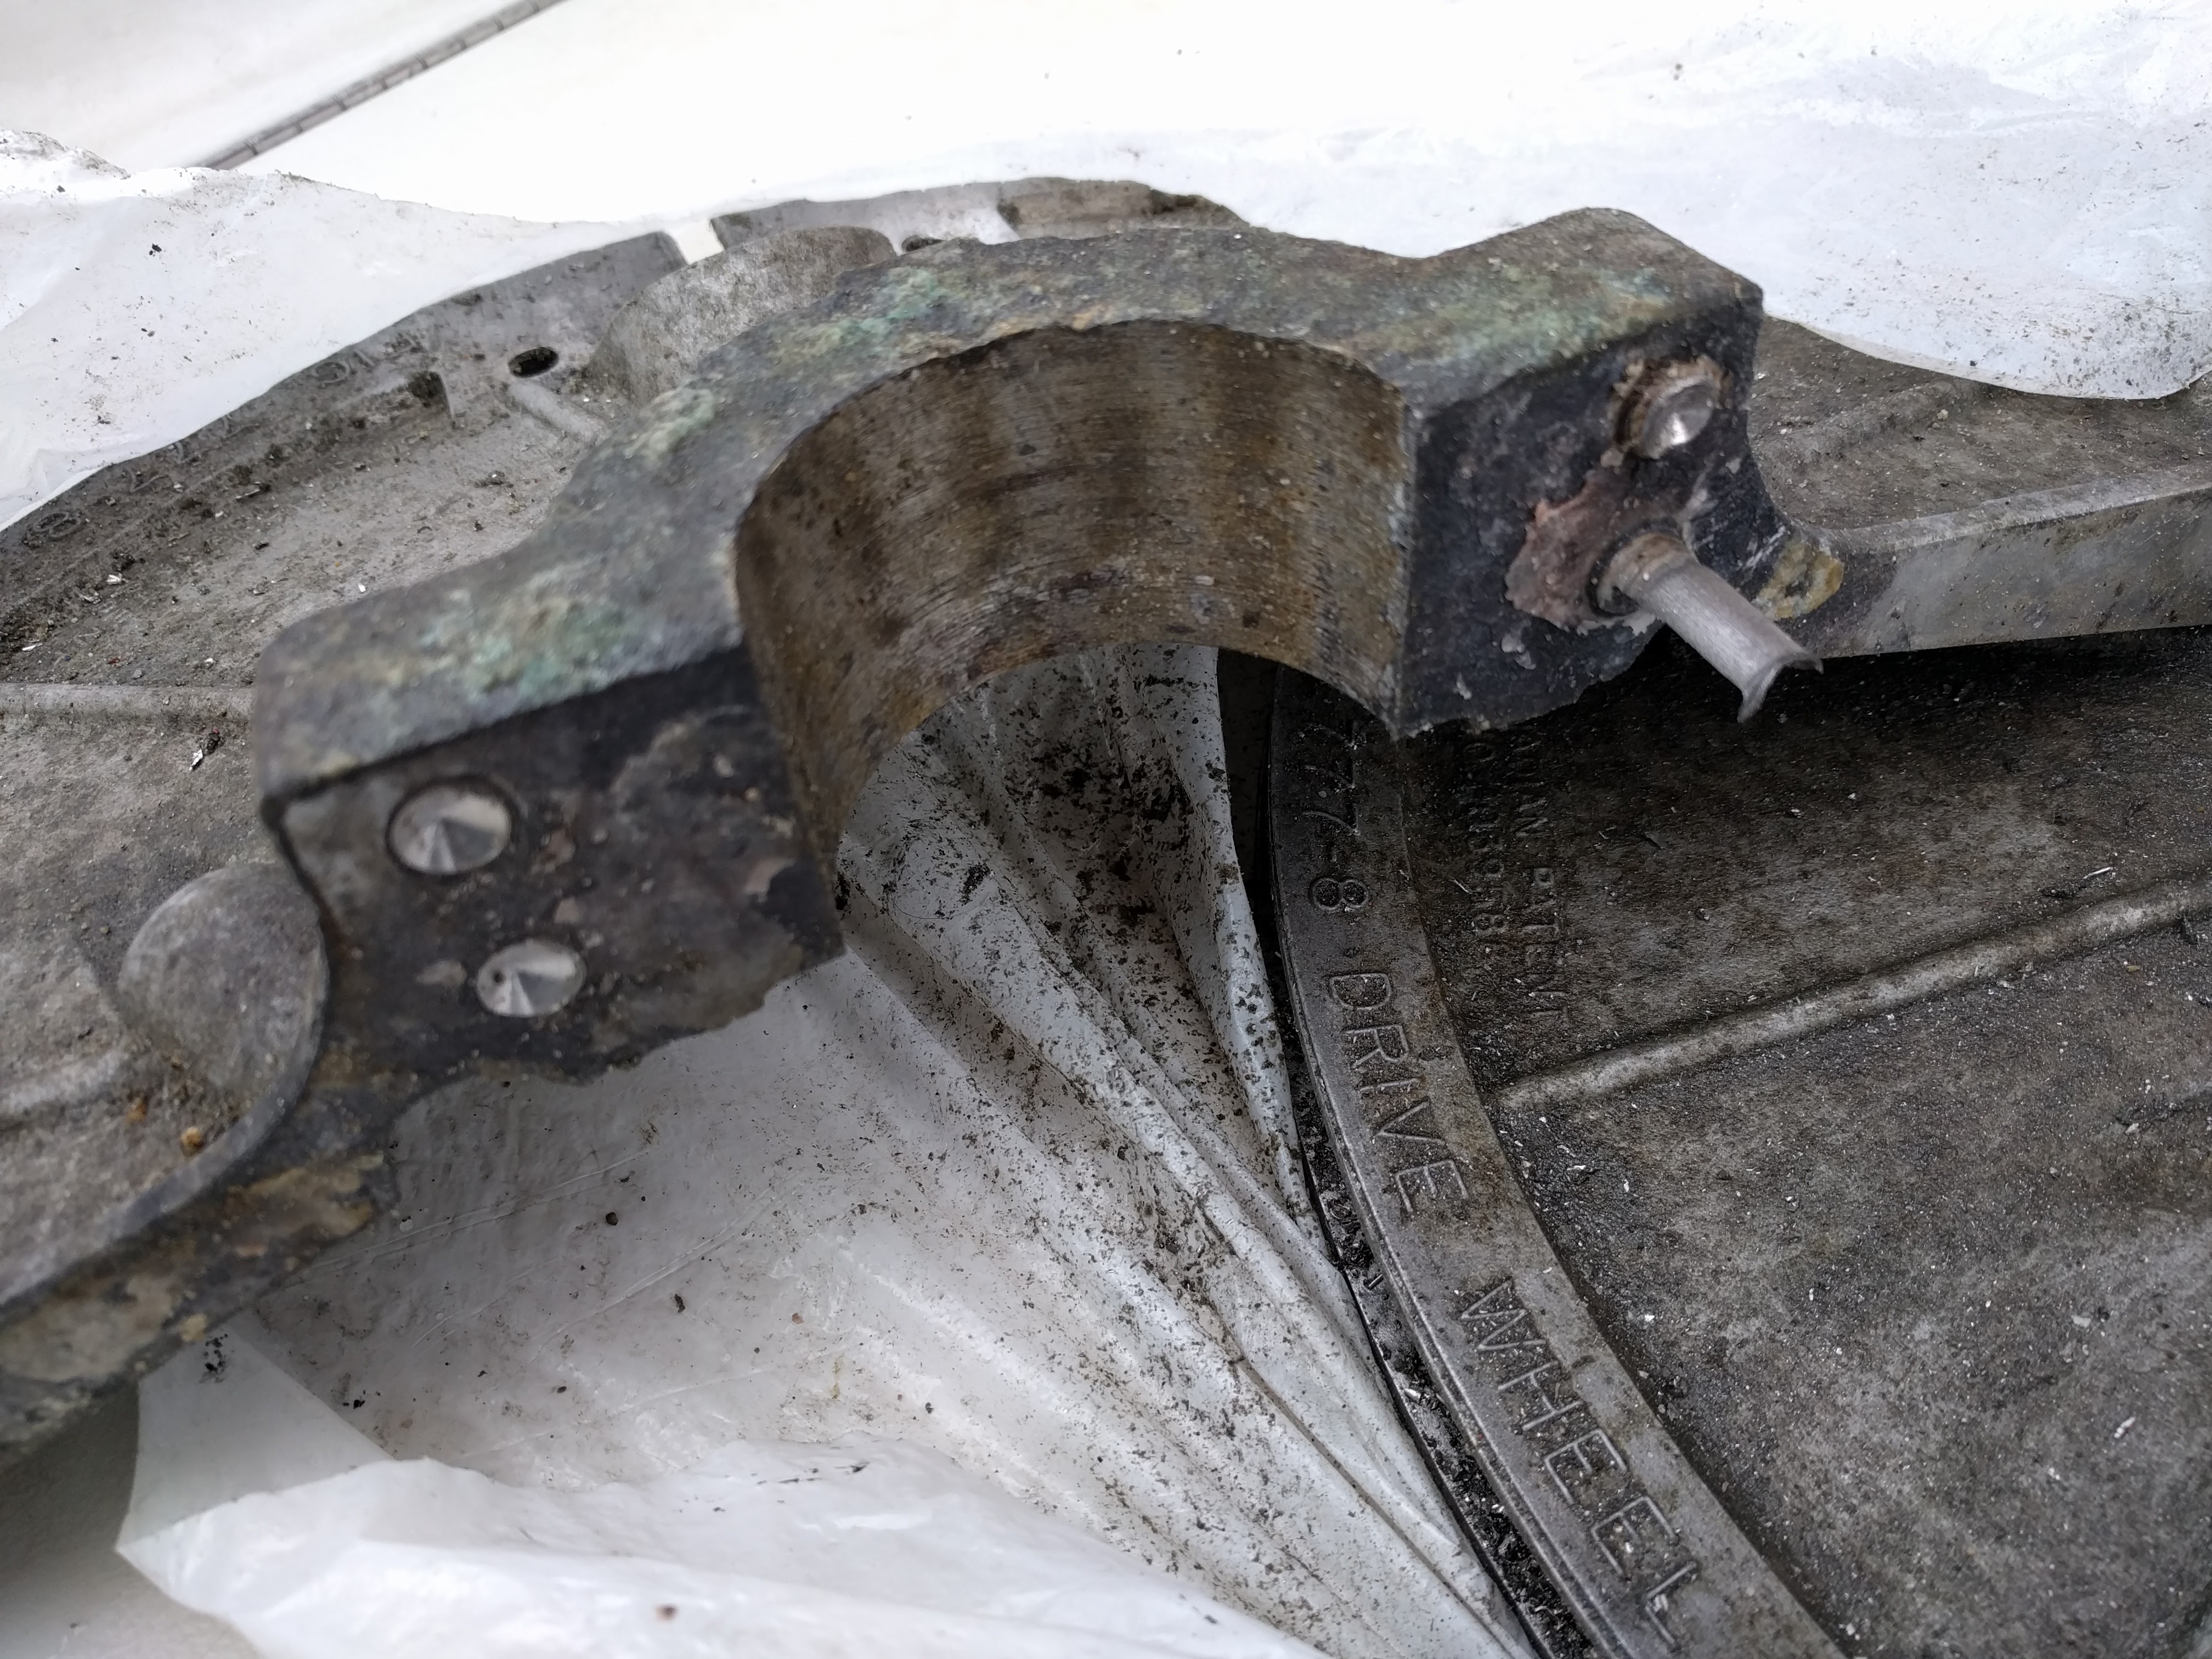
The Rudder Collar Nut
A stainless steel part that looks like a “donut” (but is more properly called a threaded bore shaft collar) is what holds up the rudder on a C&C Landfall 38. It’s threaded onto male threads at the top of the rudder shaft, and then secured from rotation with two set screws.
Another Landfall 38 owner named Wally who did a ton of work refitting an older LF38 has an excellent write-up on this same job.
In my case, the two set screws had damaged the threads on the rudder shaft, making it very difficult to get the collar off – what we found out later was the damaged threads meant the only way to get the nut off was shearing off stainless steel layers from the threads. Stainless steel is very strong, and shearing it requires tremendous force – PB Blaster doesn’t help with this. And the smooth outer edge of the collar makes it quite difficult to grip.

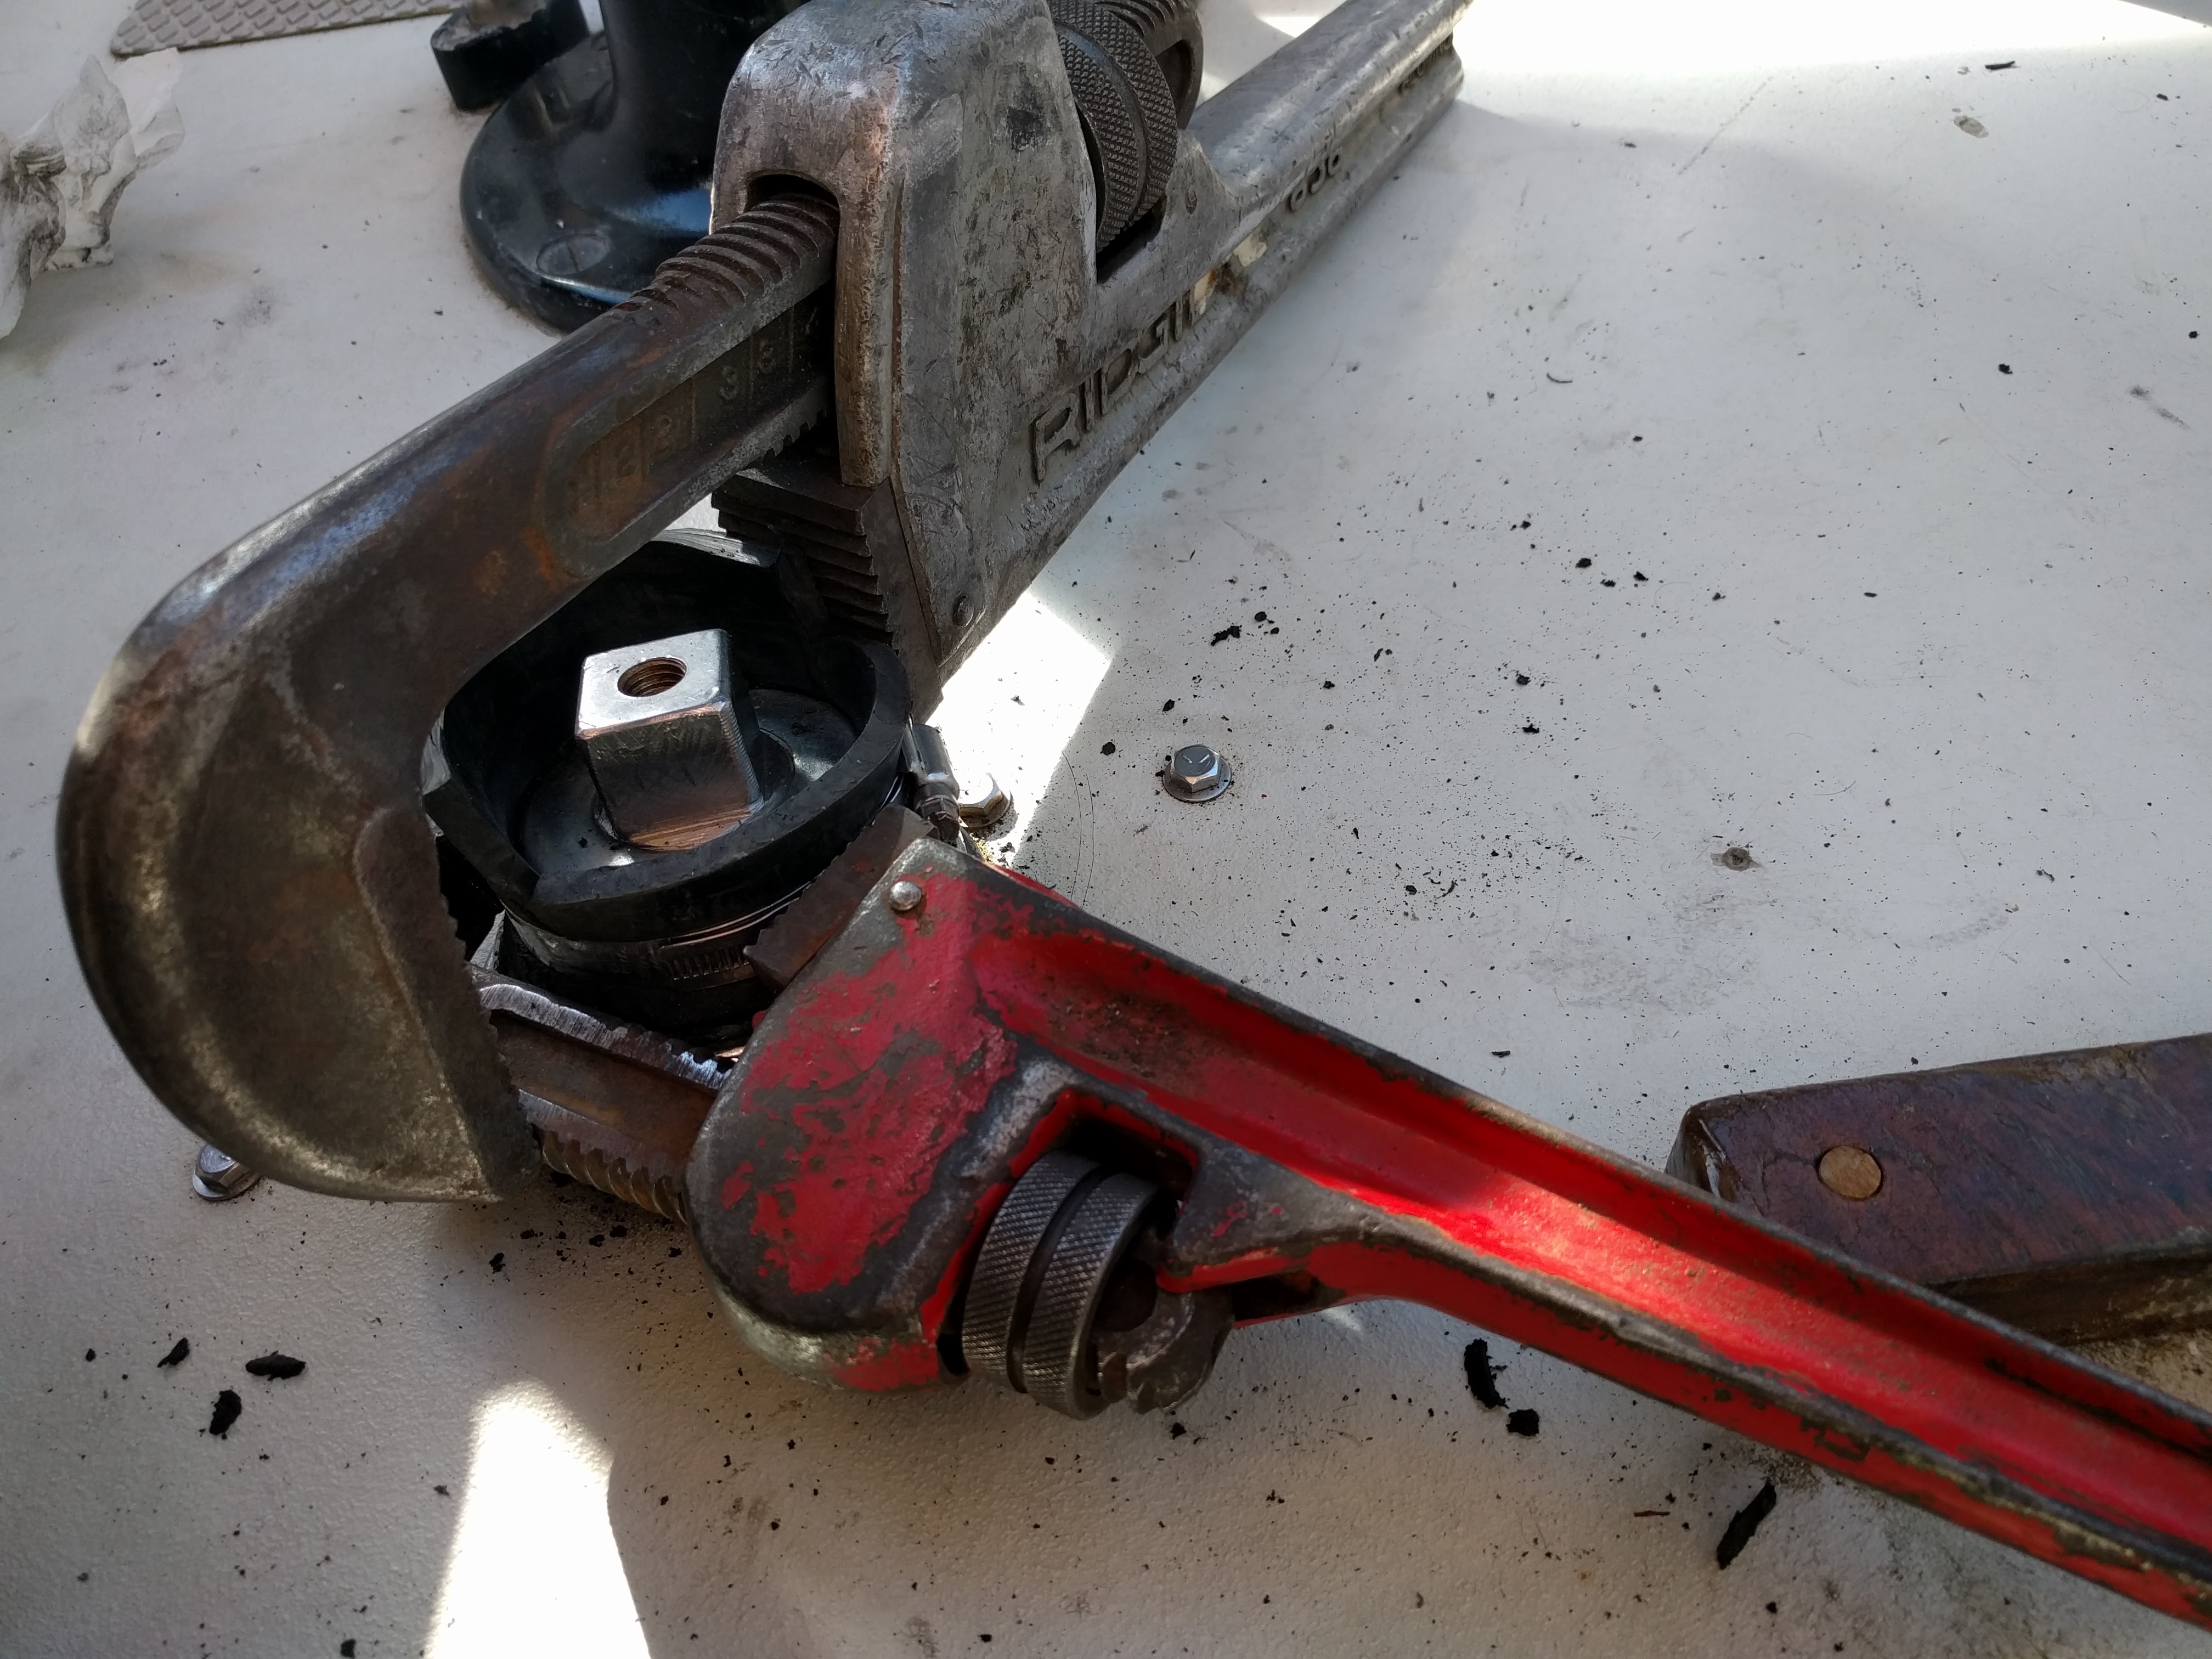
We ended up using a huge pipe wrench to get it off, and hammering on the end of that pipe wrench with another huge pipe wrench. It scraped up the exterior of the collar, but that’s a cosmetic issue we can live with.
Having the Right Tools
Having the right tools for the job makes a world of difference in haul-out work. I often make the mistake of using tools that are too small or too weak at first. For example, a heat gun isn’t really appropriate for heating corroded metal parts – a Bernzomatic torch is what you need. And having a giant wrench helps with lots of haul-out jobs.
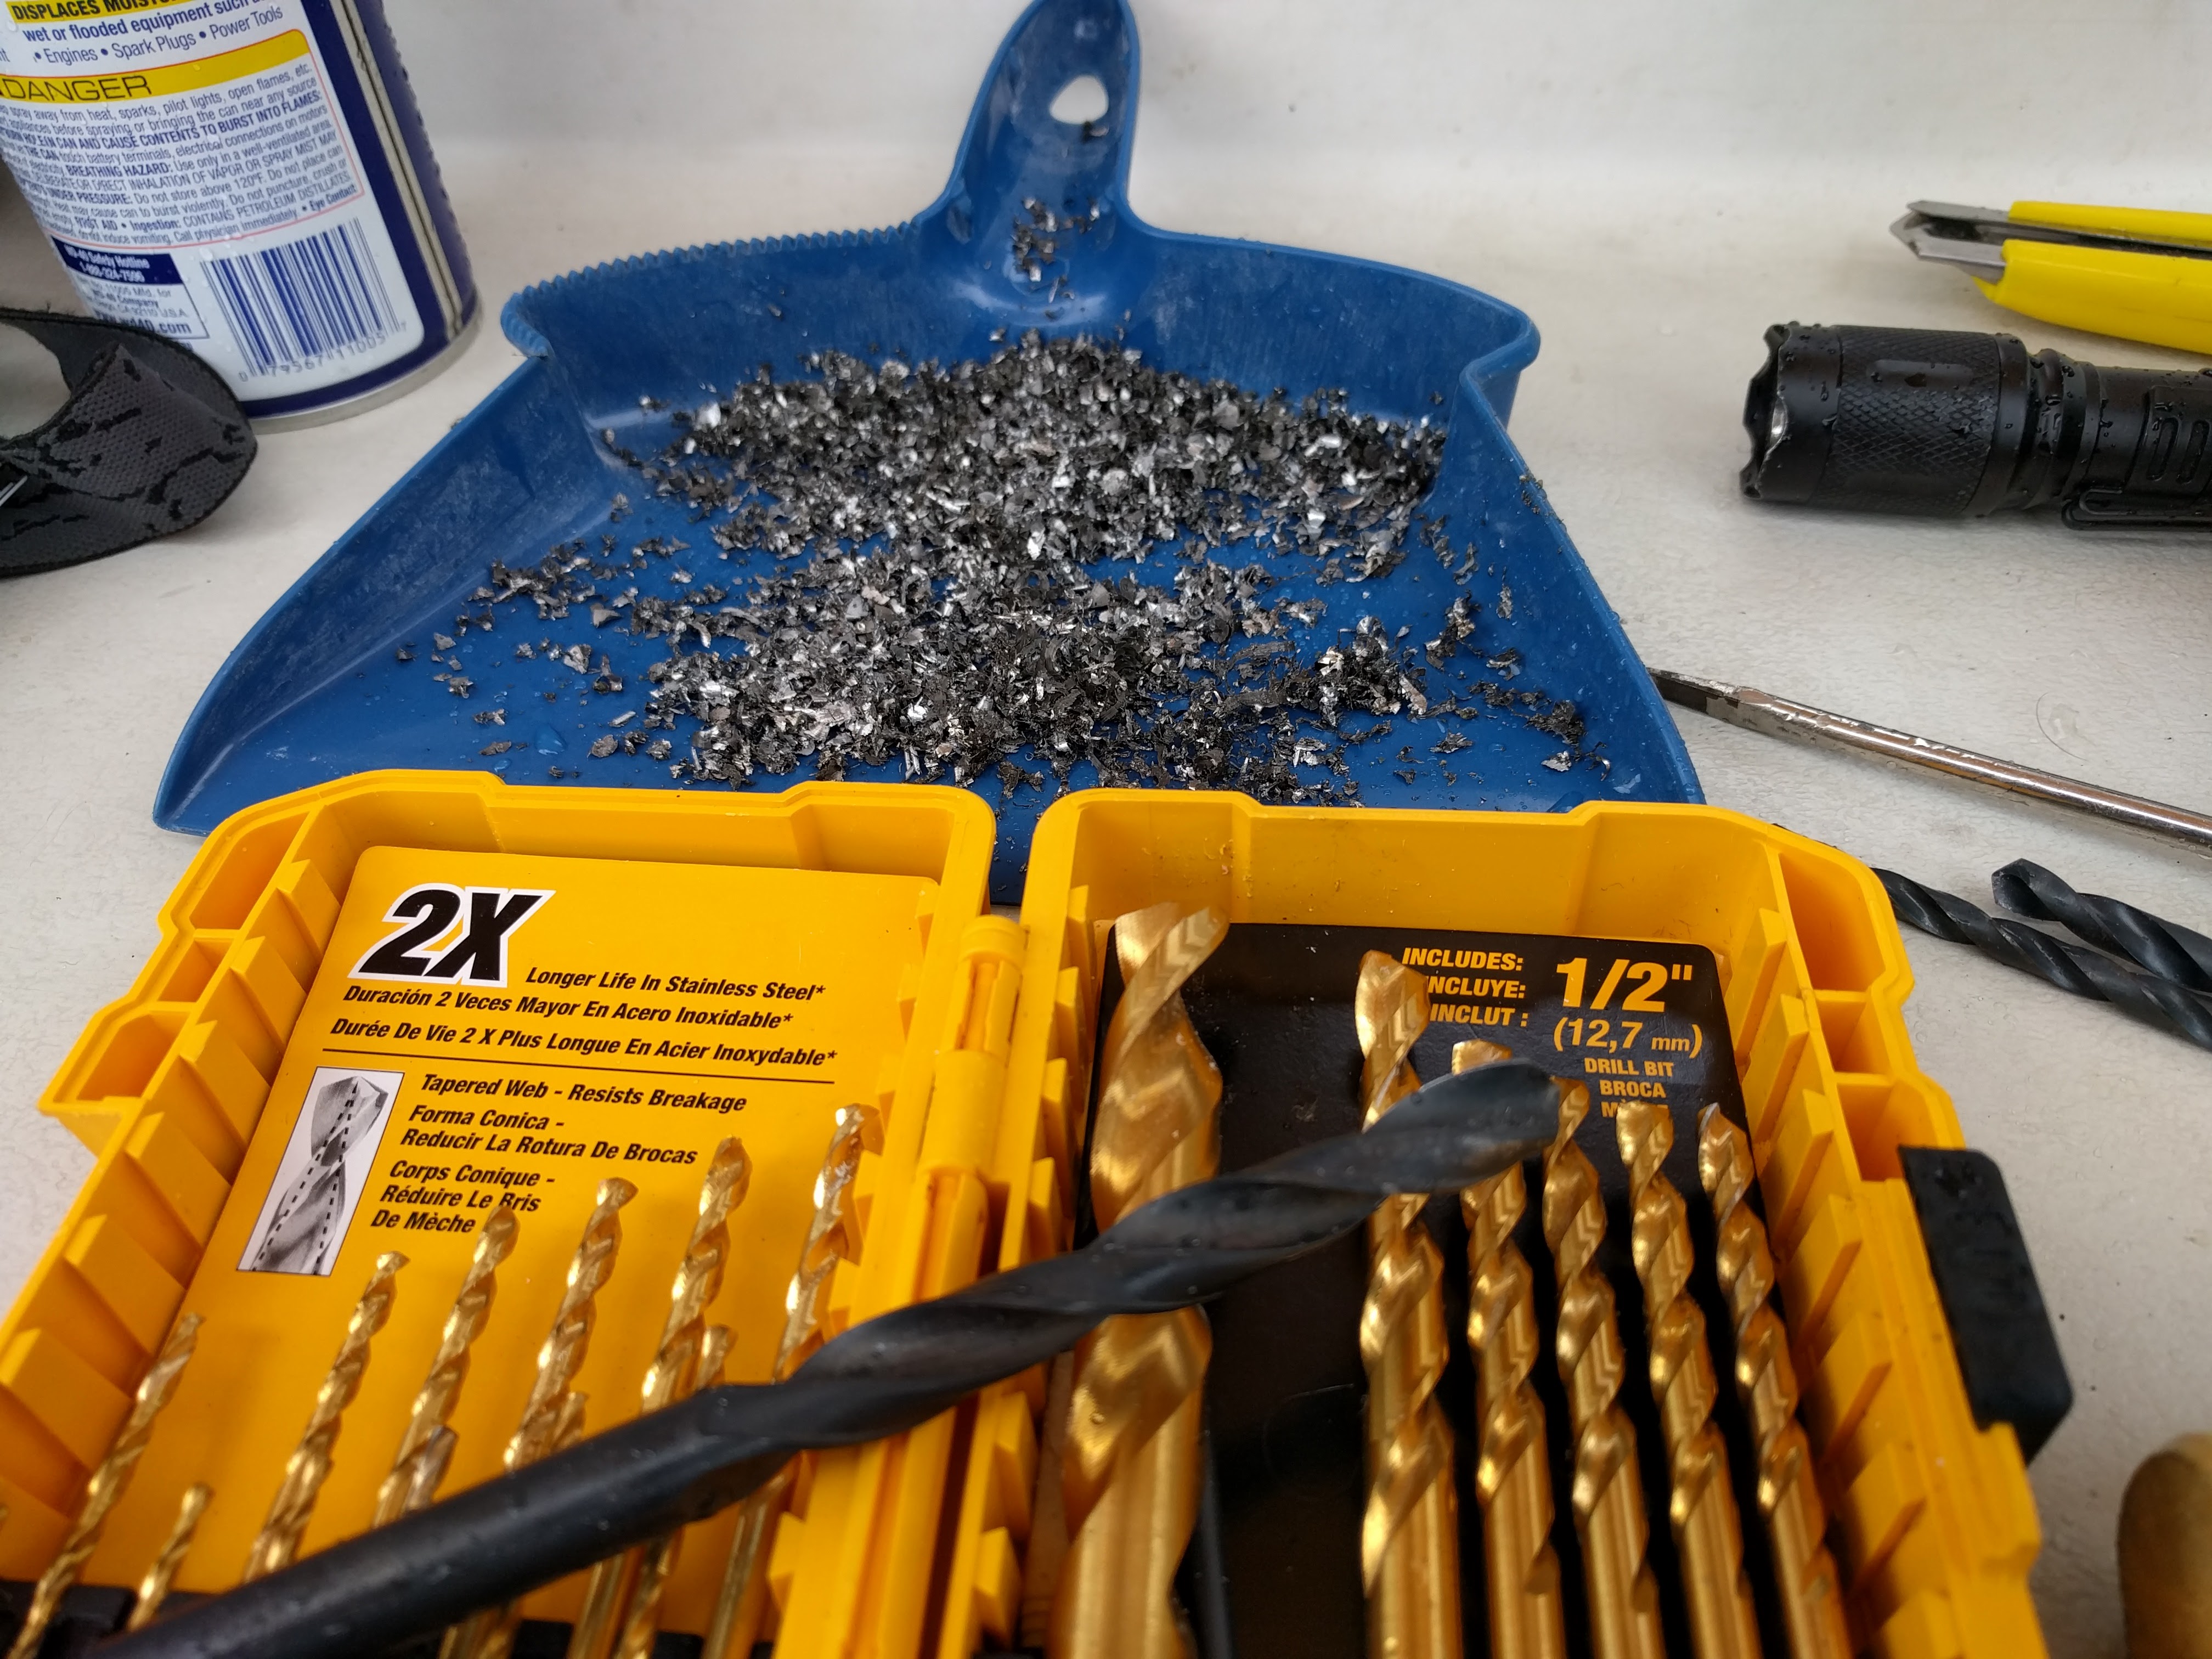
Even drill bits can make a big difference. When it came to drilling out 9/16″ stainless steel bolts, it turned out my gold-colored Dewalt bits were about twice as fast as the old darker bits, even though they’re both HSS bits (high speed steel).
Boatyard workers have big tools that are well suited specifically for boatyard jobs. The problem is, as a cruiser, I don’t want to acquire a storage locker’s worth of big tools that I only use once a year and have to find a way to store the rest of the year – storage space is at a premium on a boat, and when we go cruising this summer (renting our condo), we won’t have much free storage on land either.
But I often need the reminder – if you buy a $100 tool that lets you avoid an hour of hired labor, it has already paid for itself – I could literally throw it out or give it away afterwards and still be breaking even.
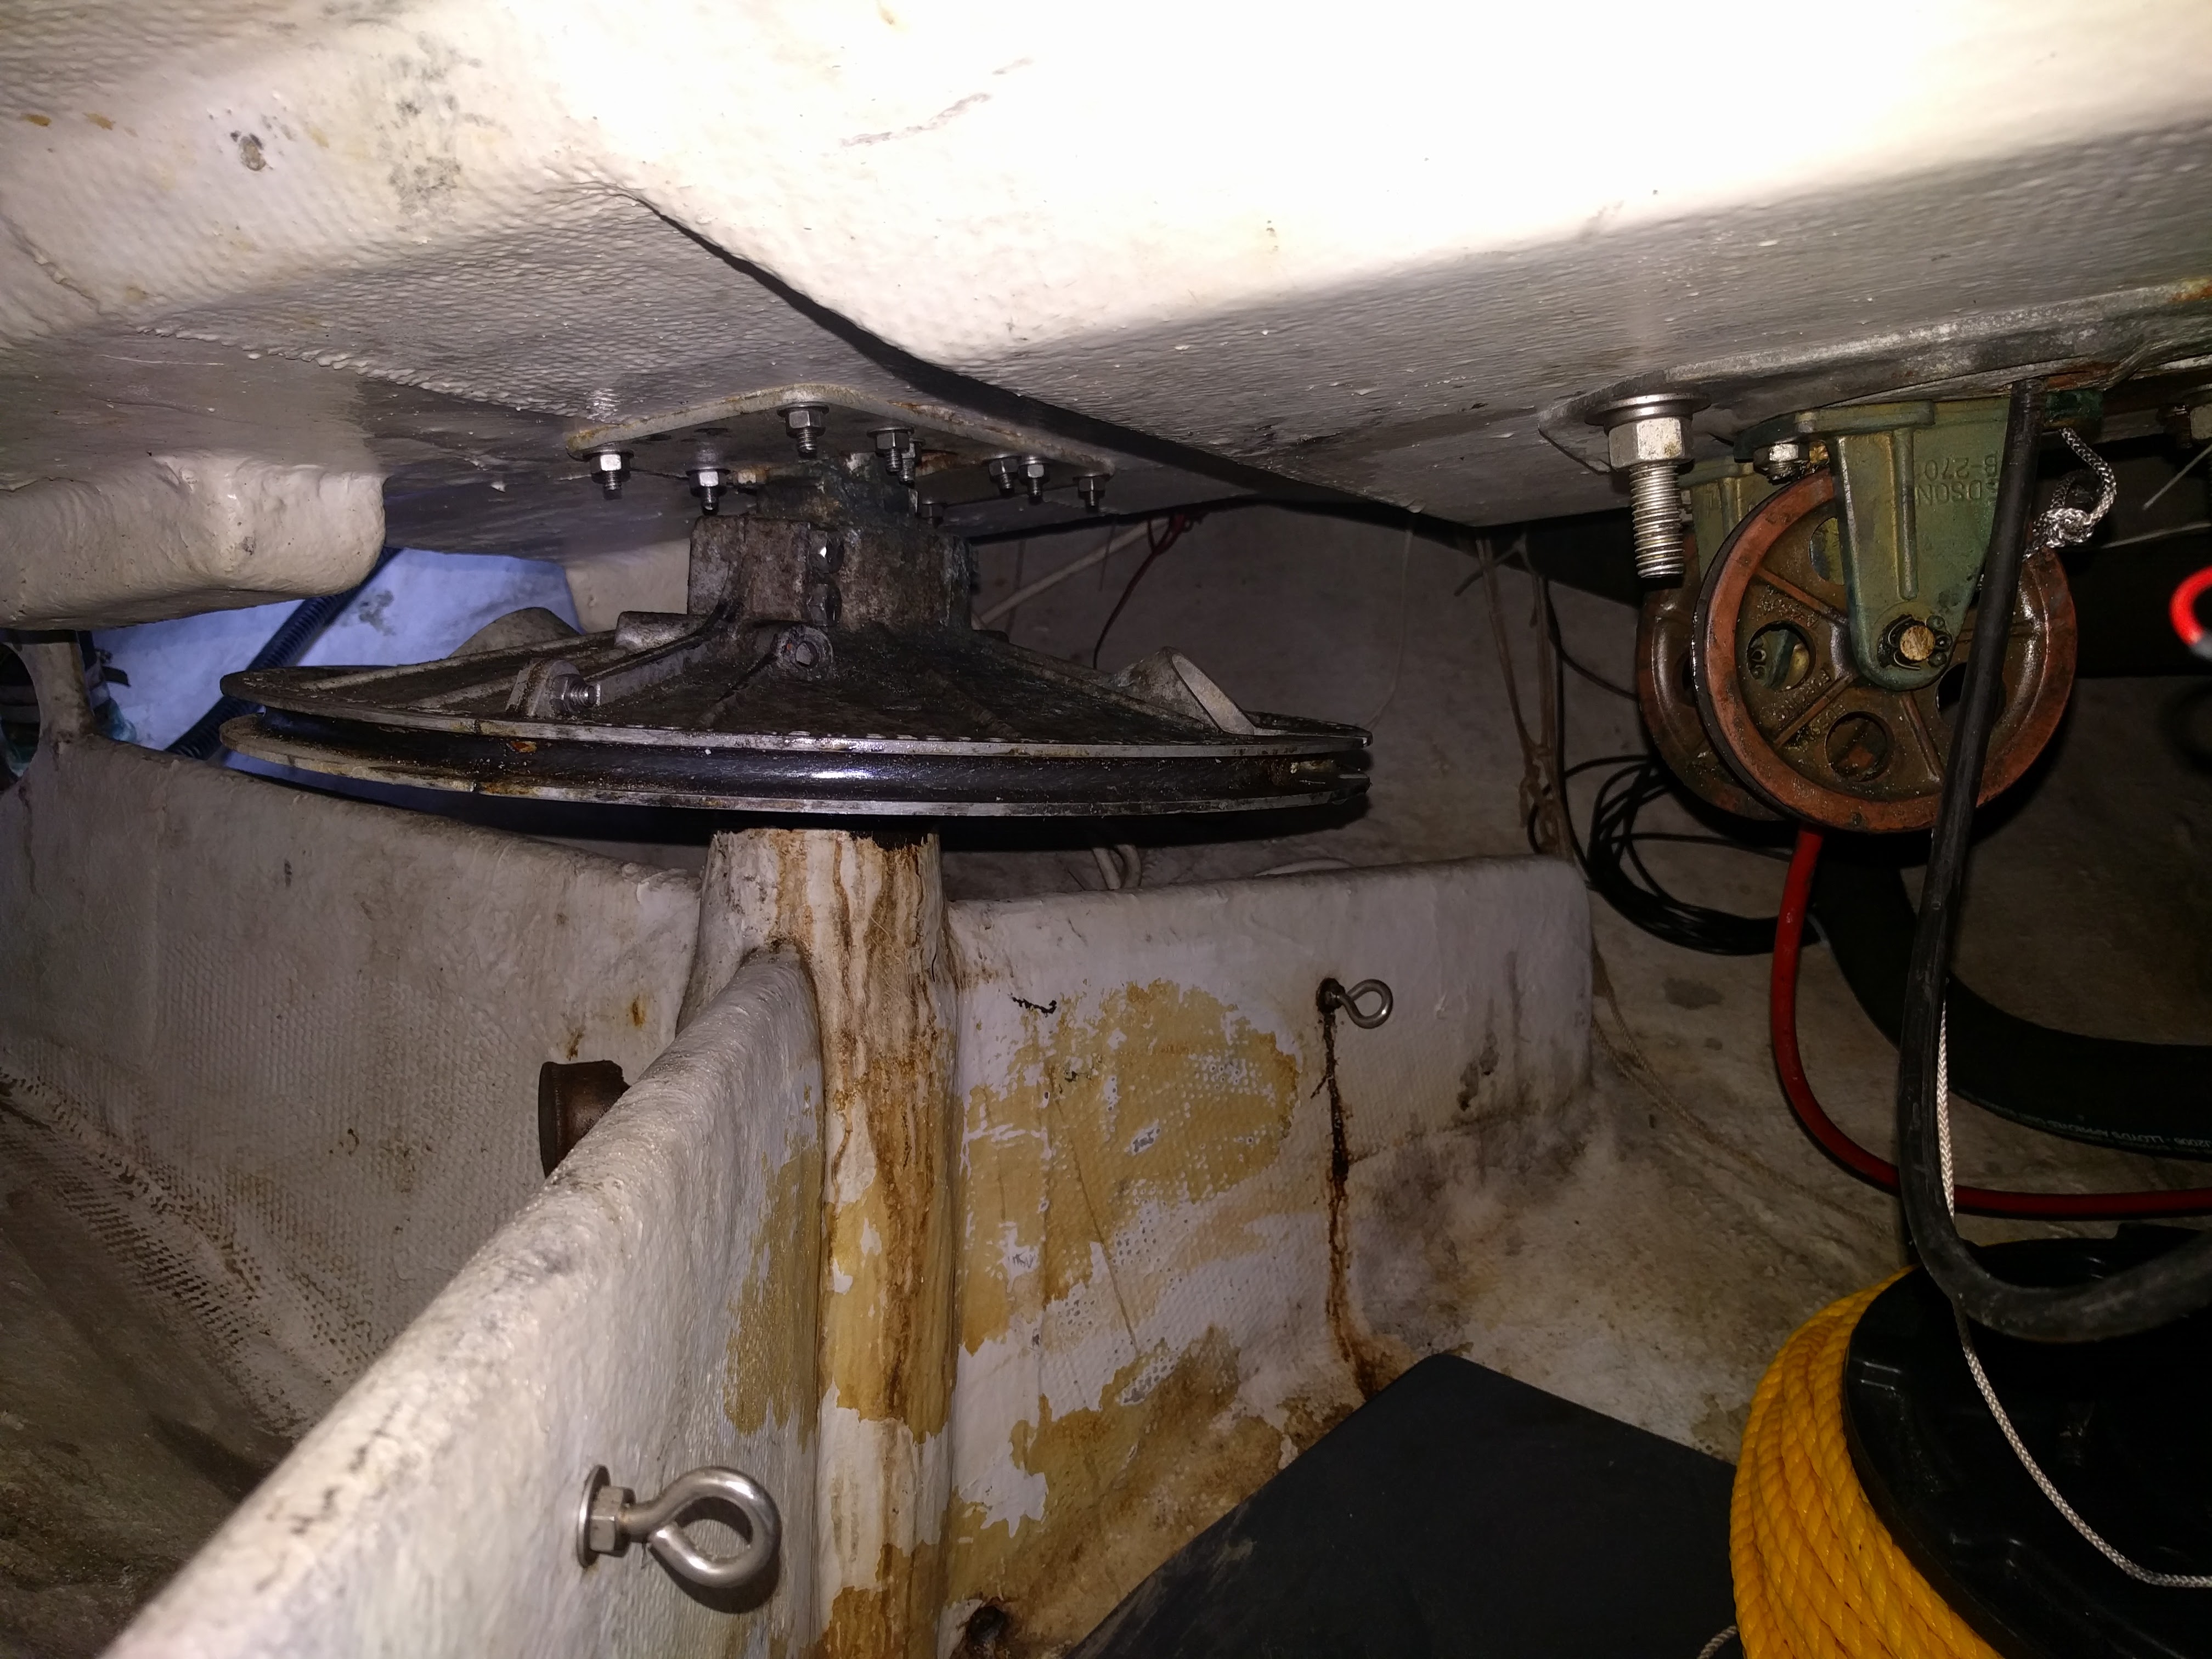
Removing the Edson Radial Drive
After removing the rudder collar nut, removing the Edson radial drive(this is similar to a quadrant, and is what allows our steering wheel to turn the rudder shaft) was the next biggest challenge. After 32 years, the aluminum saucer that clamps around our rudder stock was pretty corroded. They use stainless steel bolts into tapped aluminum holes – so it’s no surprise that galvanic corrosion plus some salt water dripping from the top basically welds it together.
The boatyard recommended cutting it off and buying a new one, but in these very cramped quarters I didn’t feel safe using a Sawzall (even if I had one, which I didn’t). Even using a Dremel with a rotary cutting disc felt dangerous, since it was inches from my face.
In the end we did buy a new one, but I managed to shear off 3 of the bolts, and drilled / Dremeled the fourth one out. The reason I used the Dremel on the drilled out bolt is – if you’ve ever tried to drill out a 9/16″ SS bolt, it’s pretty difficult to get the drill bit perfectly centered and perfectly vertically/horizontally aligned (especially when you’re crammed into a tiny crawl space). So some of the bolt ended up getting missed in the drilling, and I used the Dremel tungsten carbide bit to wear away most of the remainder.
3 bolts were sheared and then drilled a bit. The 4th bolt had its bolt head stripped a bit, which meant I couldn’t get a good enough hold to shear it – so I had to drill it out
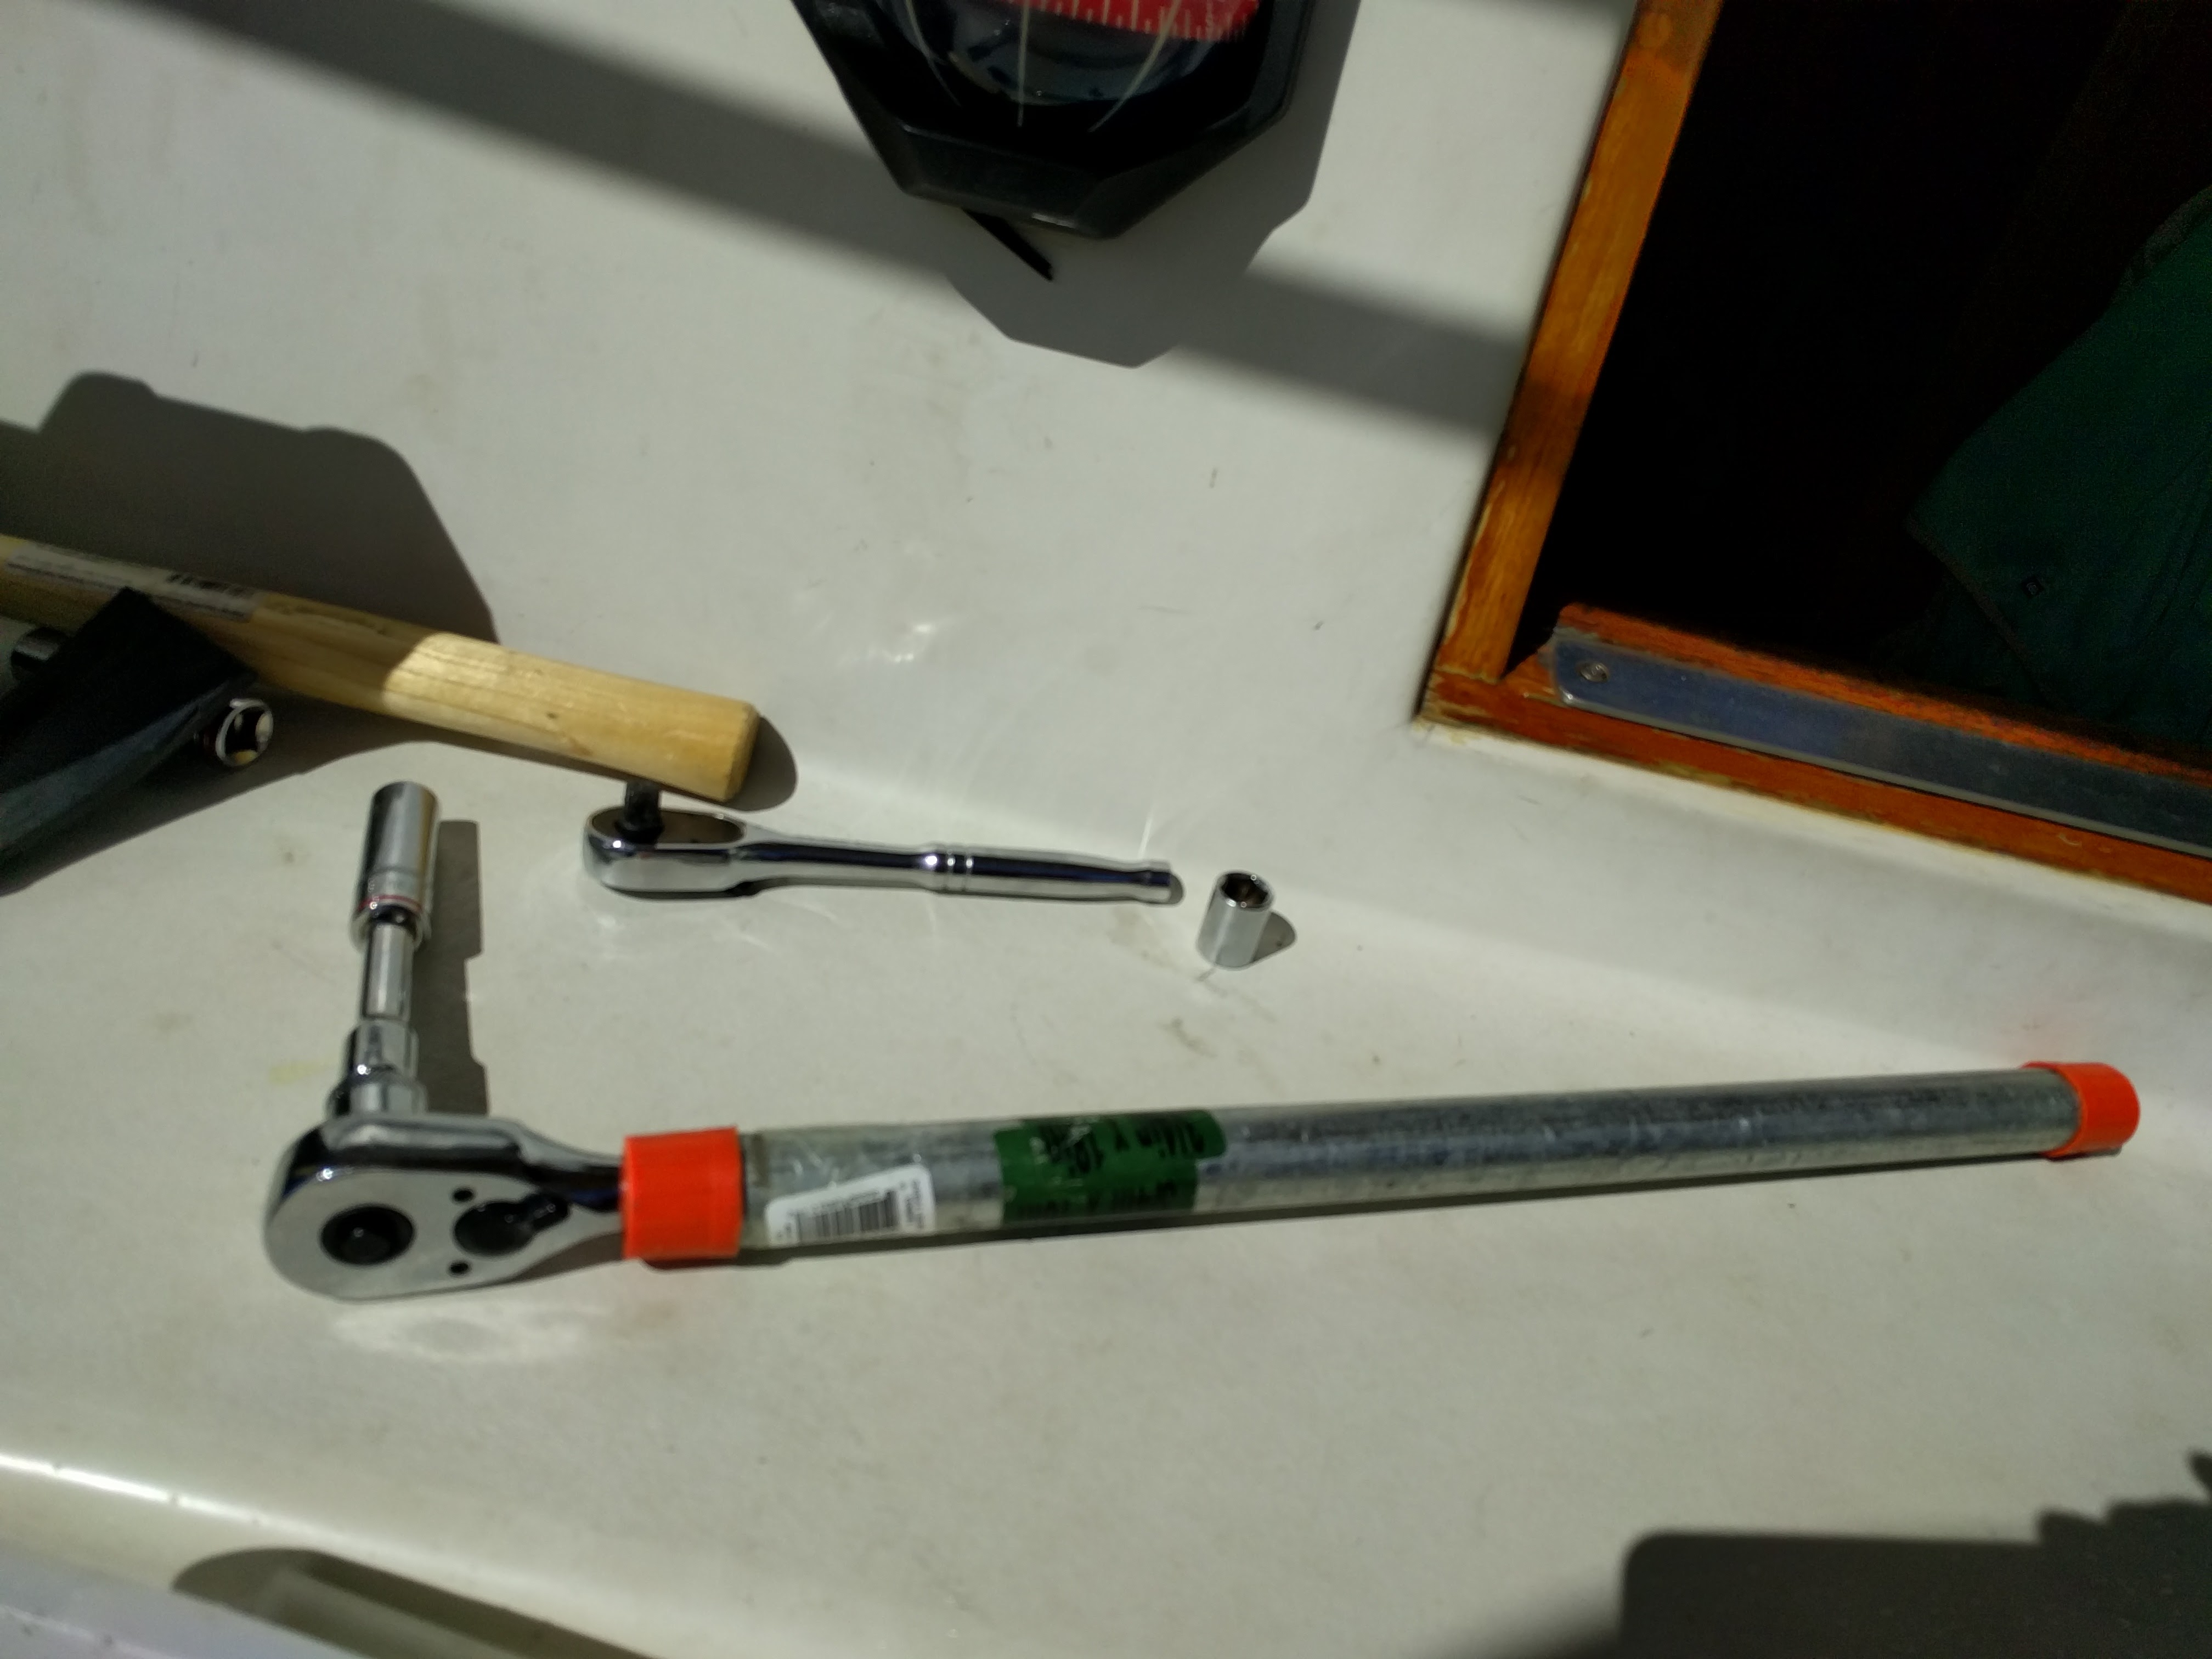
The 18″ pipe extension breaker bar that enabled me to shear off 3 of the radial drive bolts
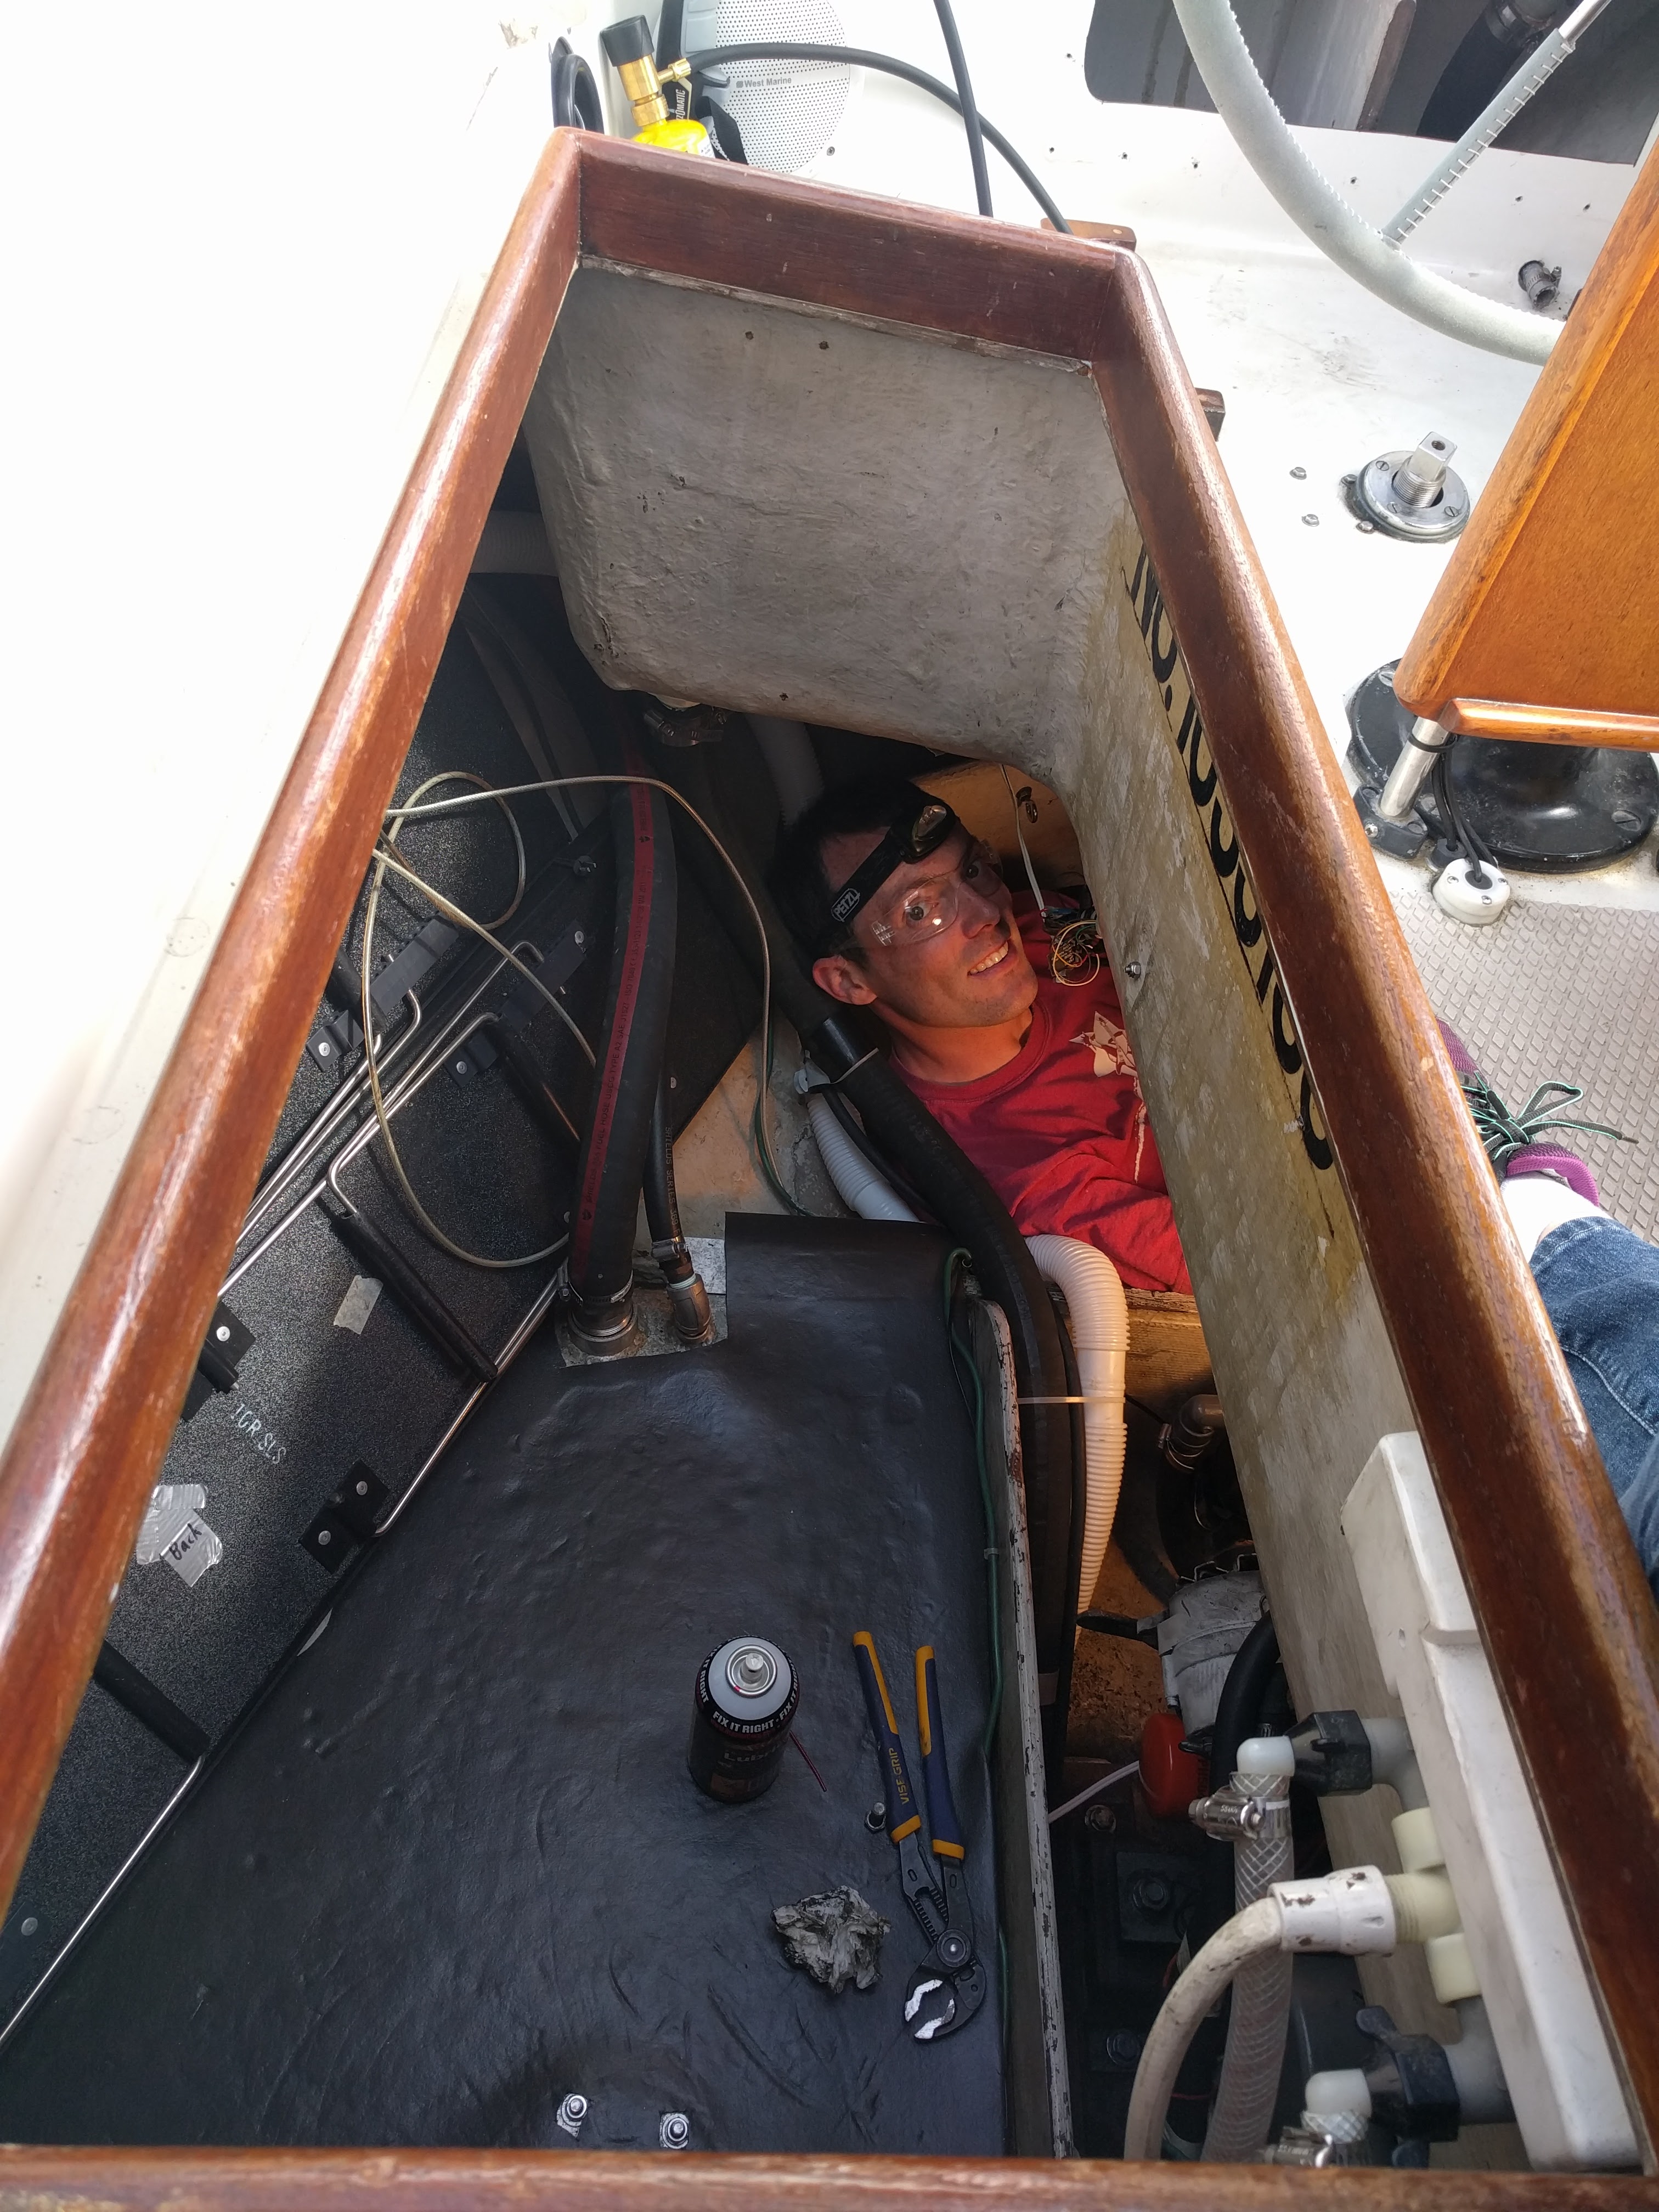
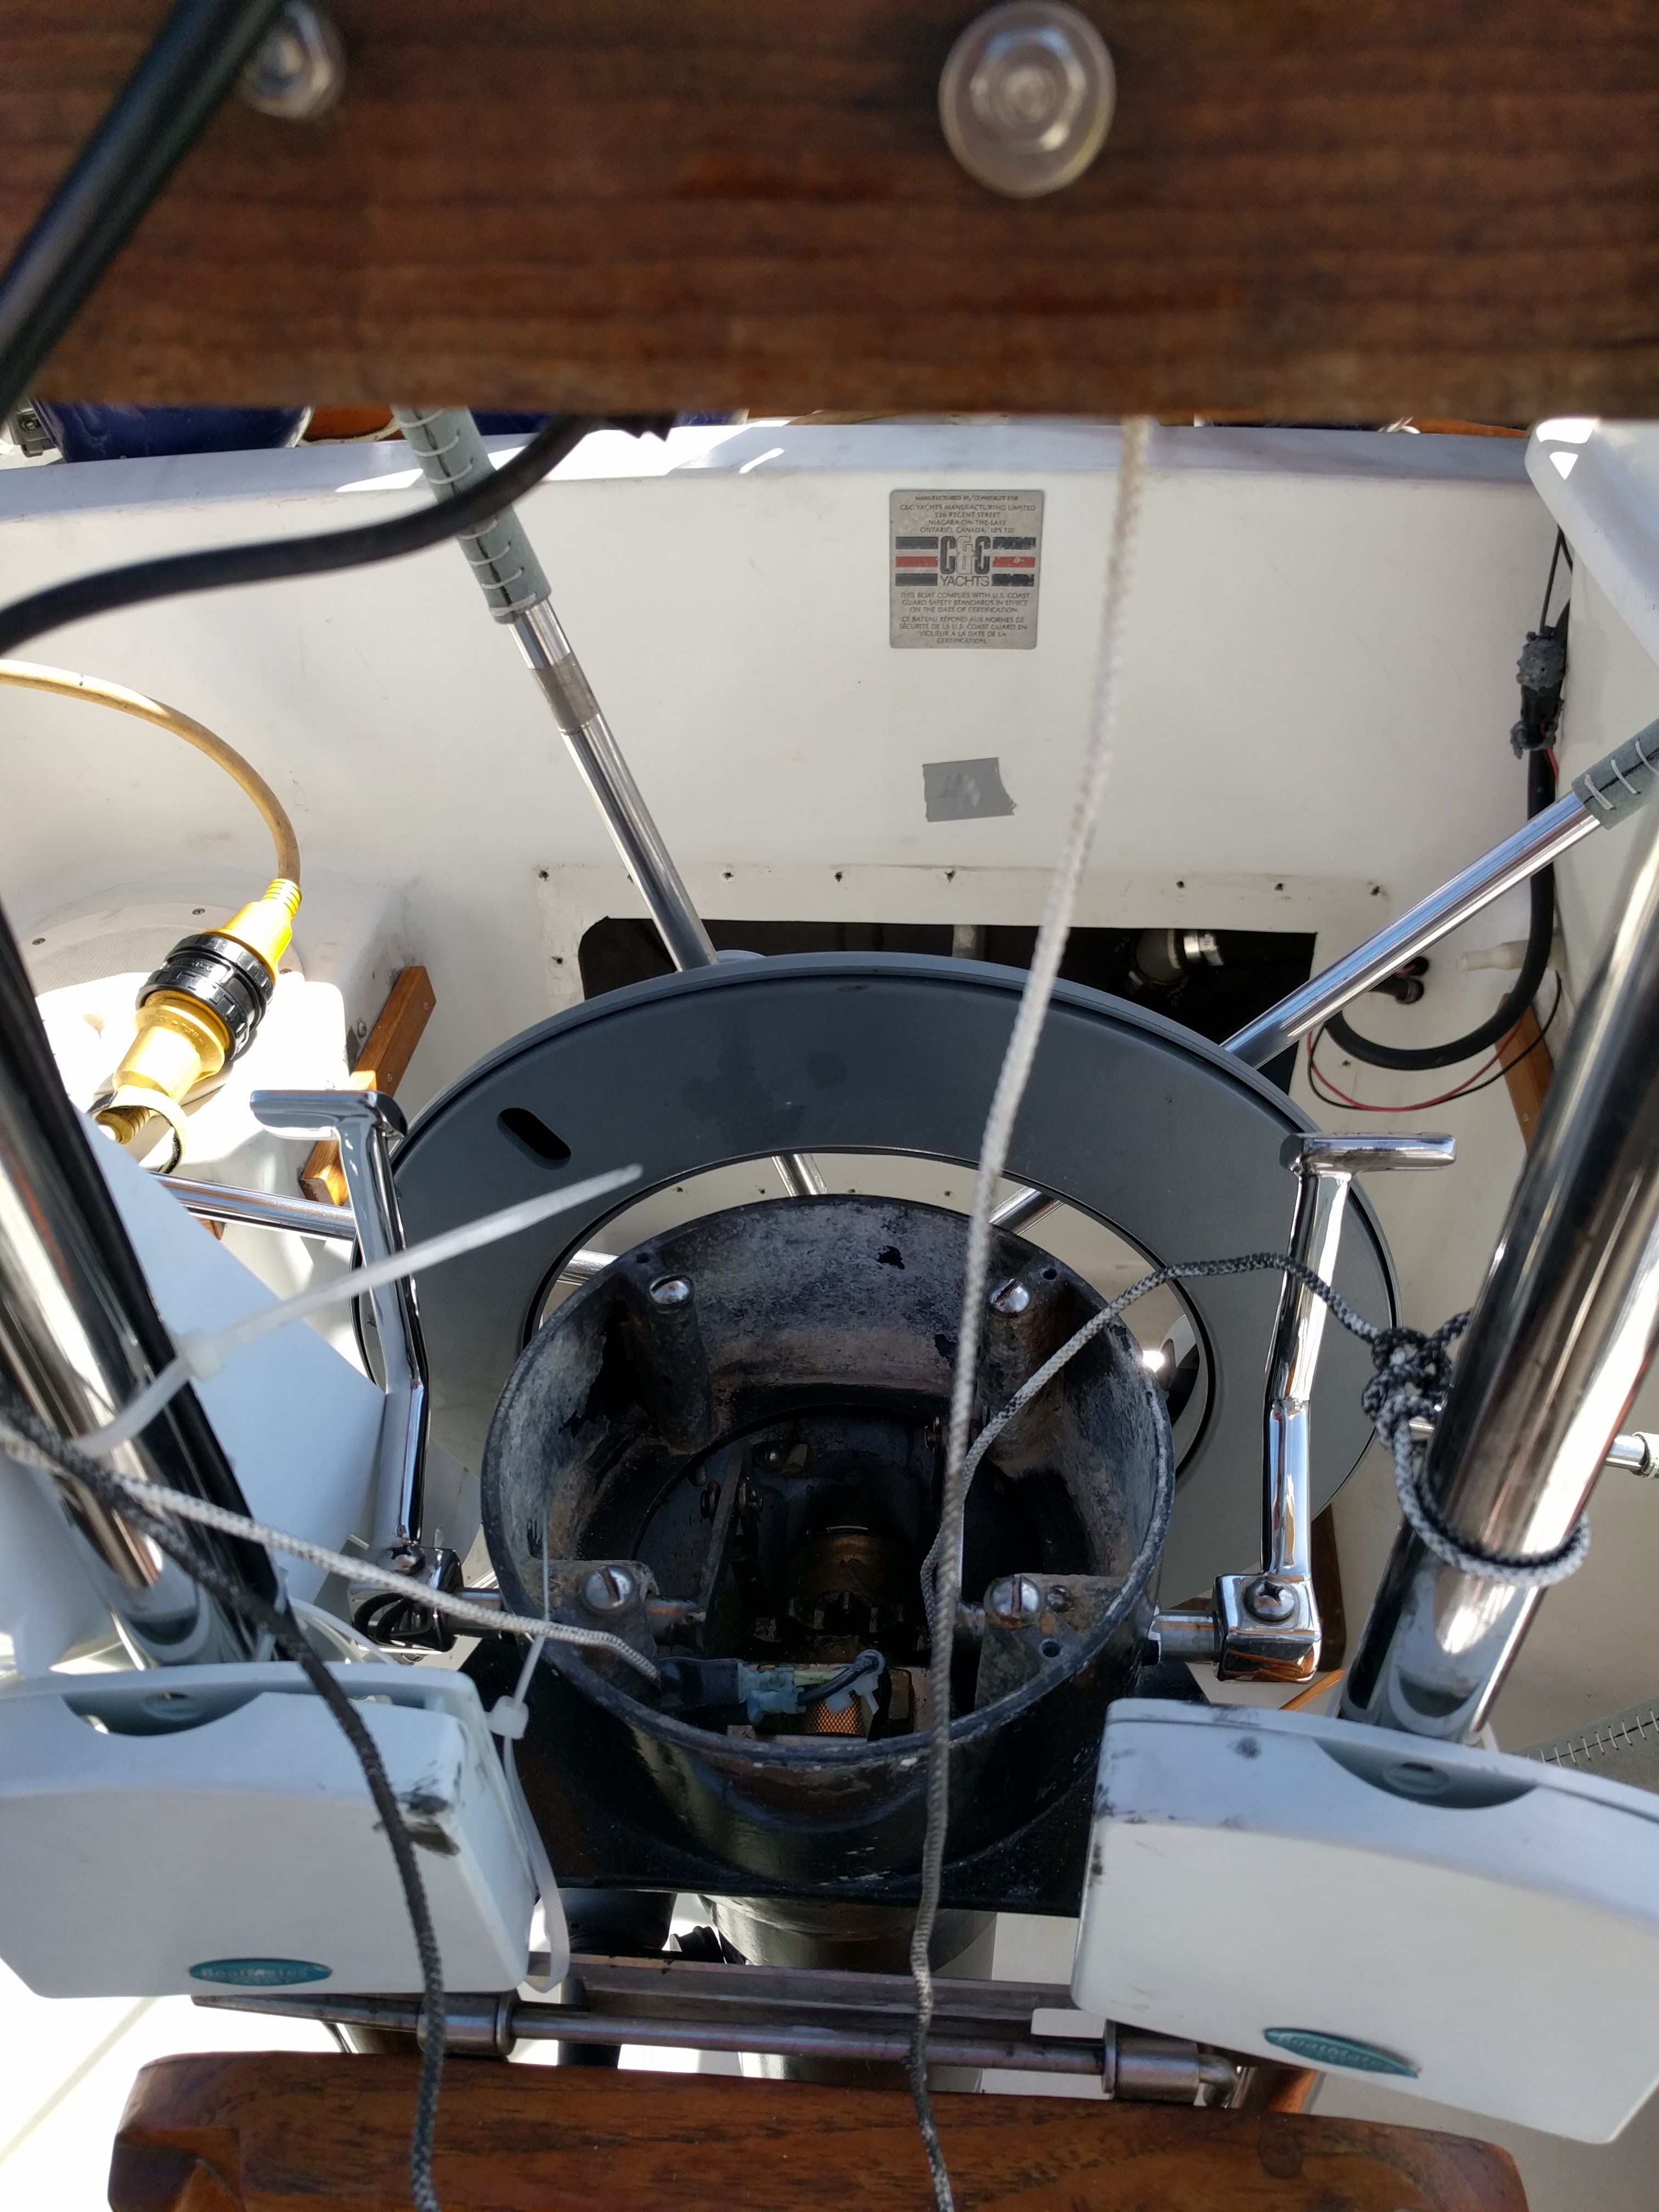
Really difficult access – the best way to get at the radial drive was crawling through this hole and then wedging my body down into the hull below the cockpit floor.
Many things were tried for removing the radial drive. The problem is I didn’t know what would work so I was trying everything. Here are things I tried:
- PB Blaster (lots of it), Loctite Freeze and Release – I don’t think these did any good, and don’t think any variant of lubricant / rust breaker would’ve helped
- Heating with a heat gun, spraying with PB Blaster and then hammering on the bolts
- Hammering with a rubber mallet, and hammering with a regular hammer
- Impact driver (18V Dewalt) – maybe a bigger impact driver would’ve worked, but this didn’t help
- Bernzomatic torch – this may have helped a little, in that it’s the last thing I did before I was able to forceably shear the bolts, so maybe it weakened them a little. Perhaps.
- Dremel fiberglass reinforced cutting disc – for cutting off a bolt head. This worked but it’s very slow going. And cutting off the bolt head isn’t the end – the bolt’s shaft is still welded into the aluminum.
- Drilling out a bolt with a 3/8″ drill bit. This worked sort of but it’s also very slow going (you need to apply a lot of pressure to drill stainless steel, and frequently shooting it with PB Blaster to keep it from heating too much). Plus it’s hard to precisely drill out the bolt.
- After the bolt was partially drilled out, I used a Dremel tungsten carbide bit to grind off some of the remaining bolt material embedded in the aluminum. This worked but was very slow.
- After all the bolts were drilled out to the half-way point (center of the discs), the drive halves still wouldn’t come apart. Tapping, hammering, and pulling was no good. Driving a thin screwdriver into the seam from the outer rim with a hammer did the trick though.
Like I said, a yard worker probably would’ve taken a Sawzall to this. But I was working inches from my face, in a confined space with my legs (and femoral artery) also only a foot or two away – I’m not sure a Sawzall would’ve been safe.
Steering System Work
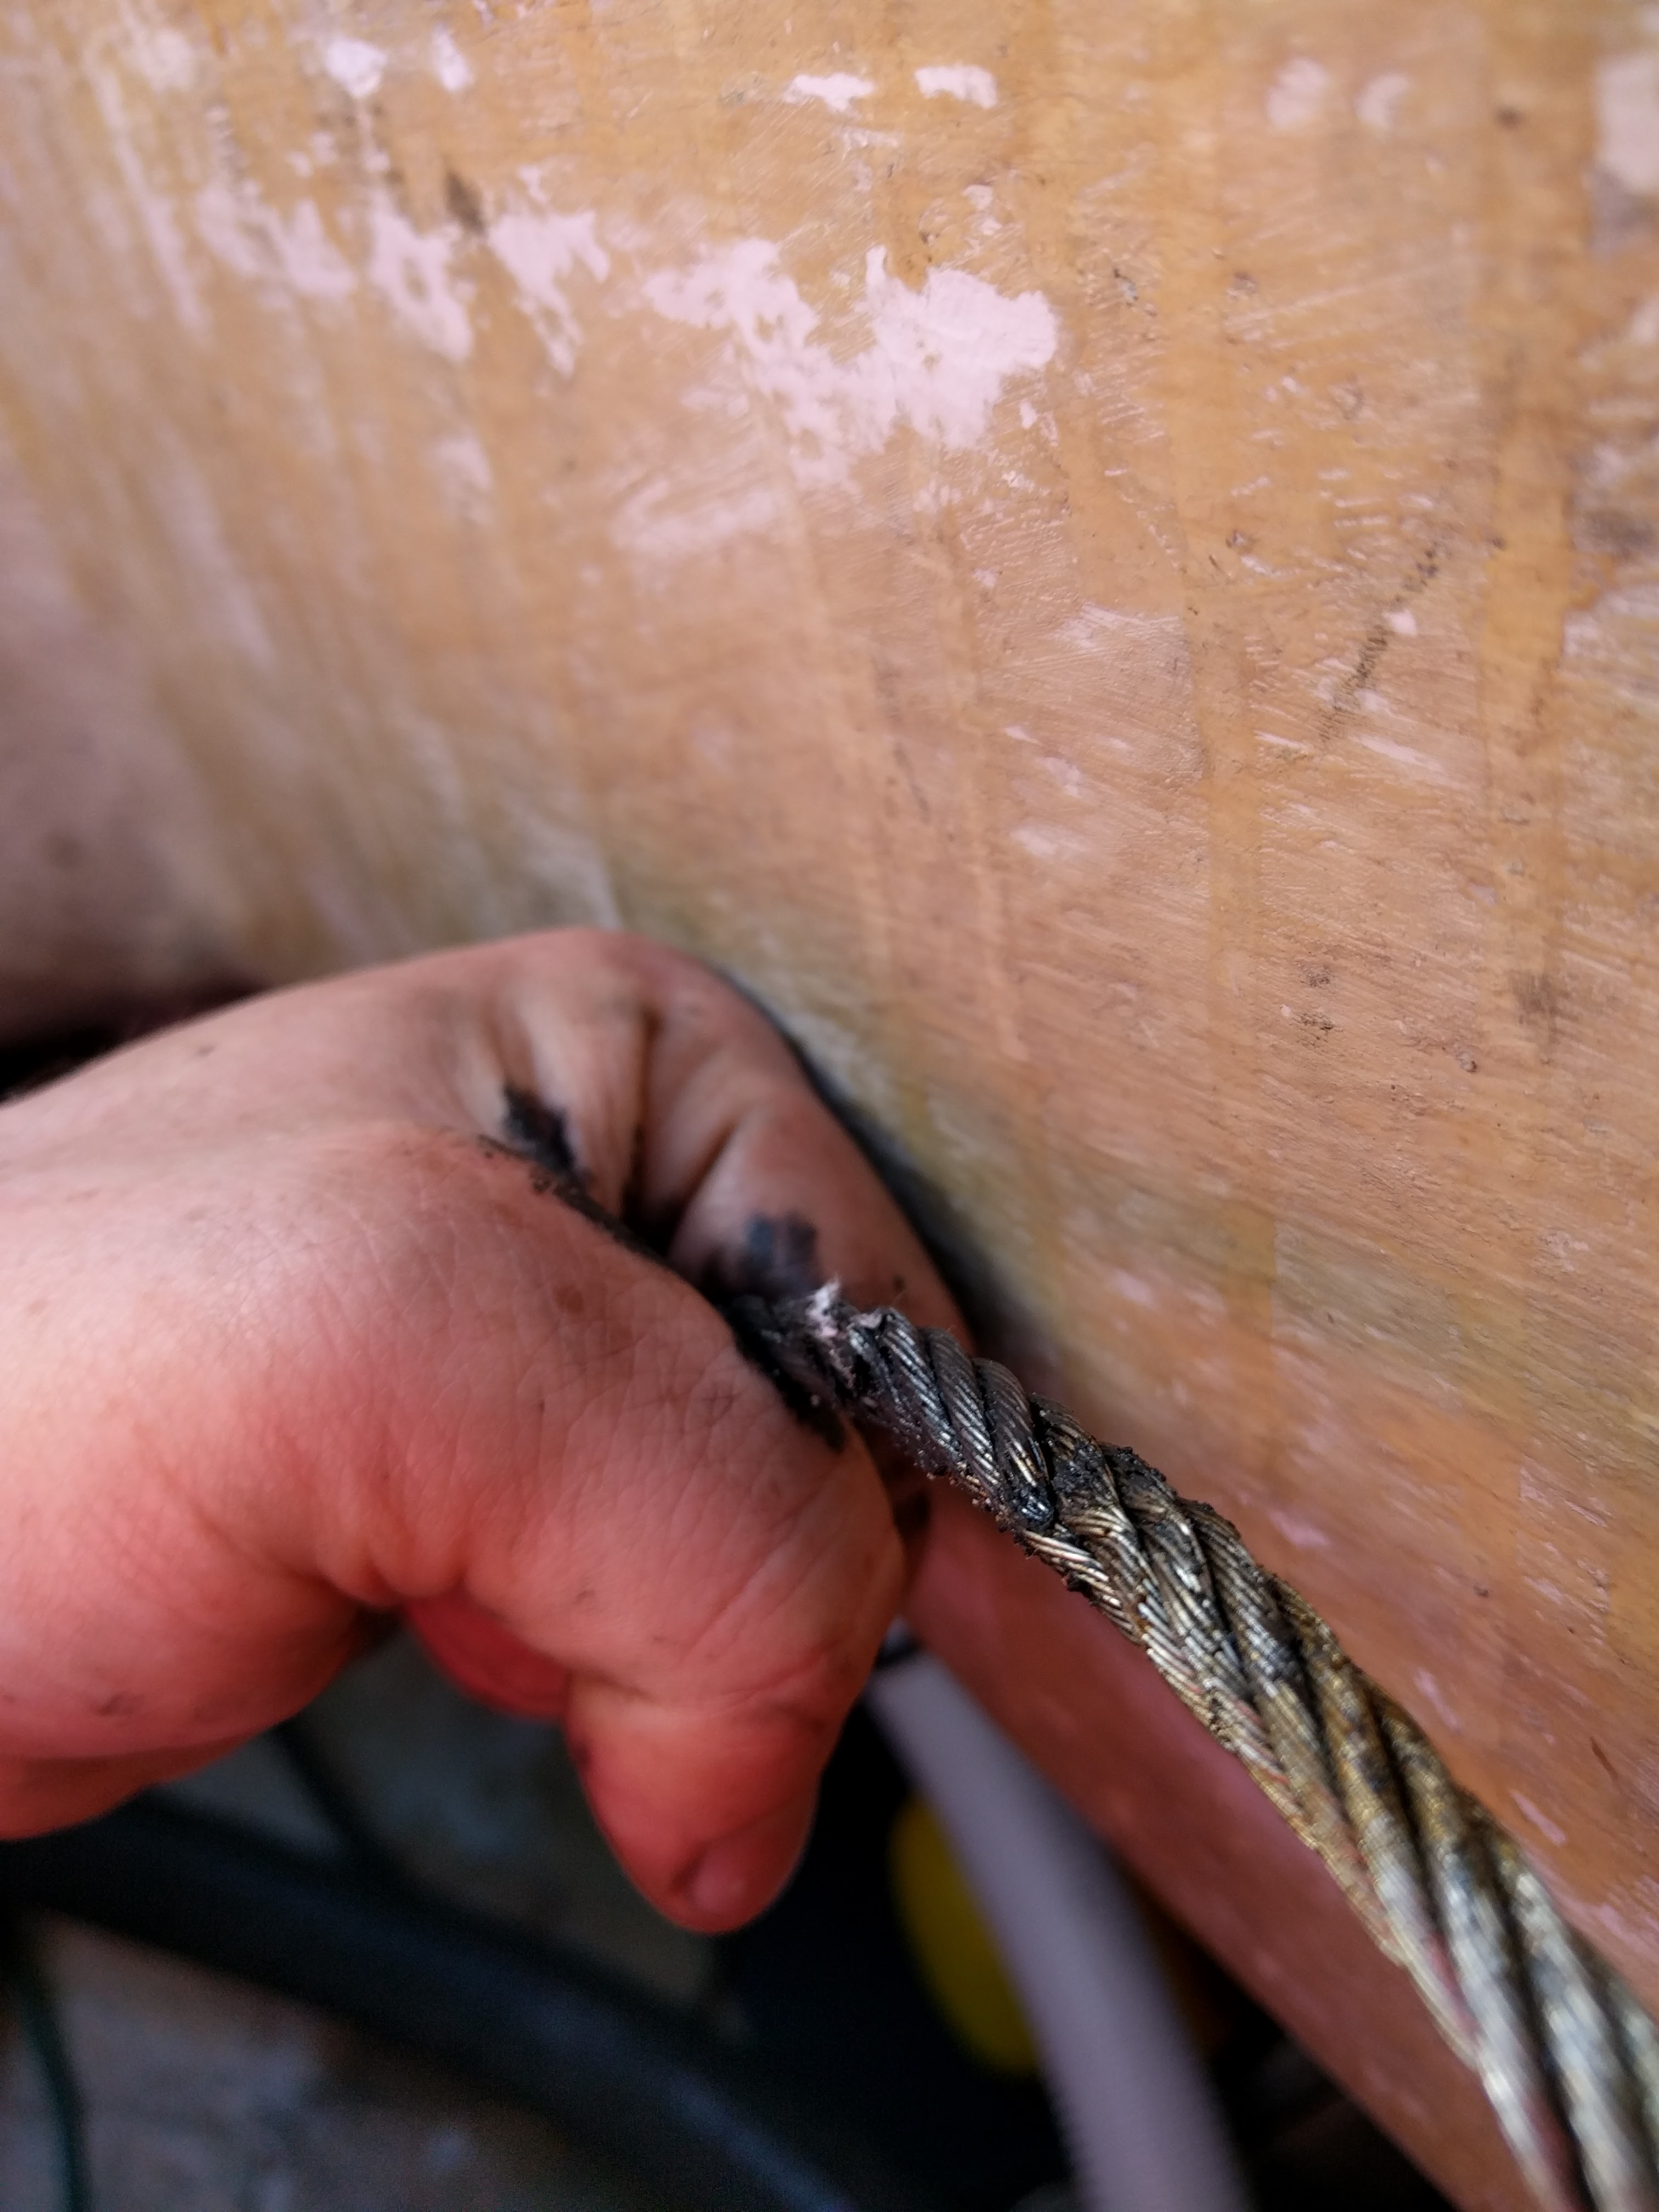
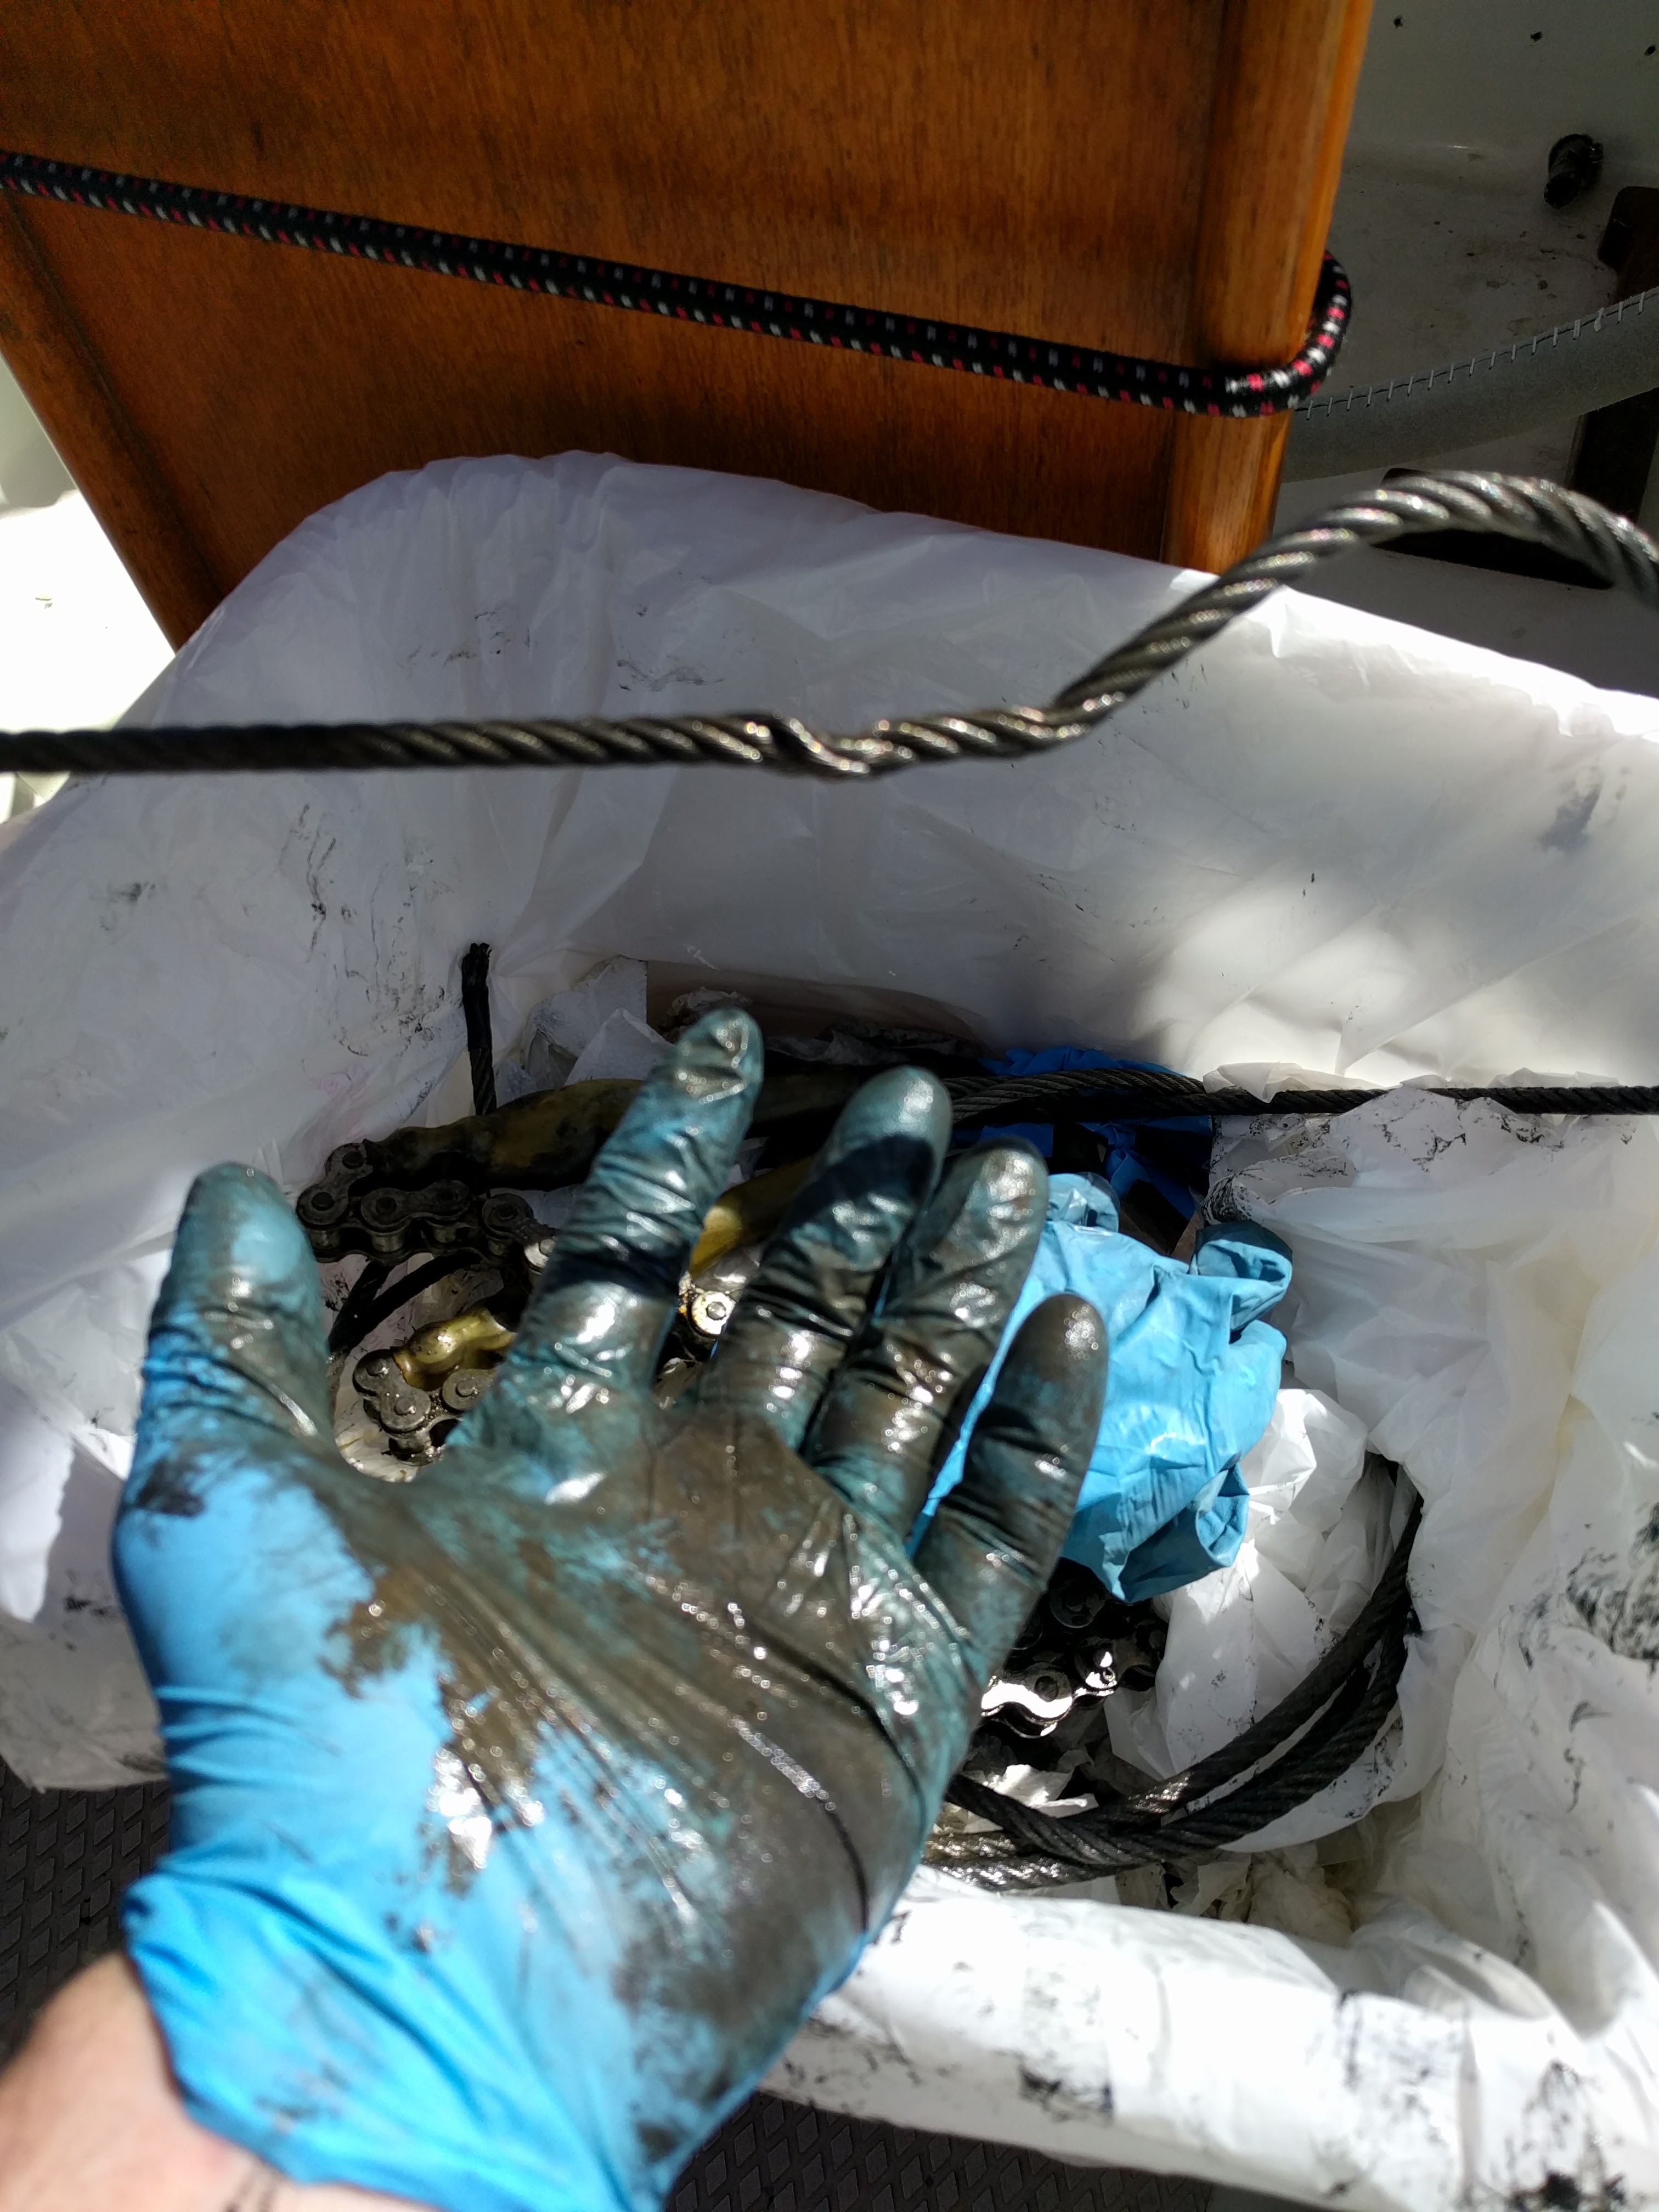
Since we had to remove the radial drive, this was a good time to replace the chain + wire which went around it. When I took off the wire it actually had several broken strands and fishhooks. And it was a greasy mess – perhaps a prior owner had greased it (which you shouldn’t do – Edson recommends just 30 weight motor oil) or gunk had accumulated over the years.
Further, at the place where the rudder stock goes through the cockpit floor (this provides the means of attaching an emergency tiller), there is a thrust bearing and 12 thru bolts going to a steel backing plate below the cockpit floor. The cockpit floor is cored with a thick layer of marine plywood here, and this is a common area for leaks on our boat model. Fortunately the core was in pretty good shape – a little bit of water had dripped down the surface but it was still solid wood. I epoxied over it to prevent future problems.
Drive System – Propeller shaft work
Since the rudder was now dropped, it made sense to do some other jobs too. Dropping the rudder was really hard, and we don’t want to have to do it again any time soon. So we also replaced the 32-year-old seized stuffing box (the traditional flax packing kind) with a PSS dripless shaft seal.

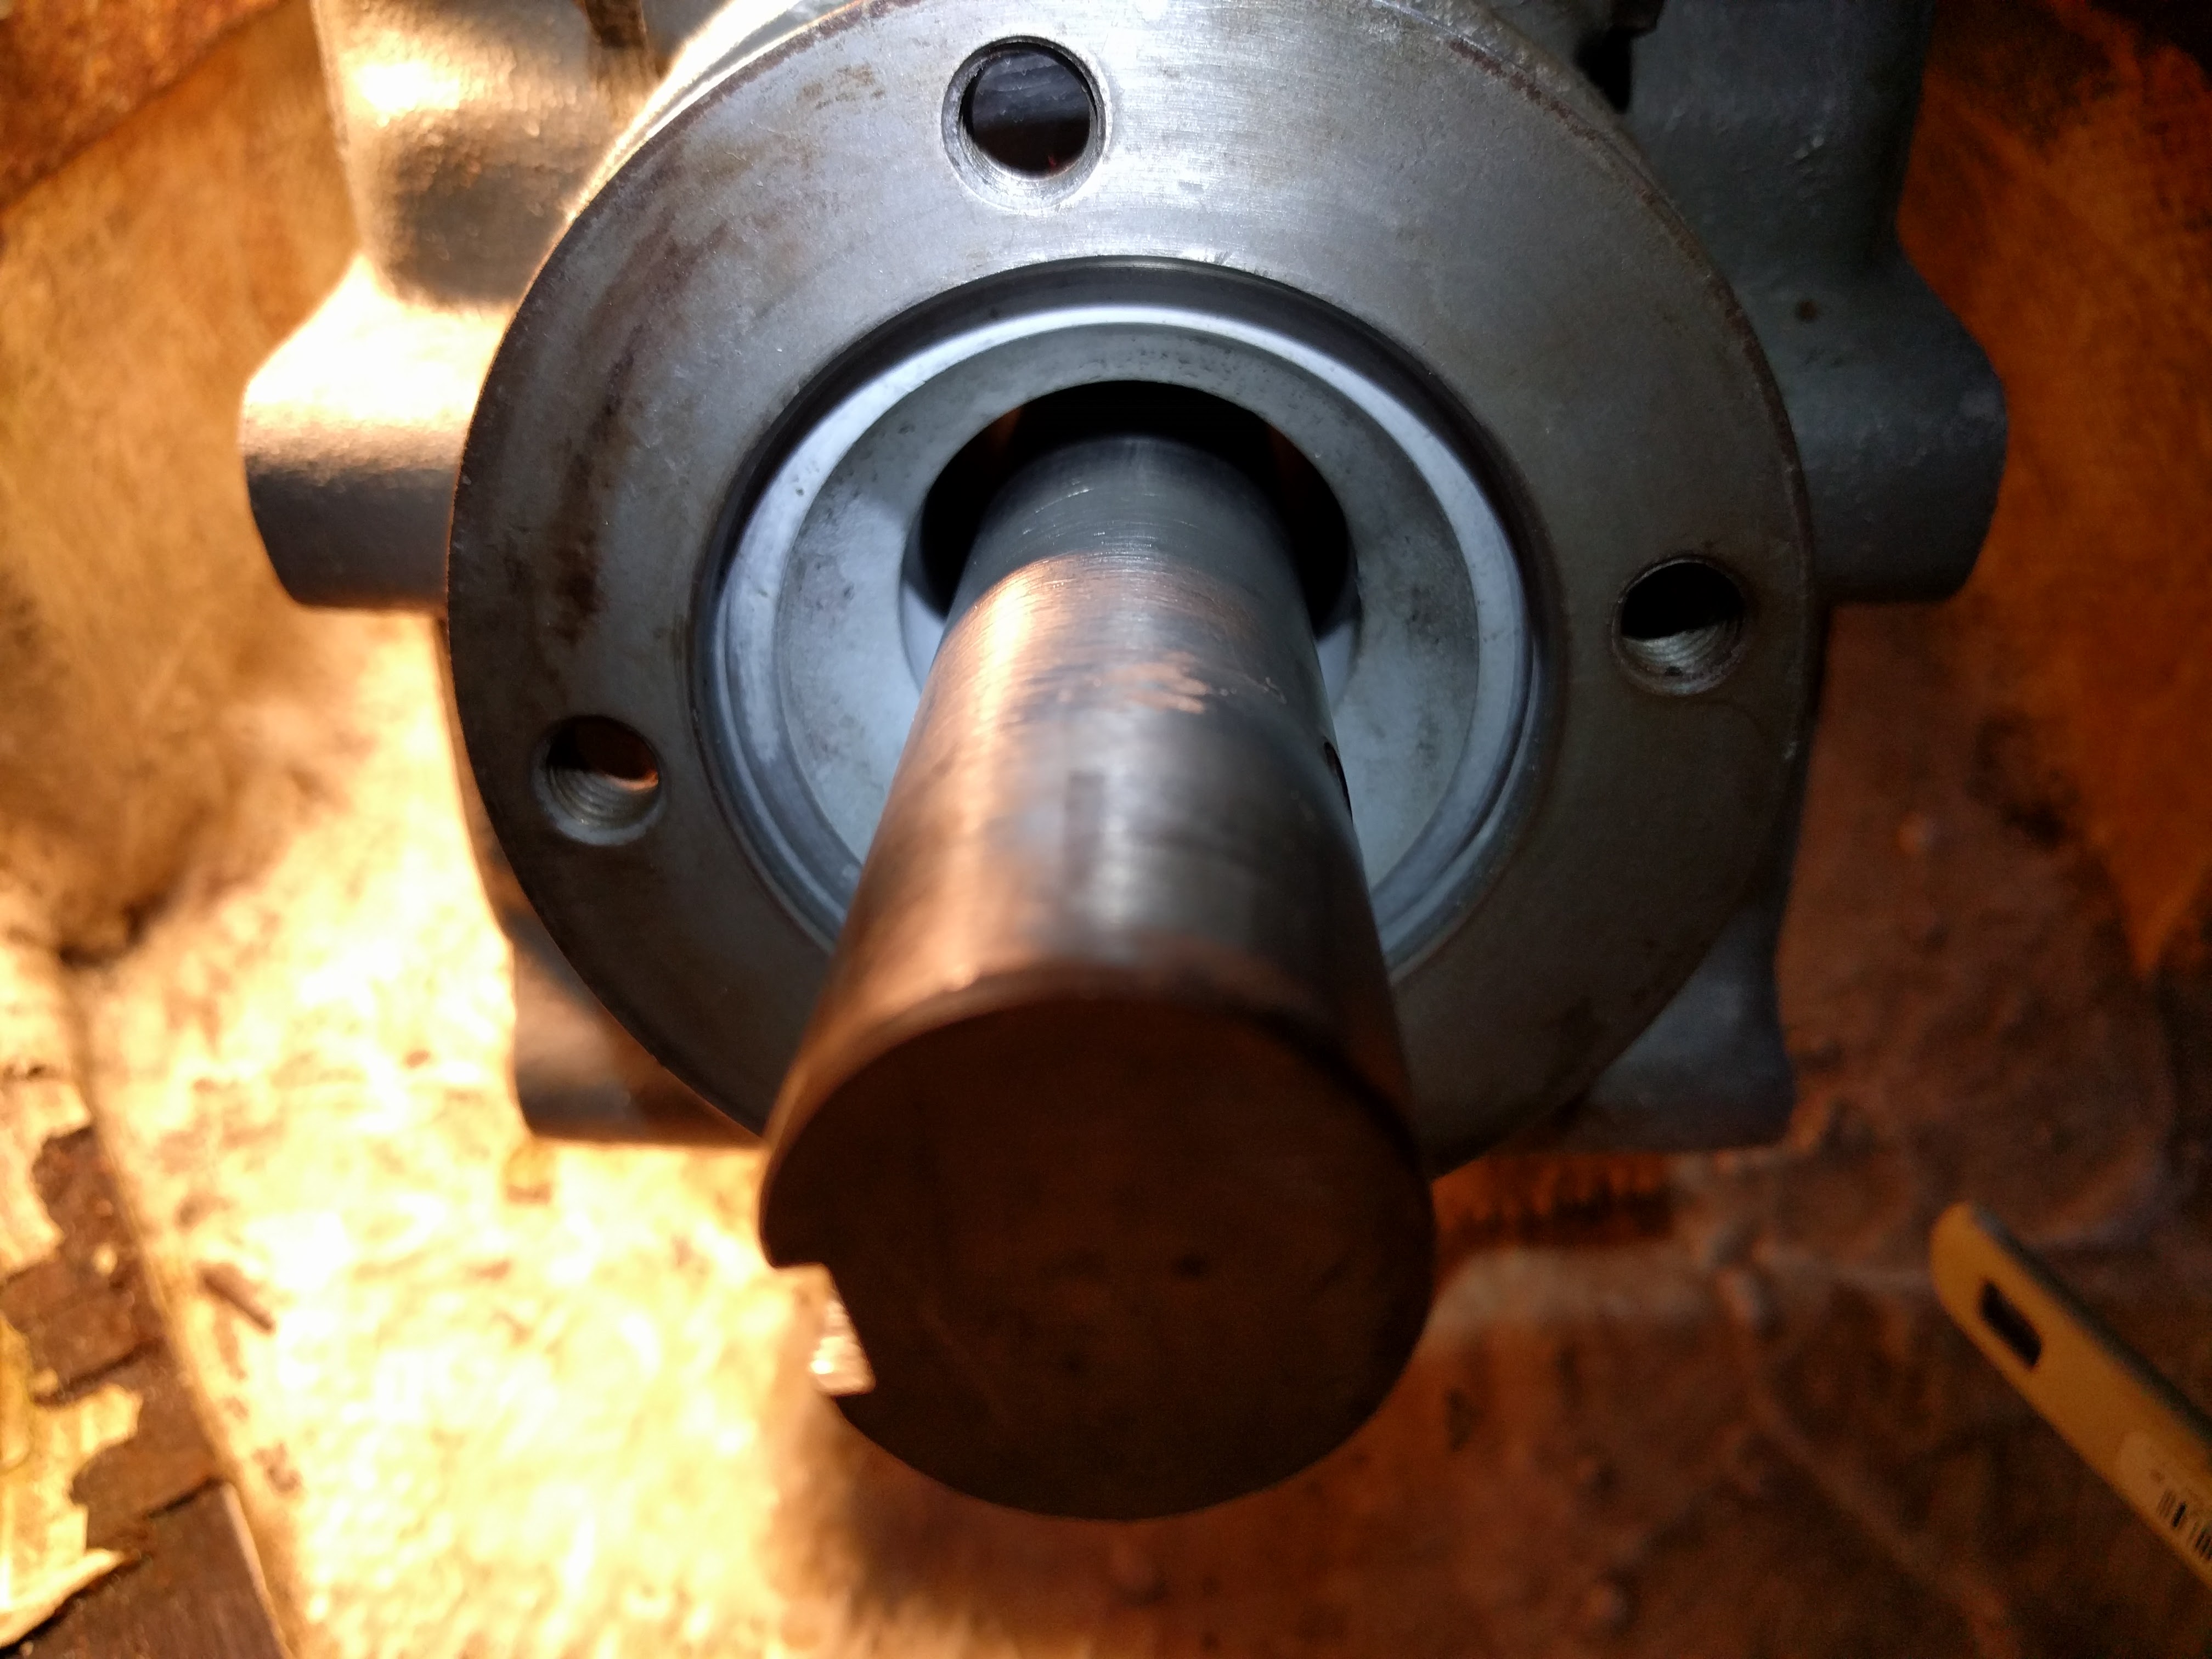
The old stuffing box (seized, and the locking nut was actually dented)
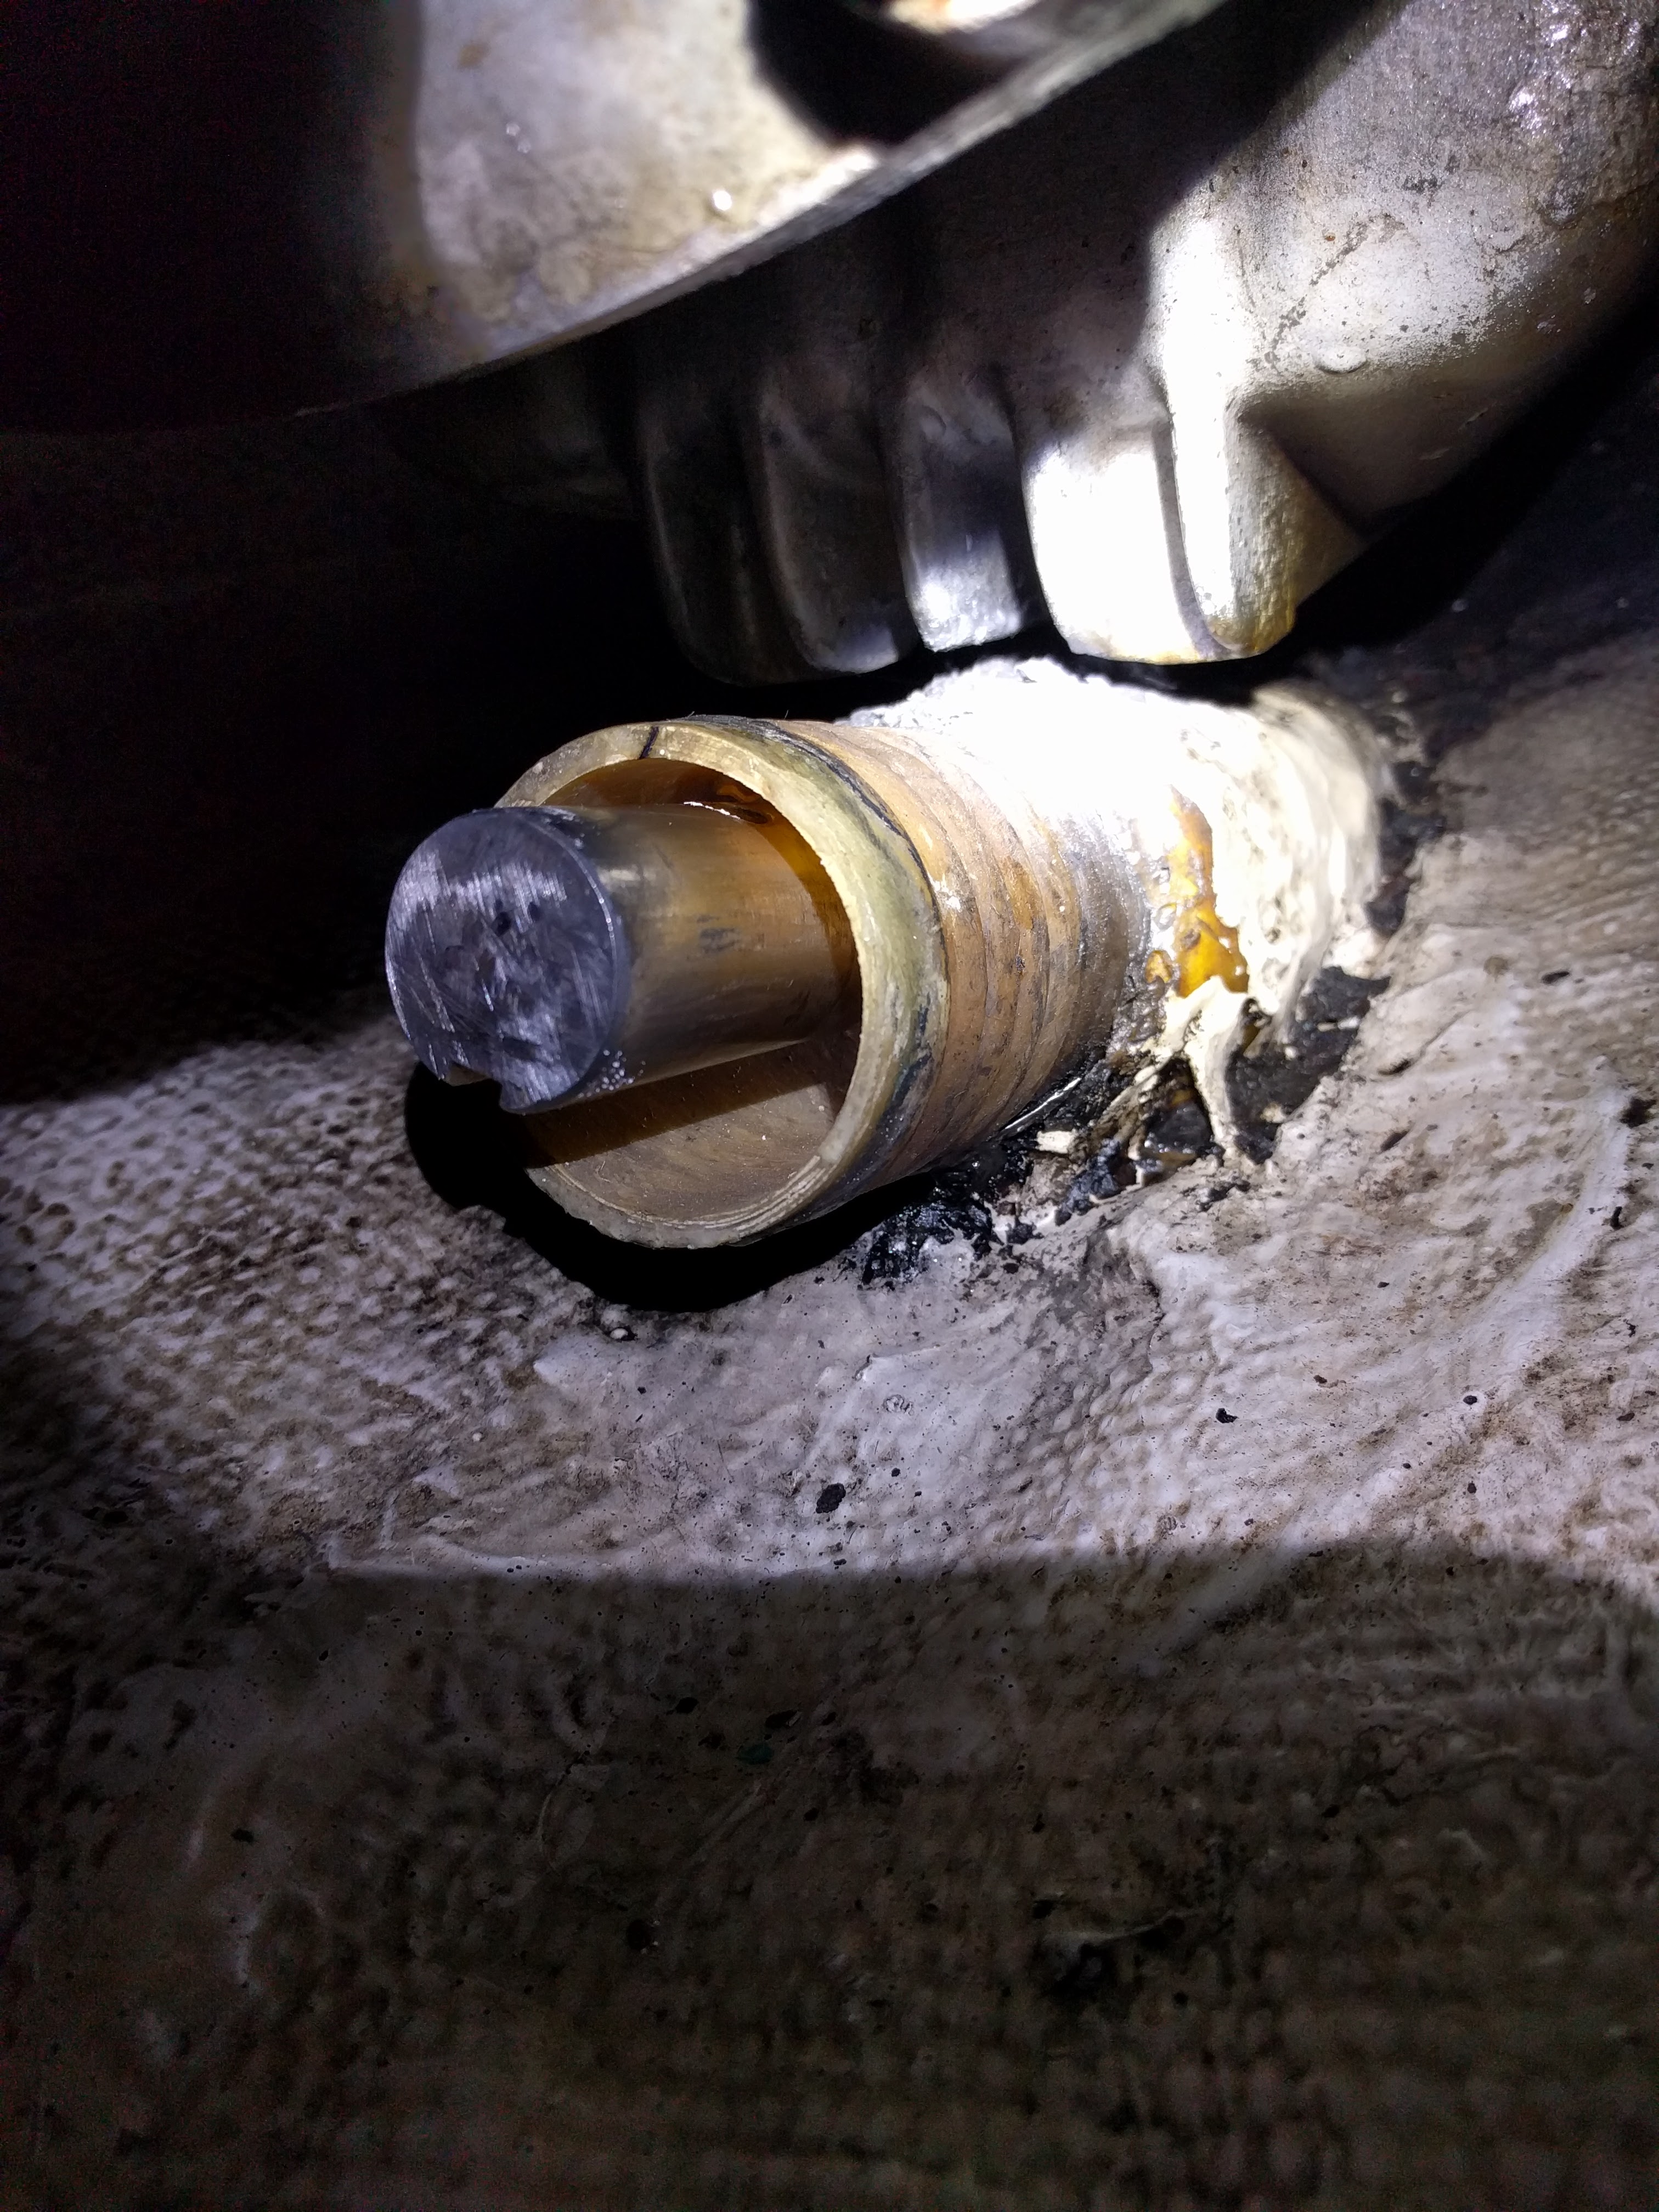
The shaft log with prop shaft partially pulled out
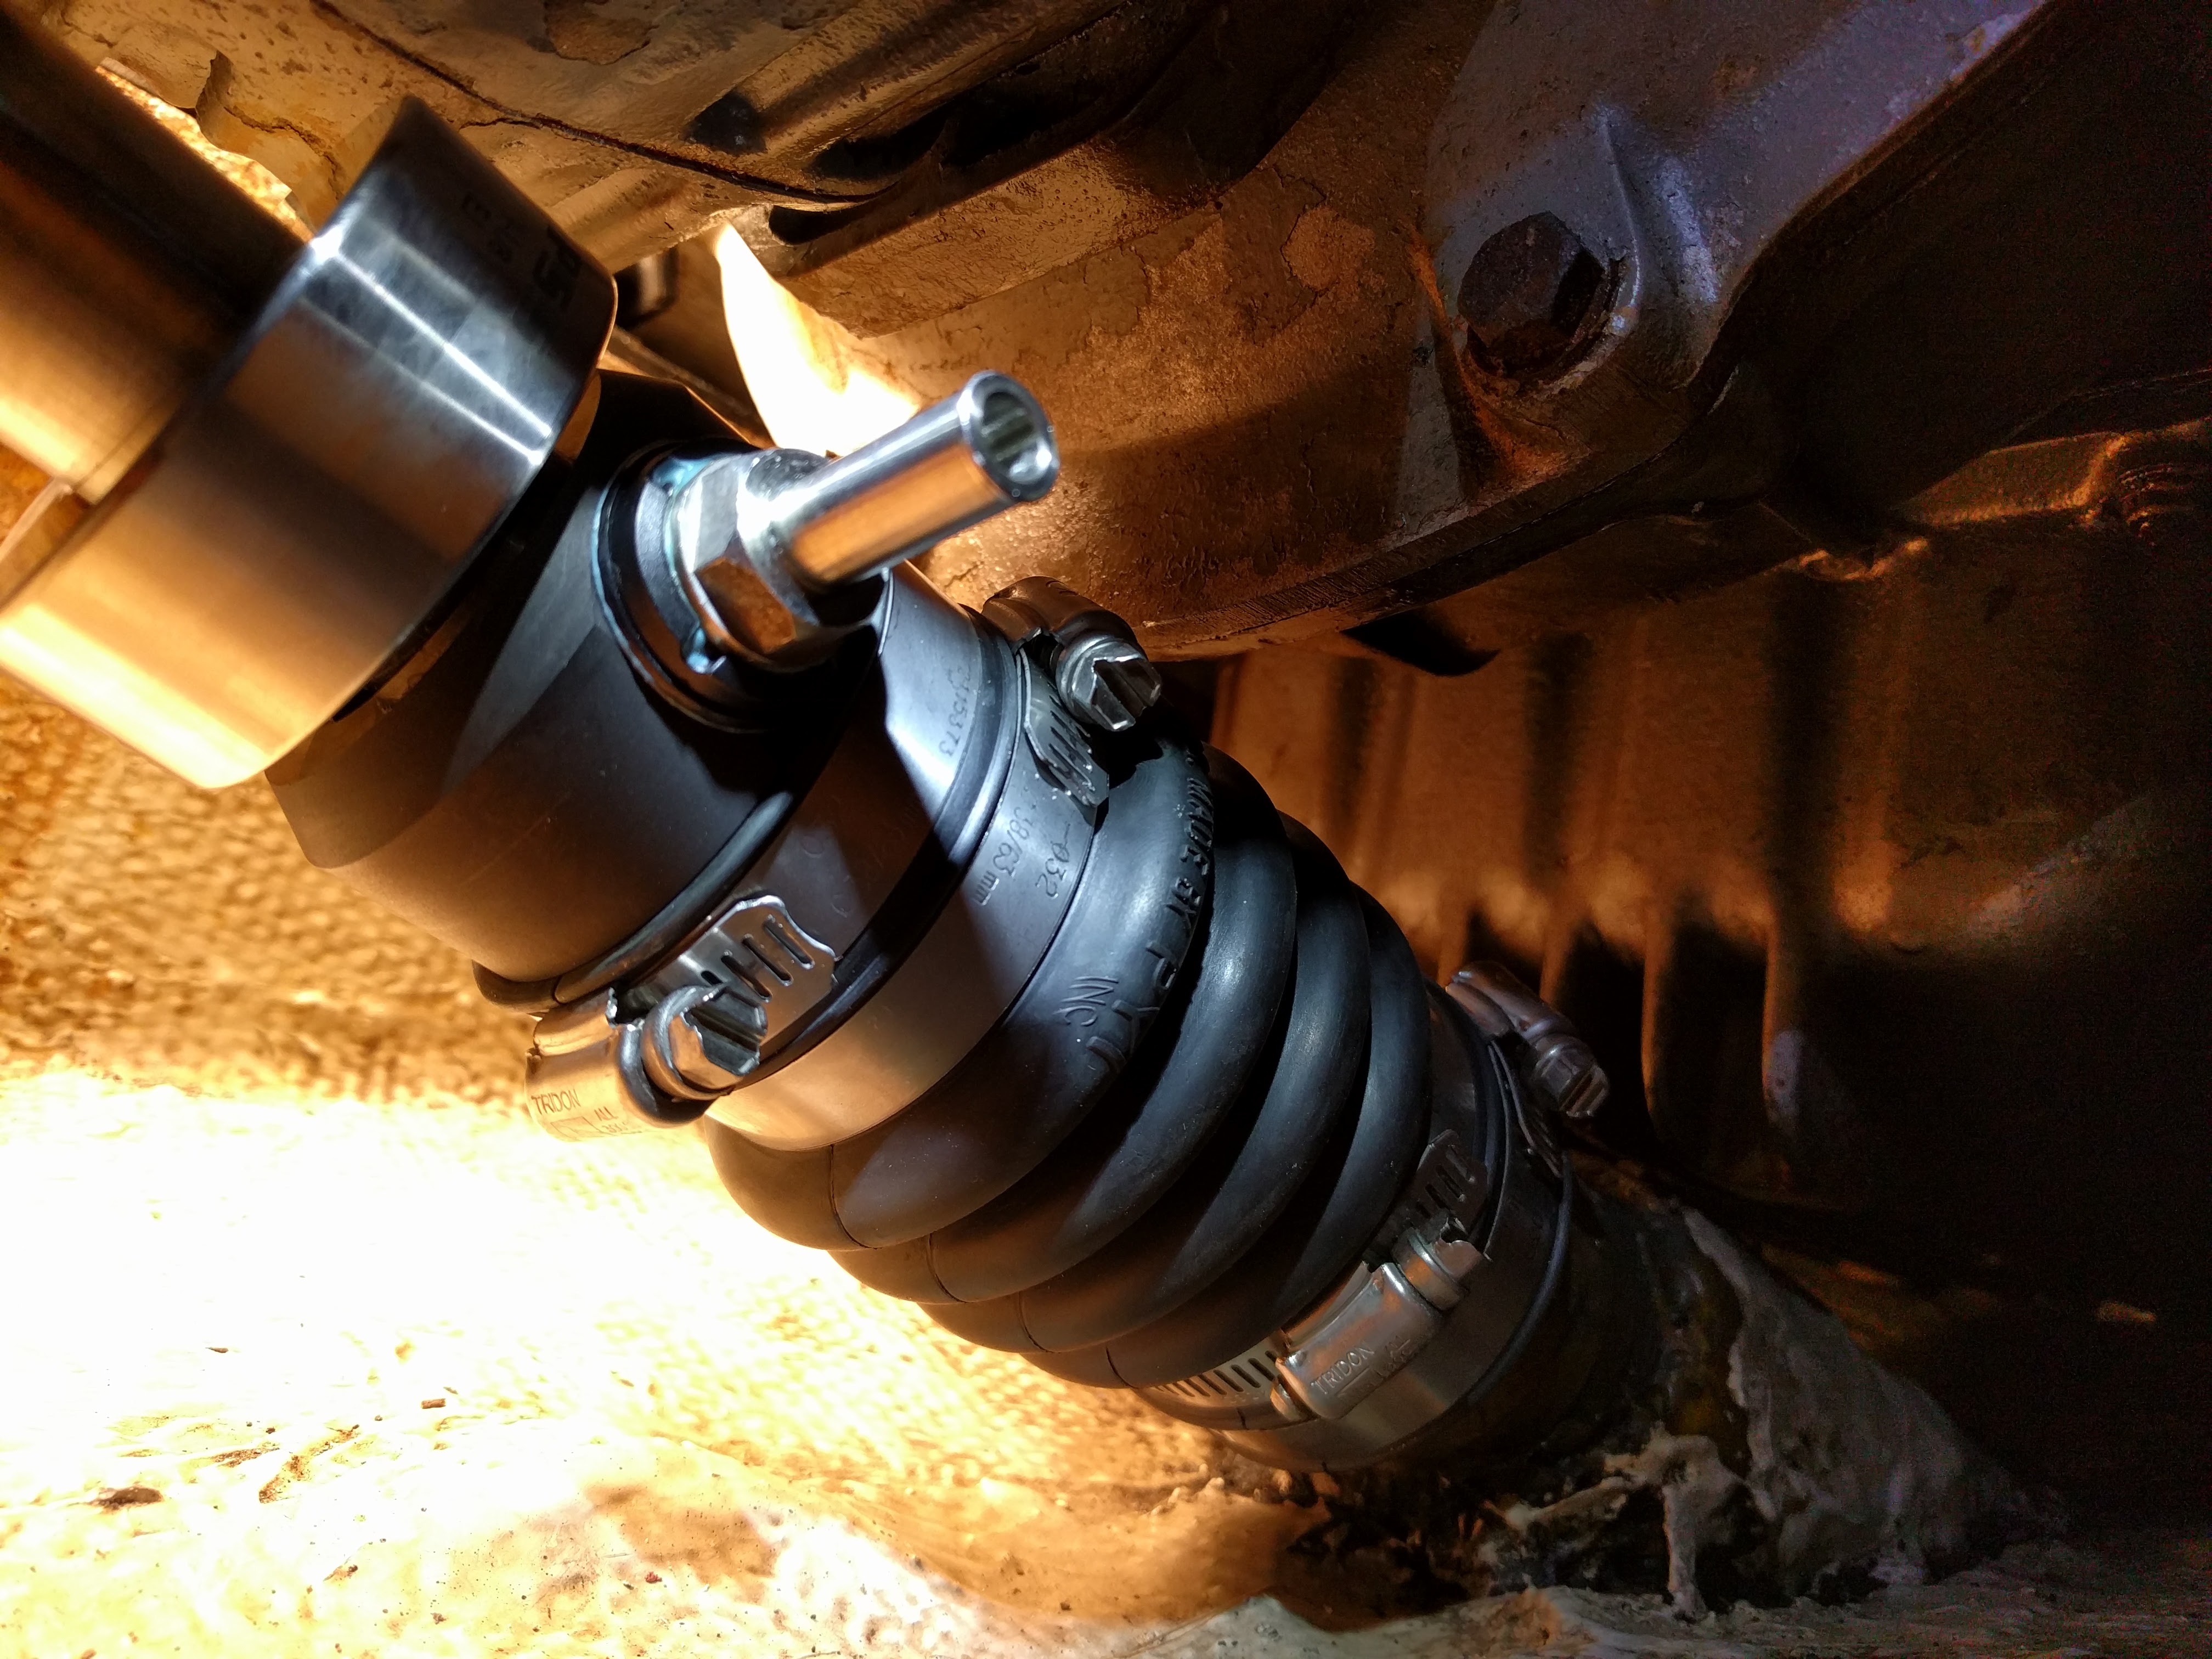
The new PSS dripless shaft seal. This photos shows how cramped things are behind our v-drive transmission with the prop shaft only inches under the engine.
The hardest part of installing a new shaft seal was pulling the shaft coupler and reinstalling it (which required a lot of hammering).
Cutlass Bearing
Since the cutlass bearing in the prop shaft strut is much easier to replace by pulling the prop shaft, we also replaced the cutlass bearing even though it probably had a few years left on it.
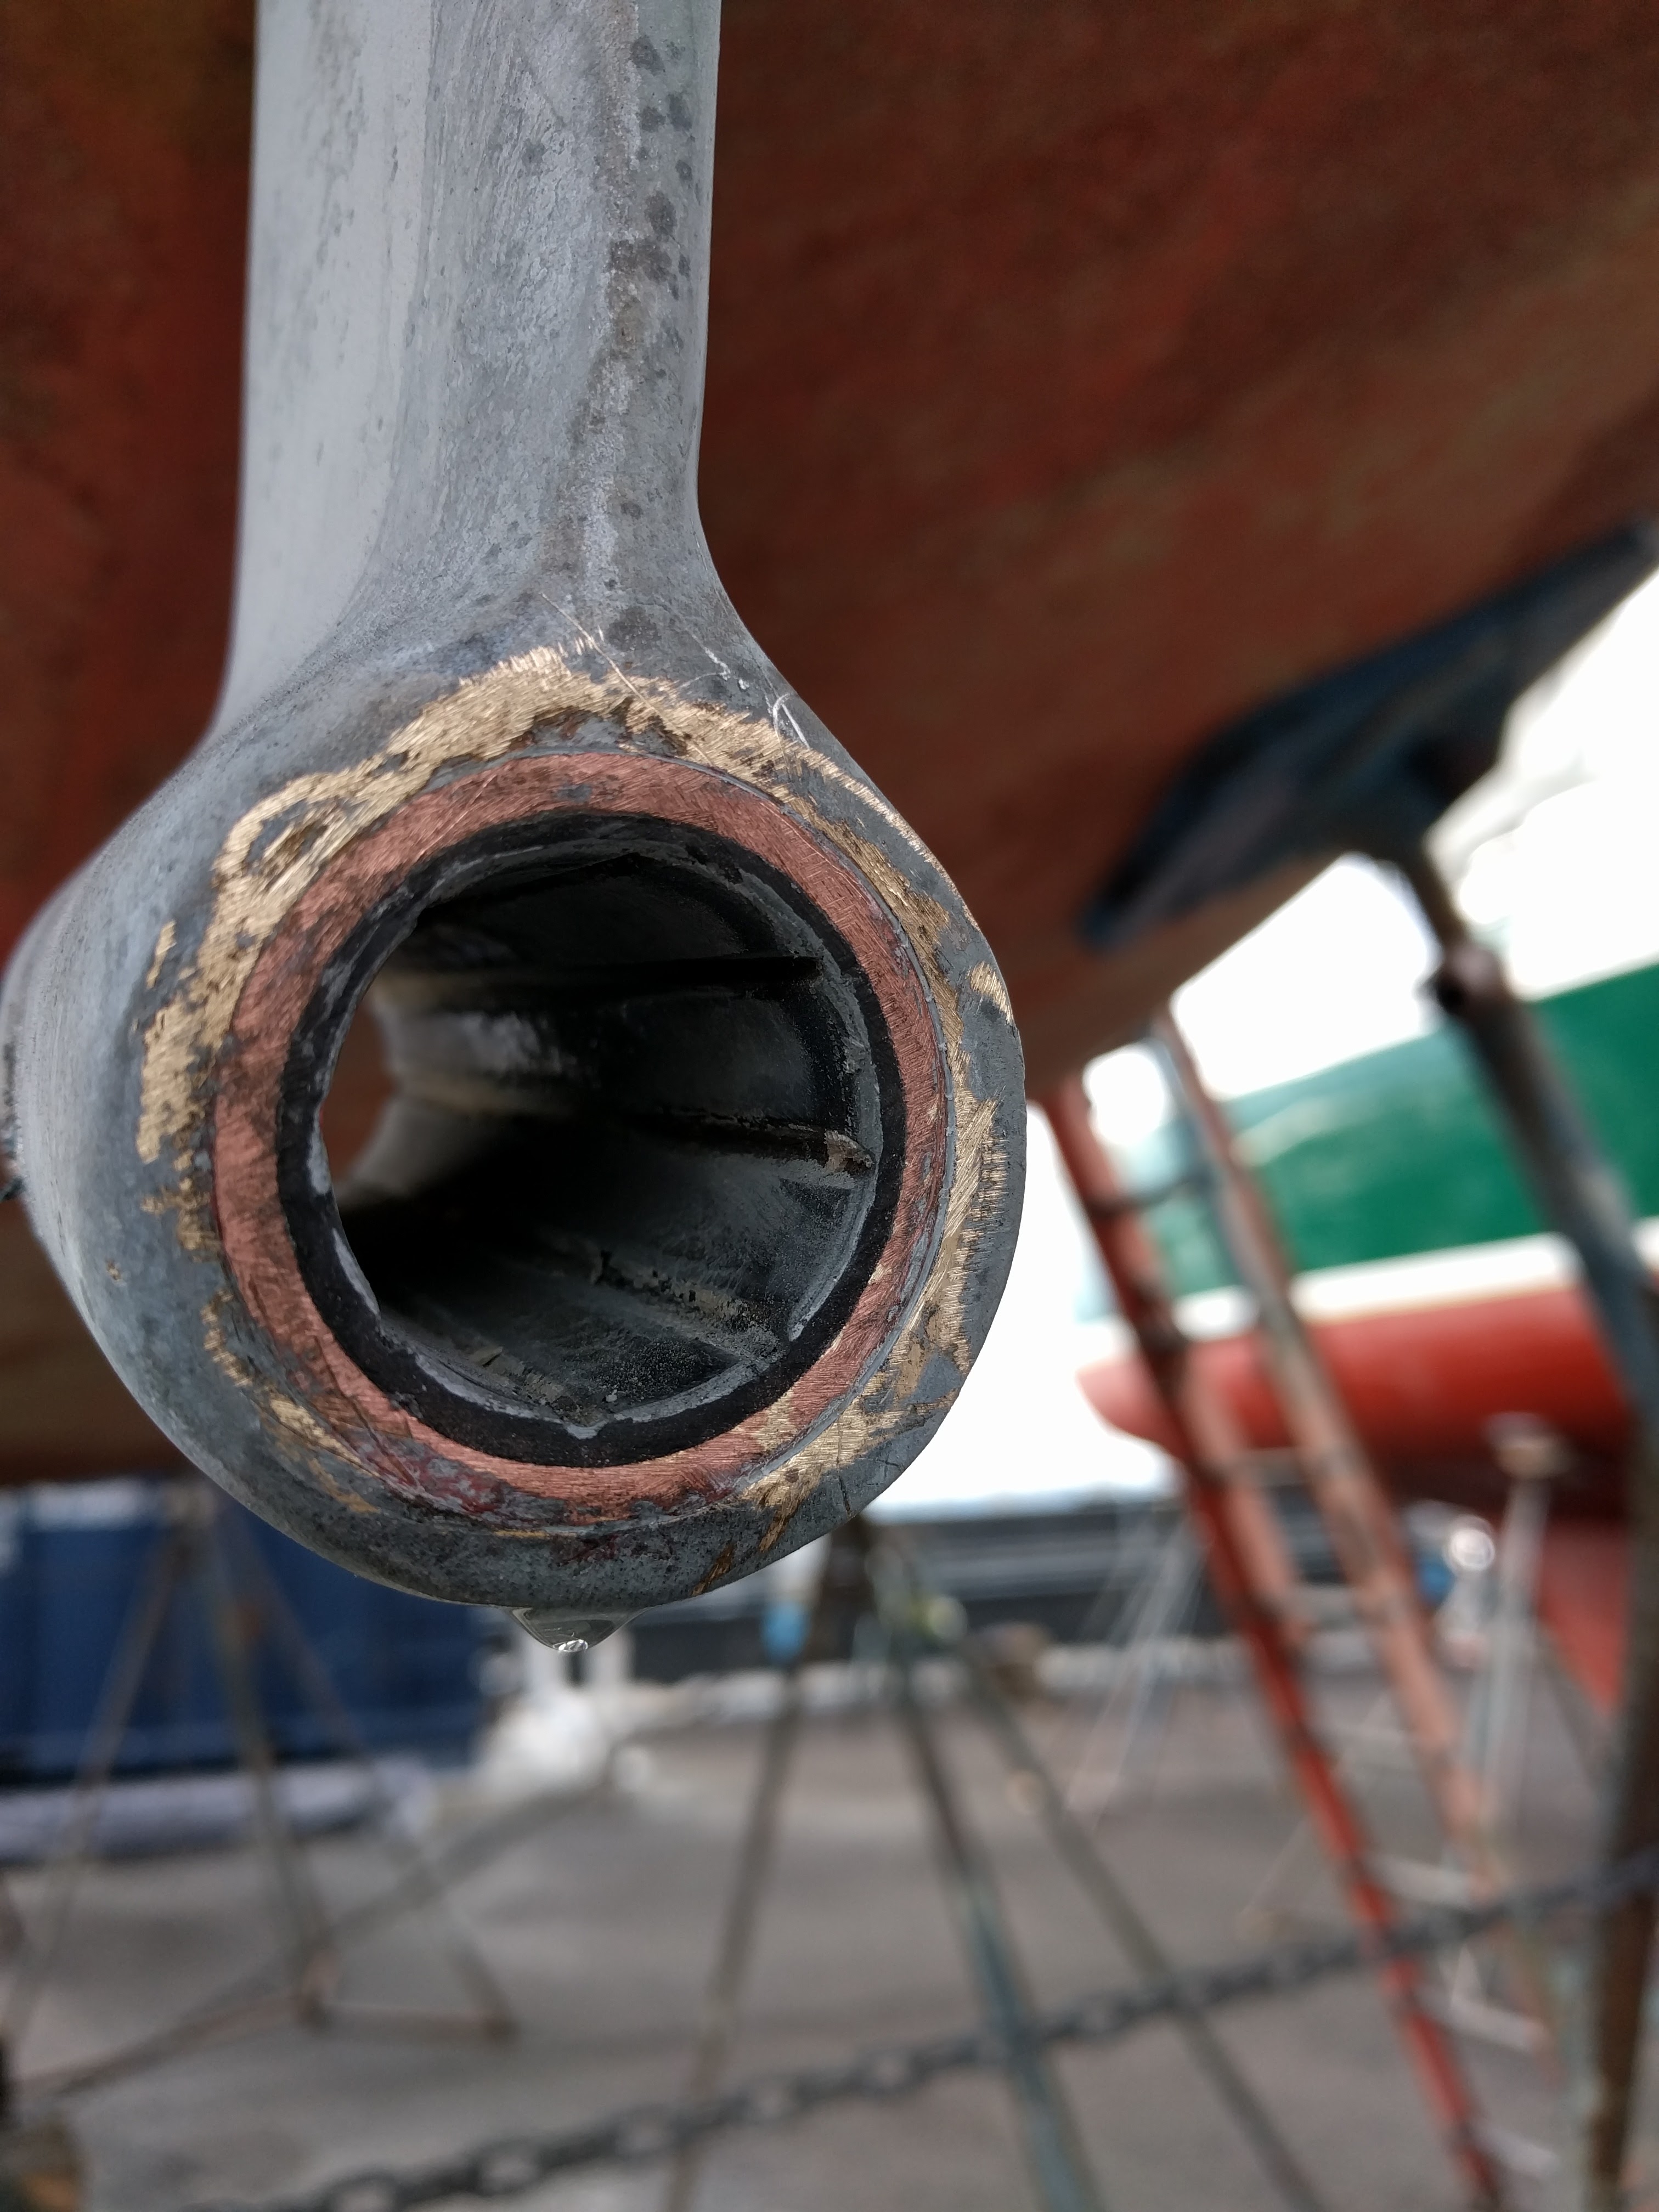
This is another job where having the right tools makes a big difference. I followed Compass Marine’s guide but found it didn’t work very well. His idea of using a bolt in the set screw holes to collapse the bearing just stripped the threads in one of the set screw holes. And getting the new bearing in didn’t require making a threaded rod compression device, so I’m glad I didn’t waste time/money on buying that in advance. What was needed (and is mentioned in the article) was a cold chisel, a hammer, and a hacksaw for doing the inner cuts.
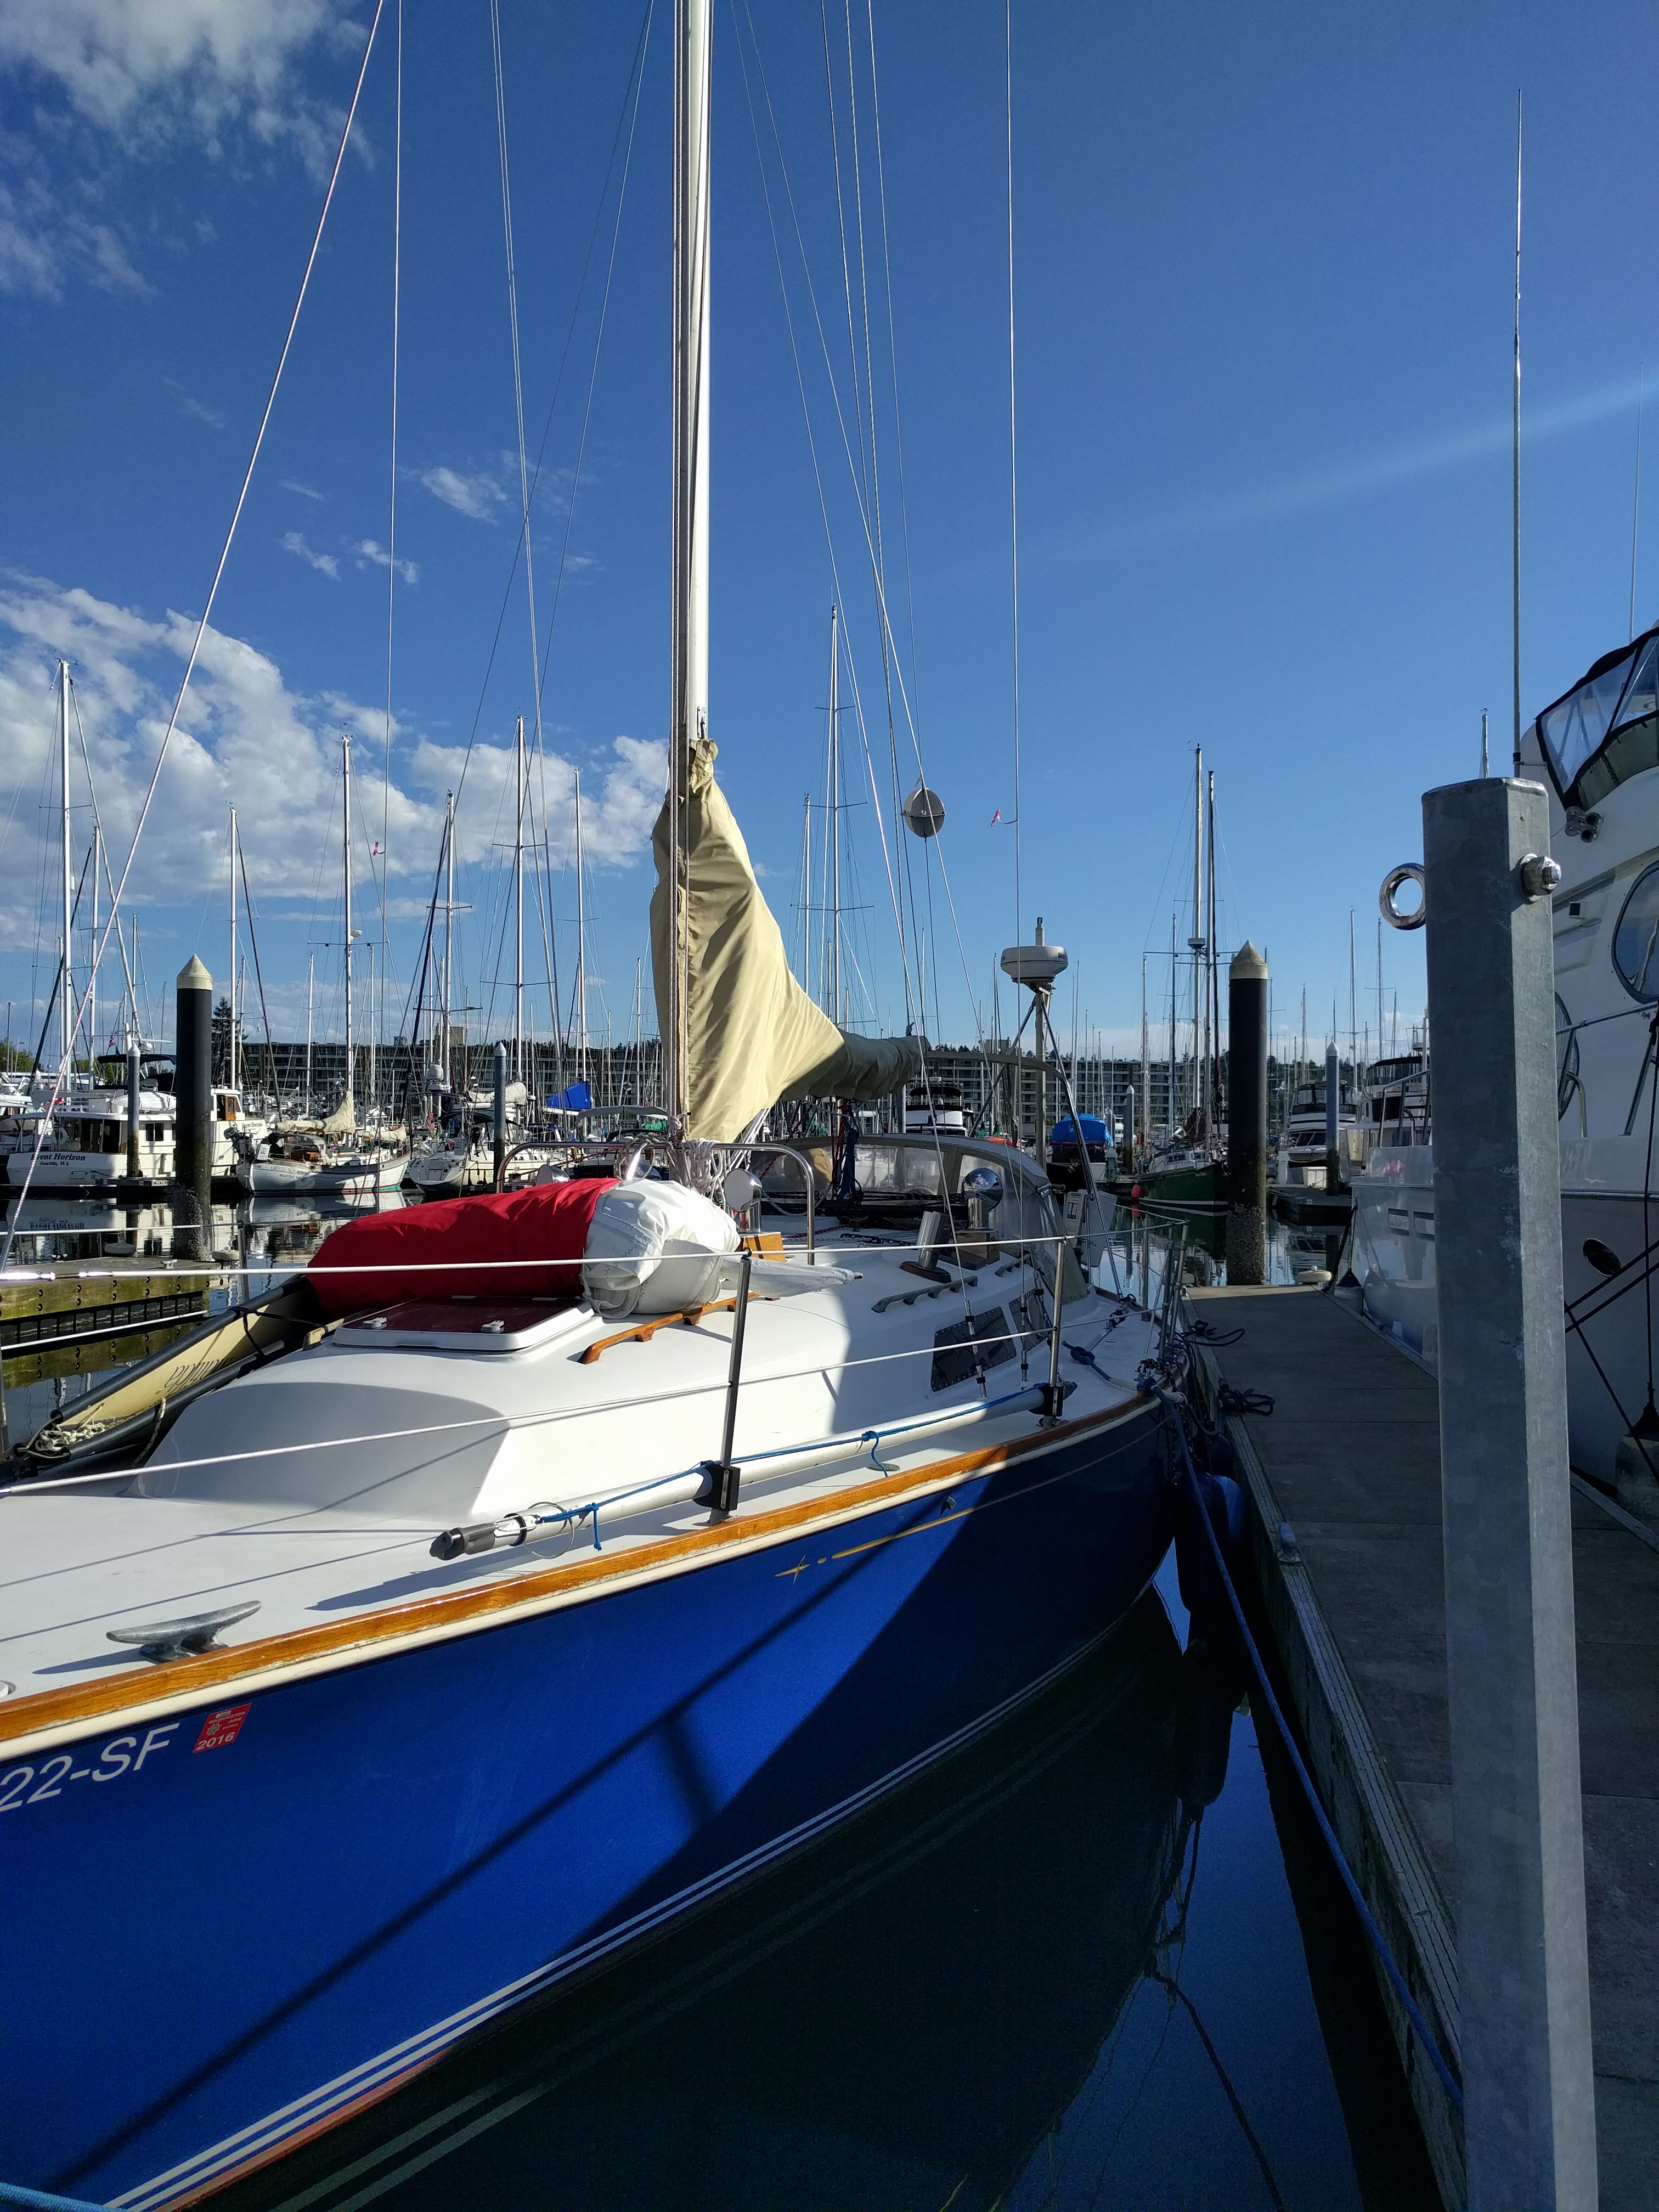
Relaunch
After the haul-out we also moved marinas – from Elliott Bay Marina to Shilshole guest dock. I found out Shilshole allows temporary moorage (at monthly rates) for periods that don’t exactly start and end on month boundaries – so this works out perfectly for our early June departure on our 3-month cruise.
On the 2nd day of May, Violet Hour touched water again after 2 ½ weeks of exhausting, challenging work. As we pulled into our new slip on a hot 85 degree day under a blazing sun and blue sky, we were reminded how much better it is being on the water. There’s nothing more exhilarating than being on the water, ready to sail at anytime – it’s where the boat is meant to be.
Wandering in here from ThreeSheets.
When I saw the photo of your quadrant and stock I thought there was room for a sawzall. The photo of you peering up cleared up that misconception. I think despite all of your suffering you made a very good choice to avoid using that tool. If you were to do it again, a multitool (BoschX or Hilti) w/appropriate blade might have allowed you to to cut perpendicular to the pancake at bolt locations, pushing the blade between the halves in a plunge. “Tool-late” for that, and a long time ’til a repeat!
I do have a Fein multi tool with the metal cutting blade. It’s a pretty big tool though and the blade needs to be kept straight or it will bind. Part of the difficulty is the drive seam is oriented port-stbd and with turning the rudder I could only get it at a 45 degree angle, not 90 which would’ve provided better access.
Hi,
I have an 83 LF 38. What year is yours?
– my diesel tank is in the location you are in the picture where you are in the lazerette. Is your diesel tank located under the black lining (I think I see the full hose and vent).
– I am looking at installing a PSS dripless shaft seal. Was it a very difficult job? Did you do it from inside the aft double berth?
Ours is a 1984. Yes, the original diesel tanks were under the steering system but a prior owner removed that and put a new tank in the stbd lazarette. I think I like that because it makes things easier to work on.
The PSS isn’t too difficult to install, the toughest part is getting the shaft coupler off (buy or borrow a puller tool from the yard). I did most of that work directly through the engine access panel (fwd of the engine). Having our rudder already dropped may have made things a bit easier – if you’re not dropping the rudder (which you shouldn’t do unless you have a really good reason to), then you’ll pull the prop shaft back until the prop hits the rudder. I’m not sure if that provides enough space to fit the PSS between the transmission and the shaft log. If it doesn’t, you’d have to remove either the transmission or the prop (if only one more inch or so is needed).
Thanks for quick response… PSS at least recommends 12”. The distance from the prop to the rudder is more than that. Fingers crossed 🤞.
I wonder how the PO got the tank out… it’s quite tight in there and I can’t see how it would come out in 1 piece 🤔.
Did you have to realign the shaft once back in the water?
Also, I saw your project where you had to remove the floor board on top of the aft berth. I tried to remove mine this summer as I wanted to see if there was space for additional batteries. After about 20 screws it would budge. How did you get yours out?
We didn’t realign the shaft, but the engine hadn’t been moved (motor mounts still set the same) and strut is the same so I think it’s not necessary (but could be a good idea to check anyway).
Re: the aft berth floor, there are some teak trim panels near the hull wall (which is teak paneled) at the fore and aft ends of the port side of the berth. I removed those (they’re screwed in) because they hold done those two corners of the floorboard. It’s also possible you have a screw going into the board from below somehow – need to check all around the edges, and maybe give a tap up with a hammer at a corner to get it started.
If you have any more questions, send me an email through the Contact link and I’m happy to give more details.
We removed our aluminum diesel tank with a lot of cutting/yoga positions, installed a new plastic tank on a custom platform in the same place. Our PO had stuck a 20 gal plastic tank in the lazarette (and left the defunct original tank) which just had to go.