
Since I started the rerig planning three months ago, two of the suppliers I considered have gone out of business – Navtec (news broke on SailingAnarchy) and Hall Rigging USA (announced on SailingScuttlebutt), both in Rhode Island. Both still have foreign operations, but shuttered their US operations while I was waiting for our rigging to be produced by BSI. Despite significant delays from BSI, it could’ve been even worse if I had decided to go with Navtec or Hall – I could still be waiting!
At the same time it’s sad news for their employees and the sailing community, because the US sailing industry has two fewer suppliers now. Navtec’s equipment and inventory is going up for auction (“by order of the secured creditor”), featuring an impressive array of very advanced machinery. Quite sad, but if anyone wanted to pick up where Navtec left off, all the equipment and more is there.
Completing the Rerig – Success!
As we hoisted the sails last Sunday, I quickly scurried about the deck checking the mast – is it leaning to port, to starboard? Is anything about to go horribly wrong? Amazingly, everything was perfect – my at-dock tune was good enough that no tuning was needed under sail.
As we sailed out of the protection of West Point and Discovery Park into a 20 knot southerly, the boat heeled more and the mast still looked good – no fall off to leeward or bends at the lowers or intermediates. And the mast rake was good (some weather helm but not too much) and forestay tension was good (no sag).
It was a huge relief to have successfully finished a rerig. After nearly two months (plus one month of planning), it felt really good to be out sailing again.
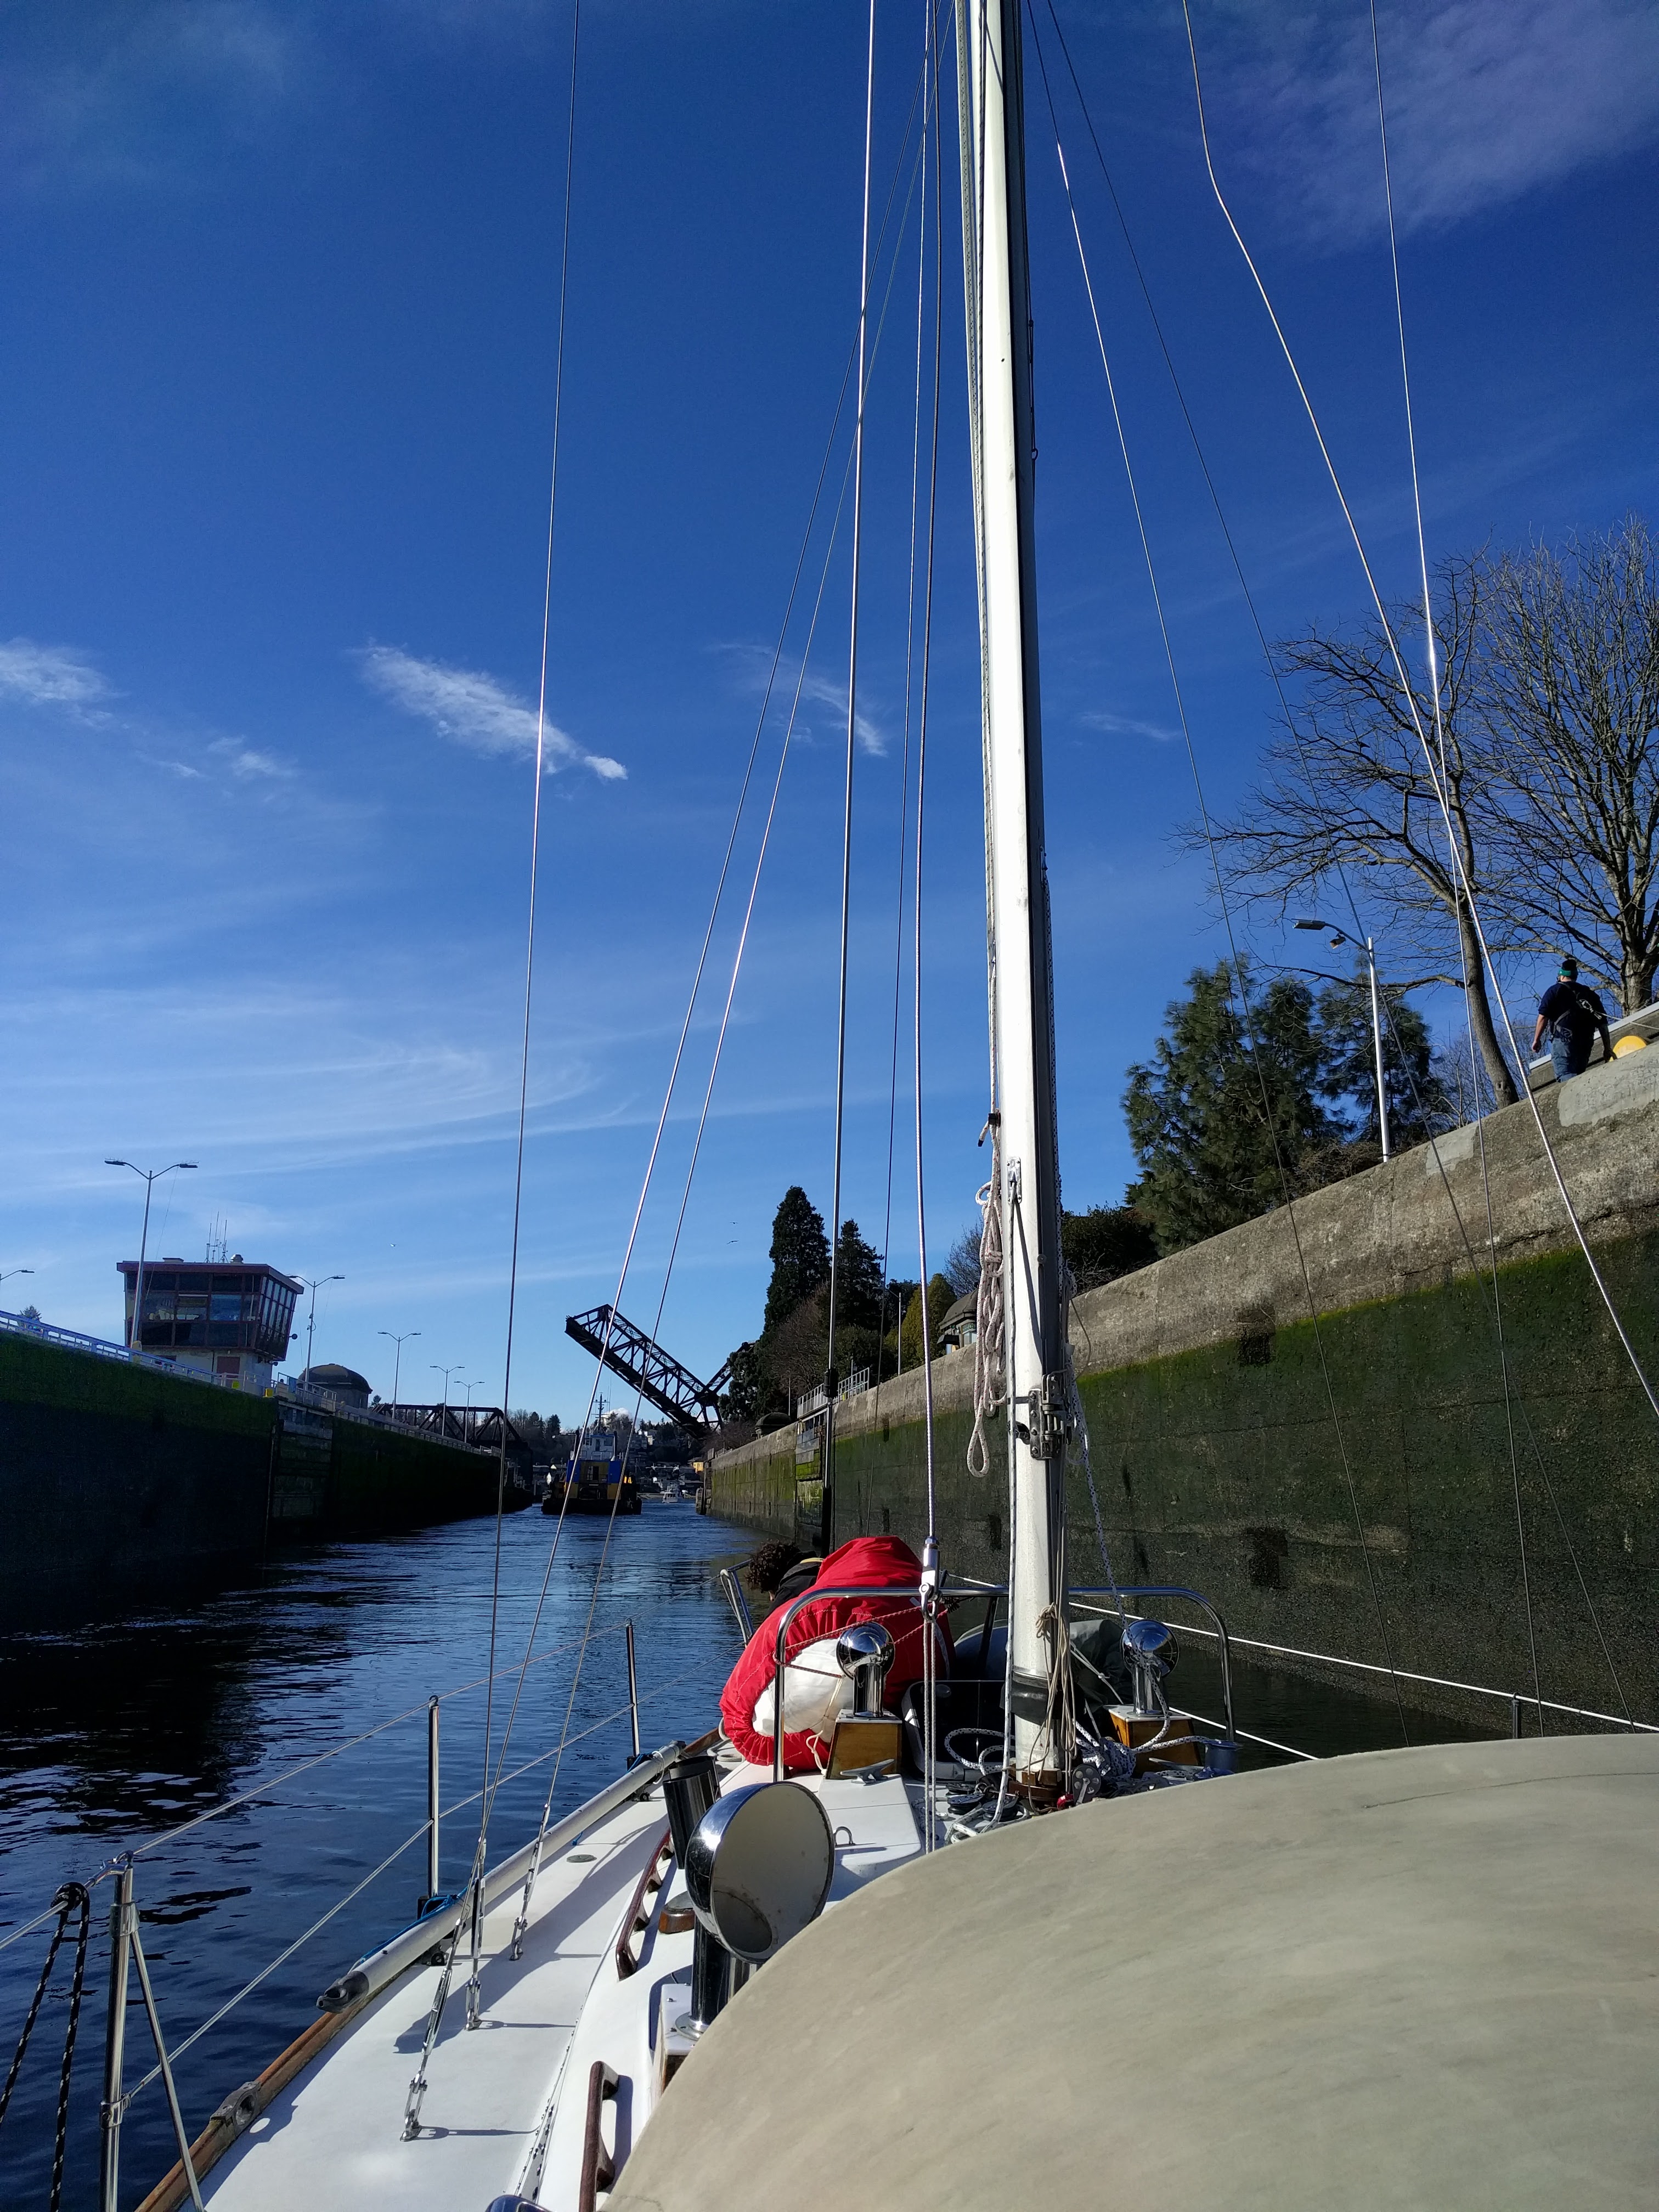
Heading out of the large Locks.
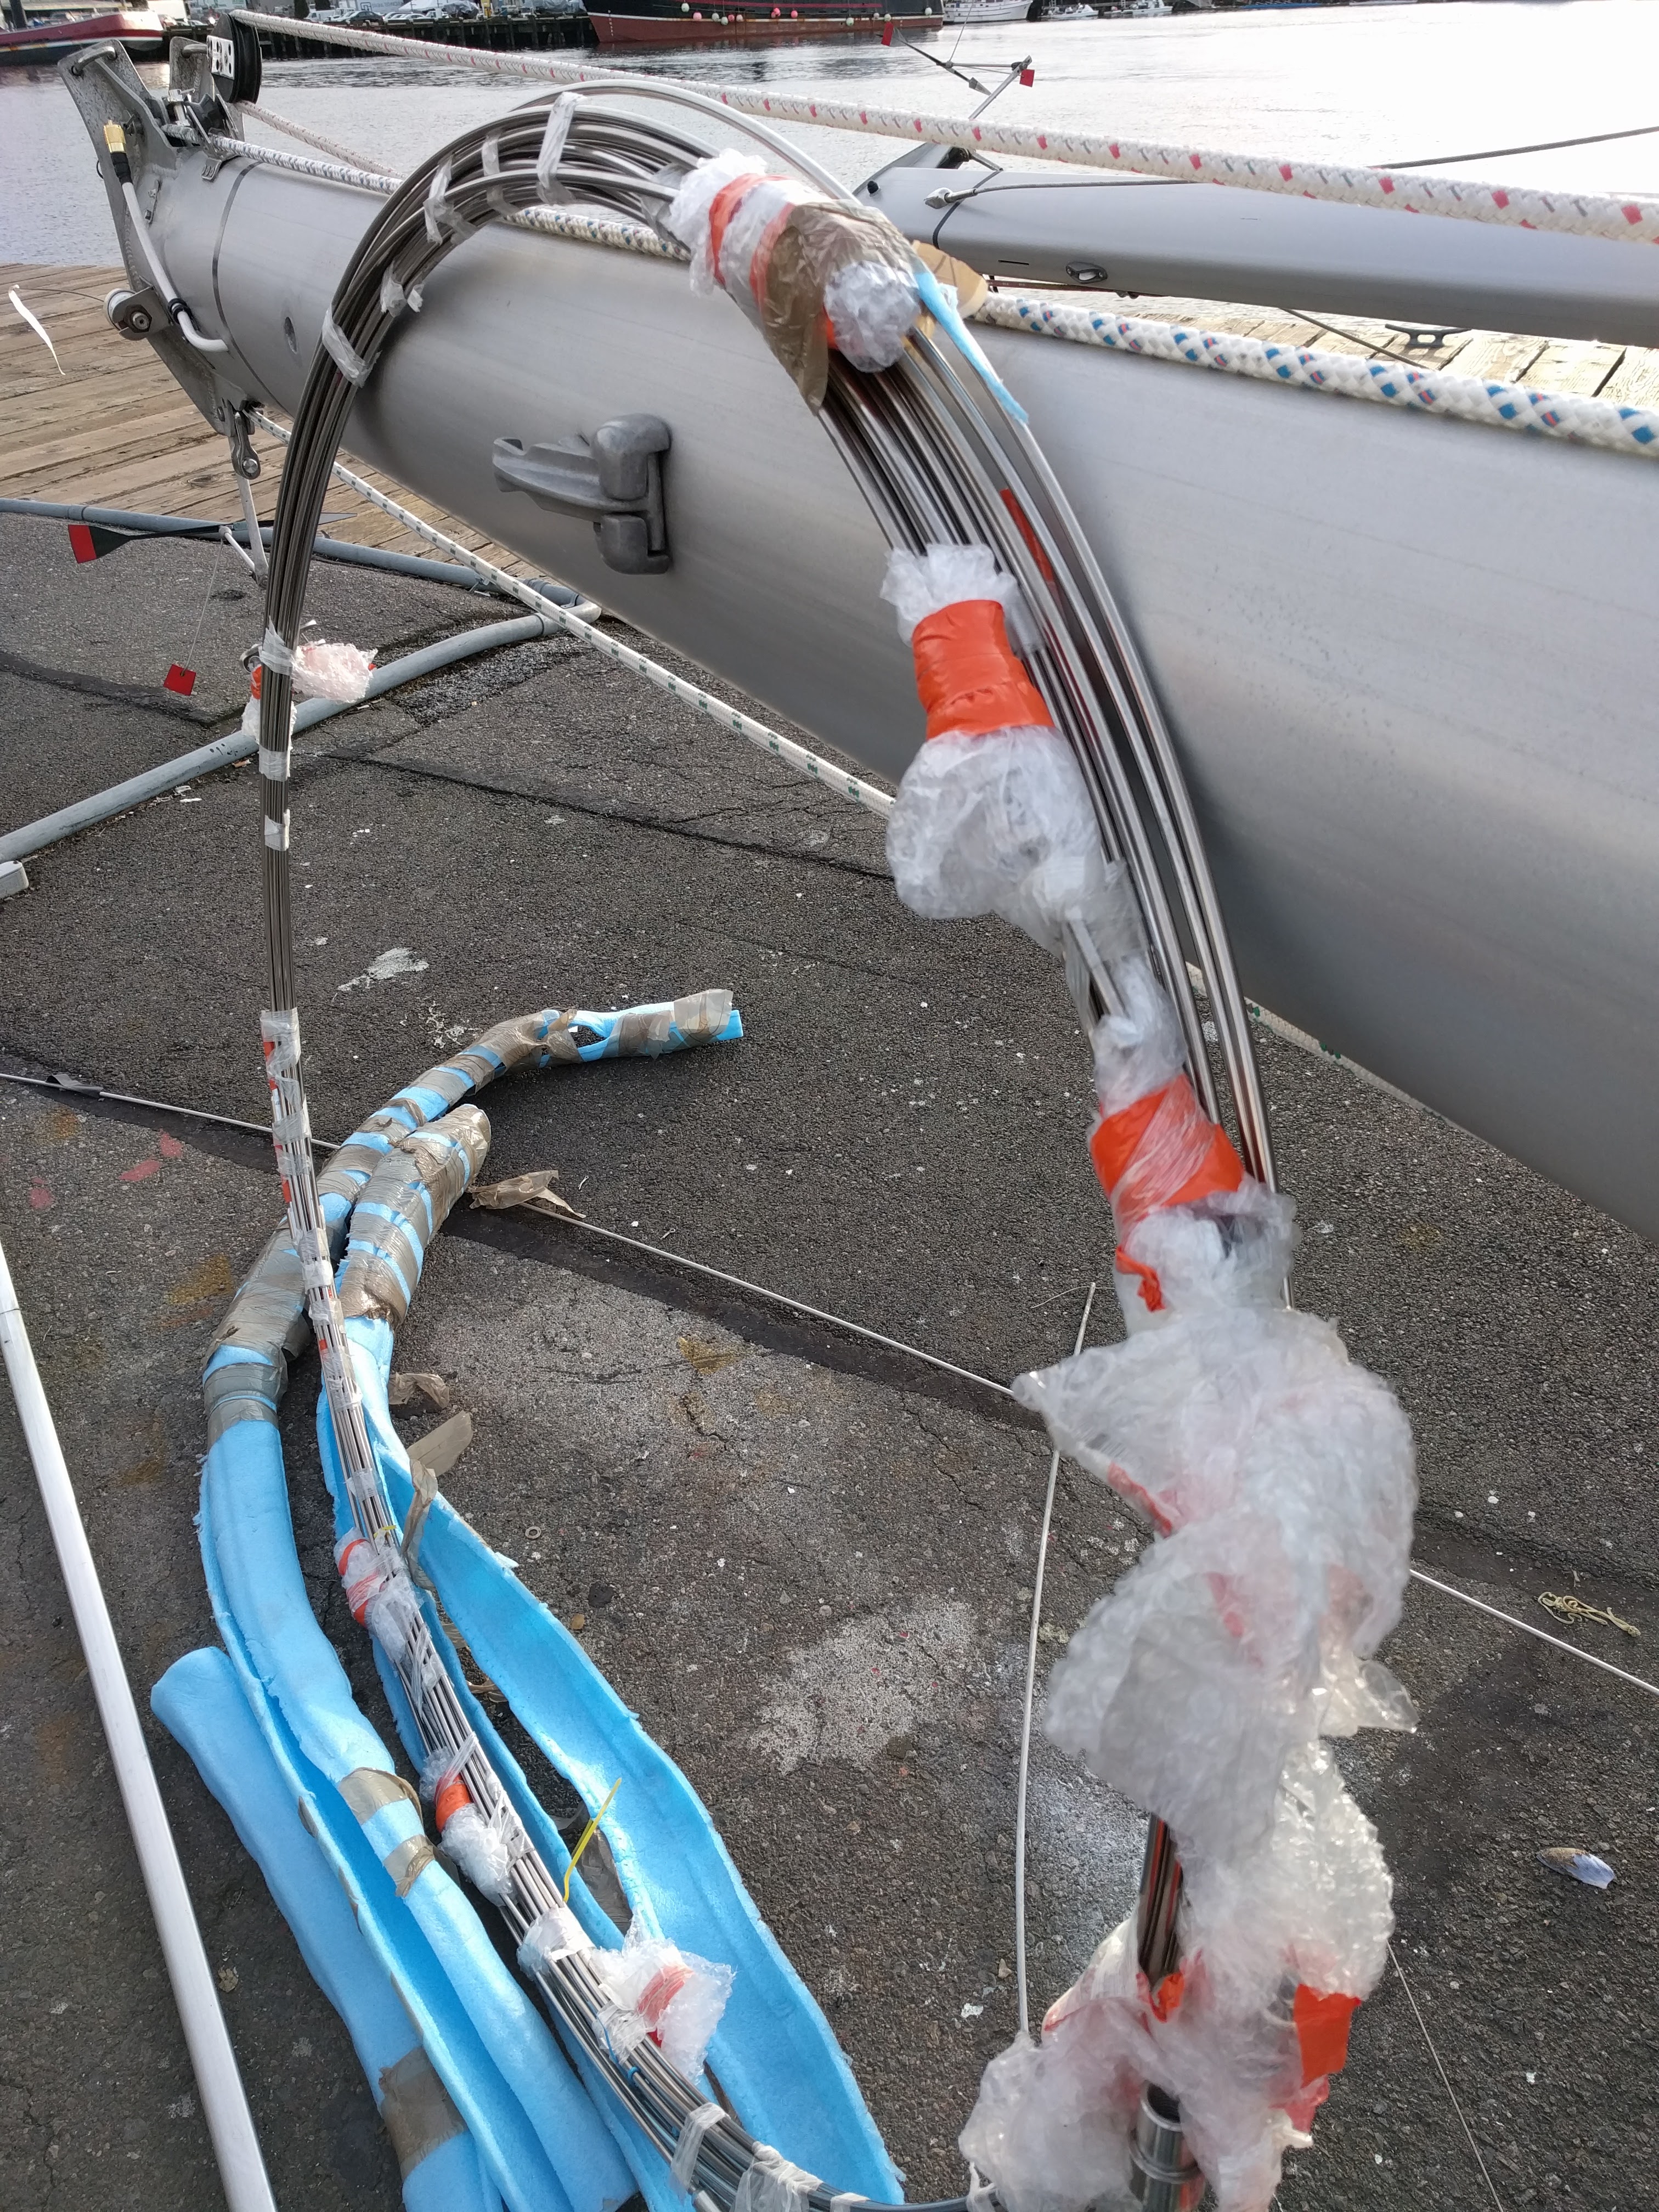
The entire rod rig (not counting D2s which were replaced last year), coiled into a circle weighing about 40 lbs.
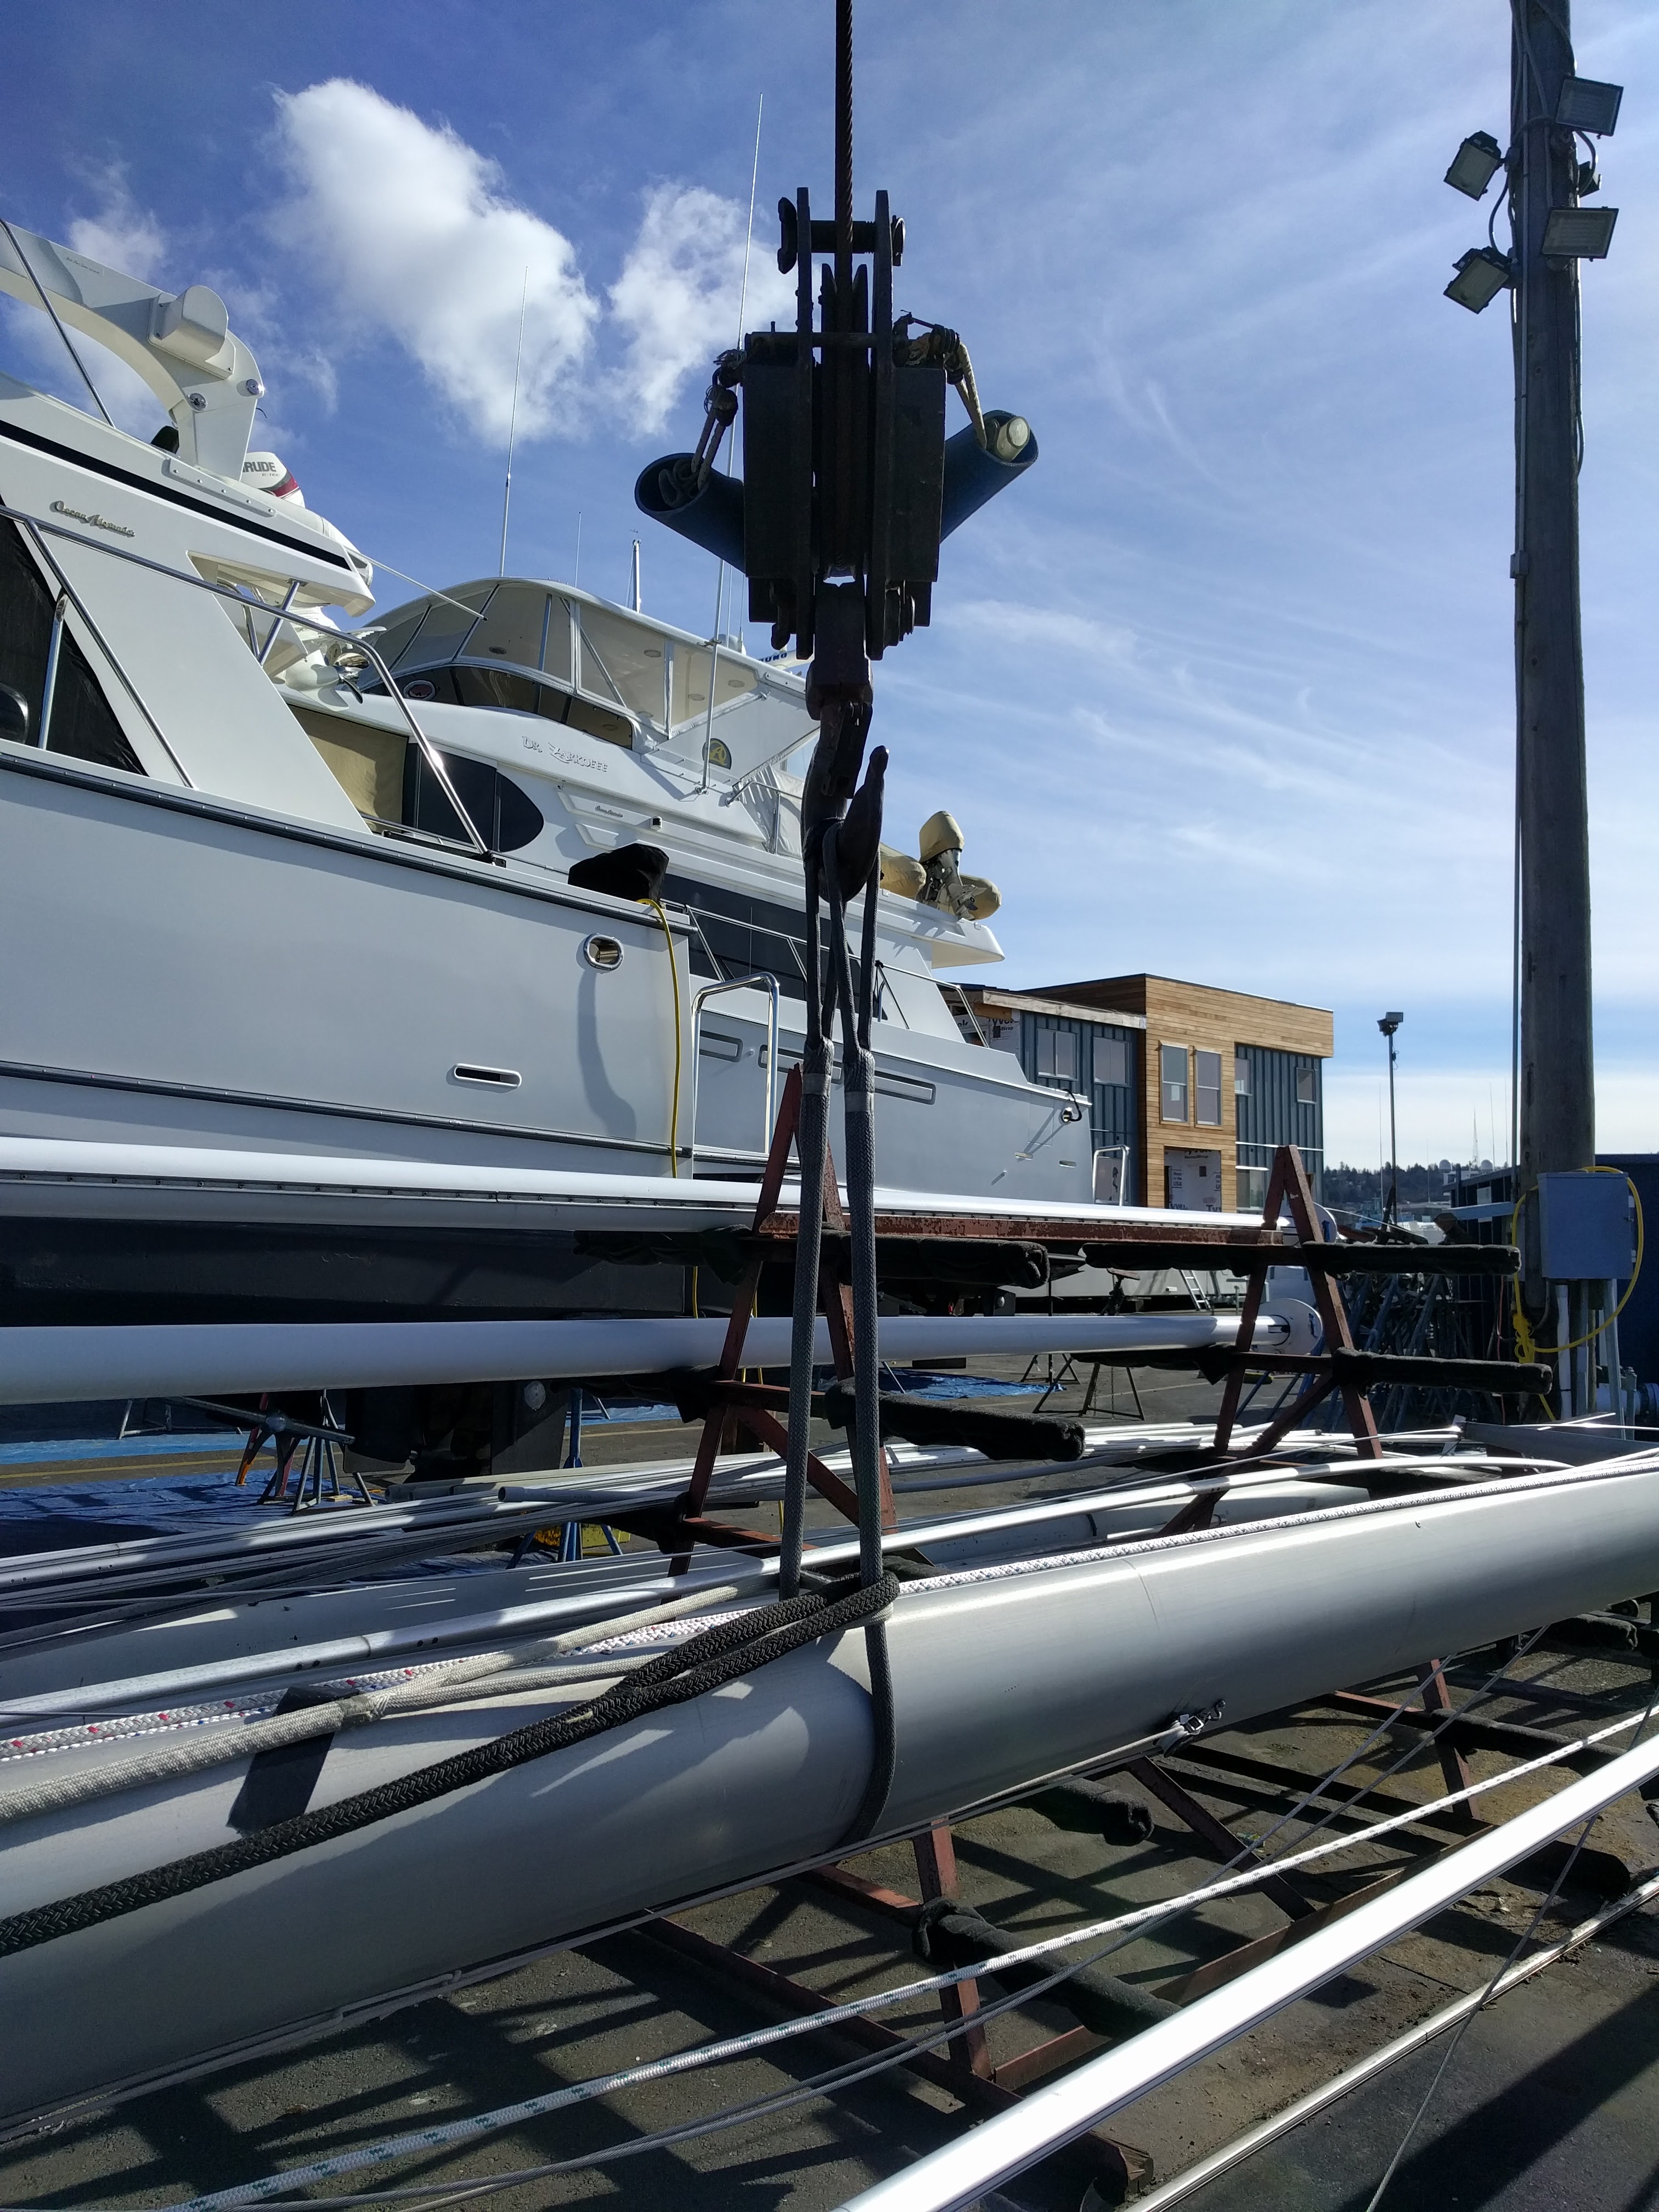
The yard preparing to lift the mast
A Lot of Work
Restepping the mast, tuning the rig, and getting the sails back on was a big job – probably 24 hours of work, done over the course of 3 days. It included:
- Step mast
- Attach mast partners (holds the deck to the mast)
- Attach shrouds, backstay, forestay
- Lube turnbuckles with SuperLube.
- Trim new mast step blocks (made from polyethylene, aka cutting board plastic) because one didn’t fit perfectly.
- Tune (*full* tune – about 4 hours)
- Two mast climbs – for tuning D2s, reattaching masthead wind anemometer, attaching spreader boots, and removing a piece of duct tape I forgot to remove in the yard.
- Insert mast partners chocks
- Reinstall mast boot
- Install boom and boom vang
- Feed running rigging through turning blocks and clutches
- Commission furler (furling line, shackles, prefeeder)
- Pin all turnbuckles and toggles.
- Reconnect mast wiring for lights and wind instrument.
There’s a well known saying that “There’s nothing half so much worth doing as simply messing about in boats.” And that’s true now more than ever.
I really like the full quote from the 1908 children’s book The Wind in The Willows, so I’m including that here too:
Believe me, my young friend, there is nothing — absolutely nothing — half so much worth doing as simply messing about in boats. Simply messing… about in boats — or with boats. In or out of ’em, it doesn’t matter. Nothing seems really to matter, that’s the charm of it. Whether you get away, or whether you don’t; whether you arrive at your destination or whether you reach somewhere else, or whether you never get anywhere at all, you’re always busy, and you never do anything in particular; and when you’ve done it there’s always something else to do, and you can do it if you like, but you’d much better not. [Source]

Forestay turnbuckle (not pinned yet)
If you’ve ever wondered whether pins in your turnbuckles are really necessary for short durations (after all, old turnbuckles are usually pretty stiff and surely they won’t rotate all by themselves right?), yes, they are! At least on new turnbuckles freshly lubricated with SuperLube. I forgot to pin an aft lower shroud before our test sail, and while checking the rig while sailing I noticed the shroud started flopping around (too loose) while on the leeward side.
When there’s no tension on the shroud (leeward side), the vibrations of the boat/rig were causing the turnbuckle to unscrew itself – surprisingly fast. In only 2 minutes or so the shroud went from tight to loose. Once loose enough to be floppy, it didn’t continue unscrewing. And there was no risk because this shroud is the least important to our rig. But it was a good experiment in why we should always pin the turnbuckles!
U-Bolt Rebedding
This was finished a few weeks ago, but I never posted a photo of the cleaned up and prepped U-Bolt. I still have only finished 3 out of 6, but I postponed the really stuck three for more important stuff (like going sailing).
Some people don’t like the smell of Lanocote, but I love it. It smells like freedom. The freedom to pull apart hardware easily in the future if I ever need to!
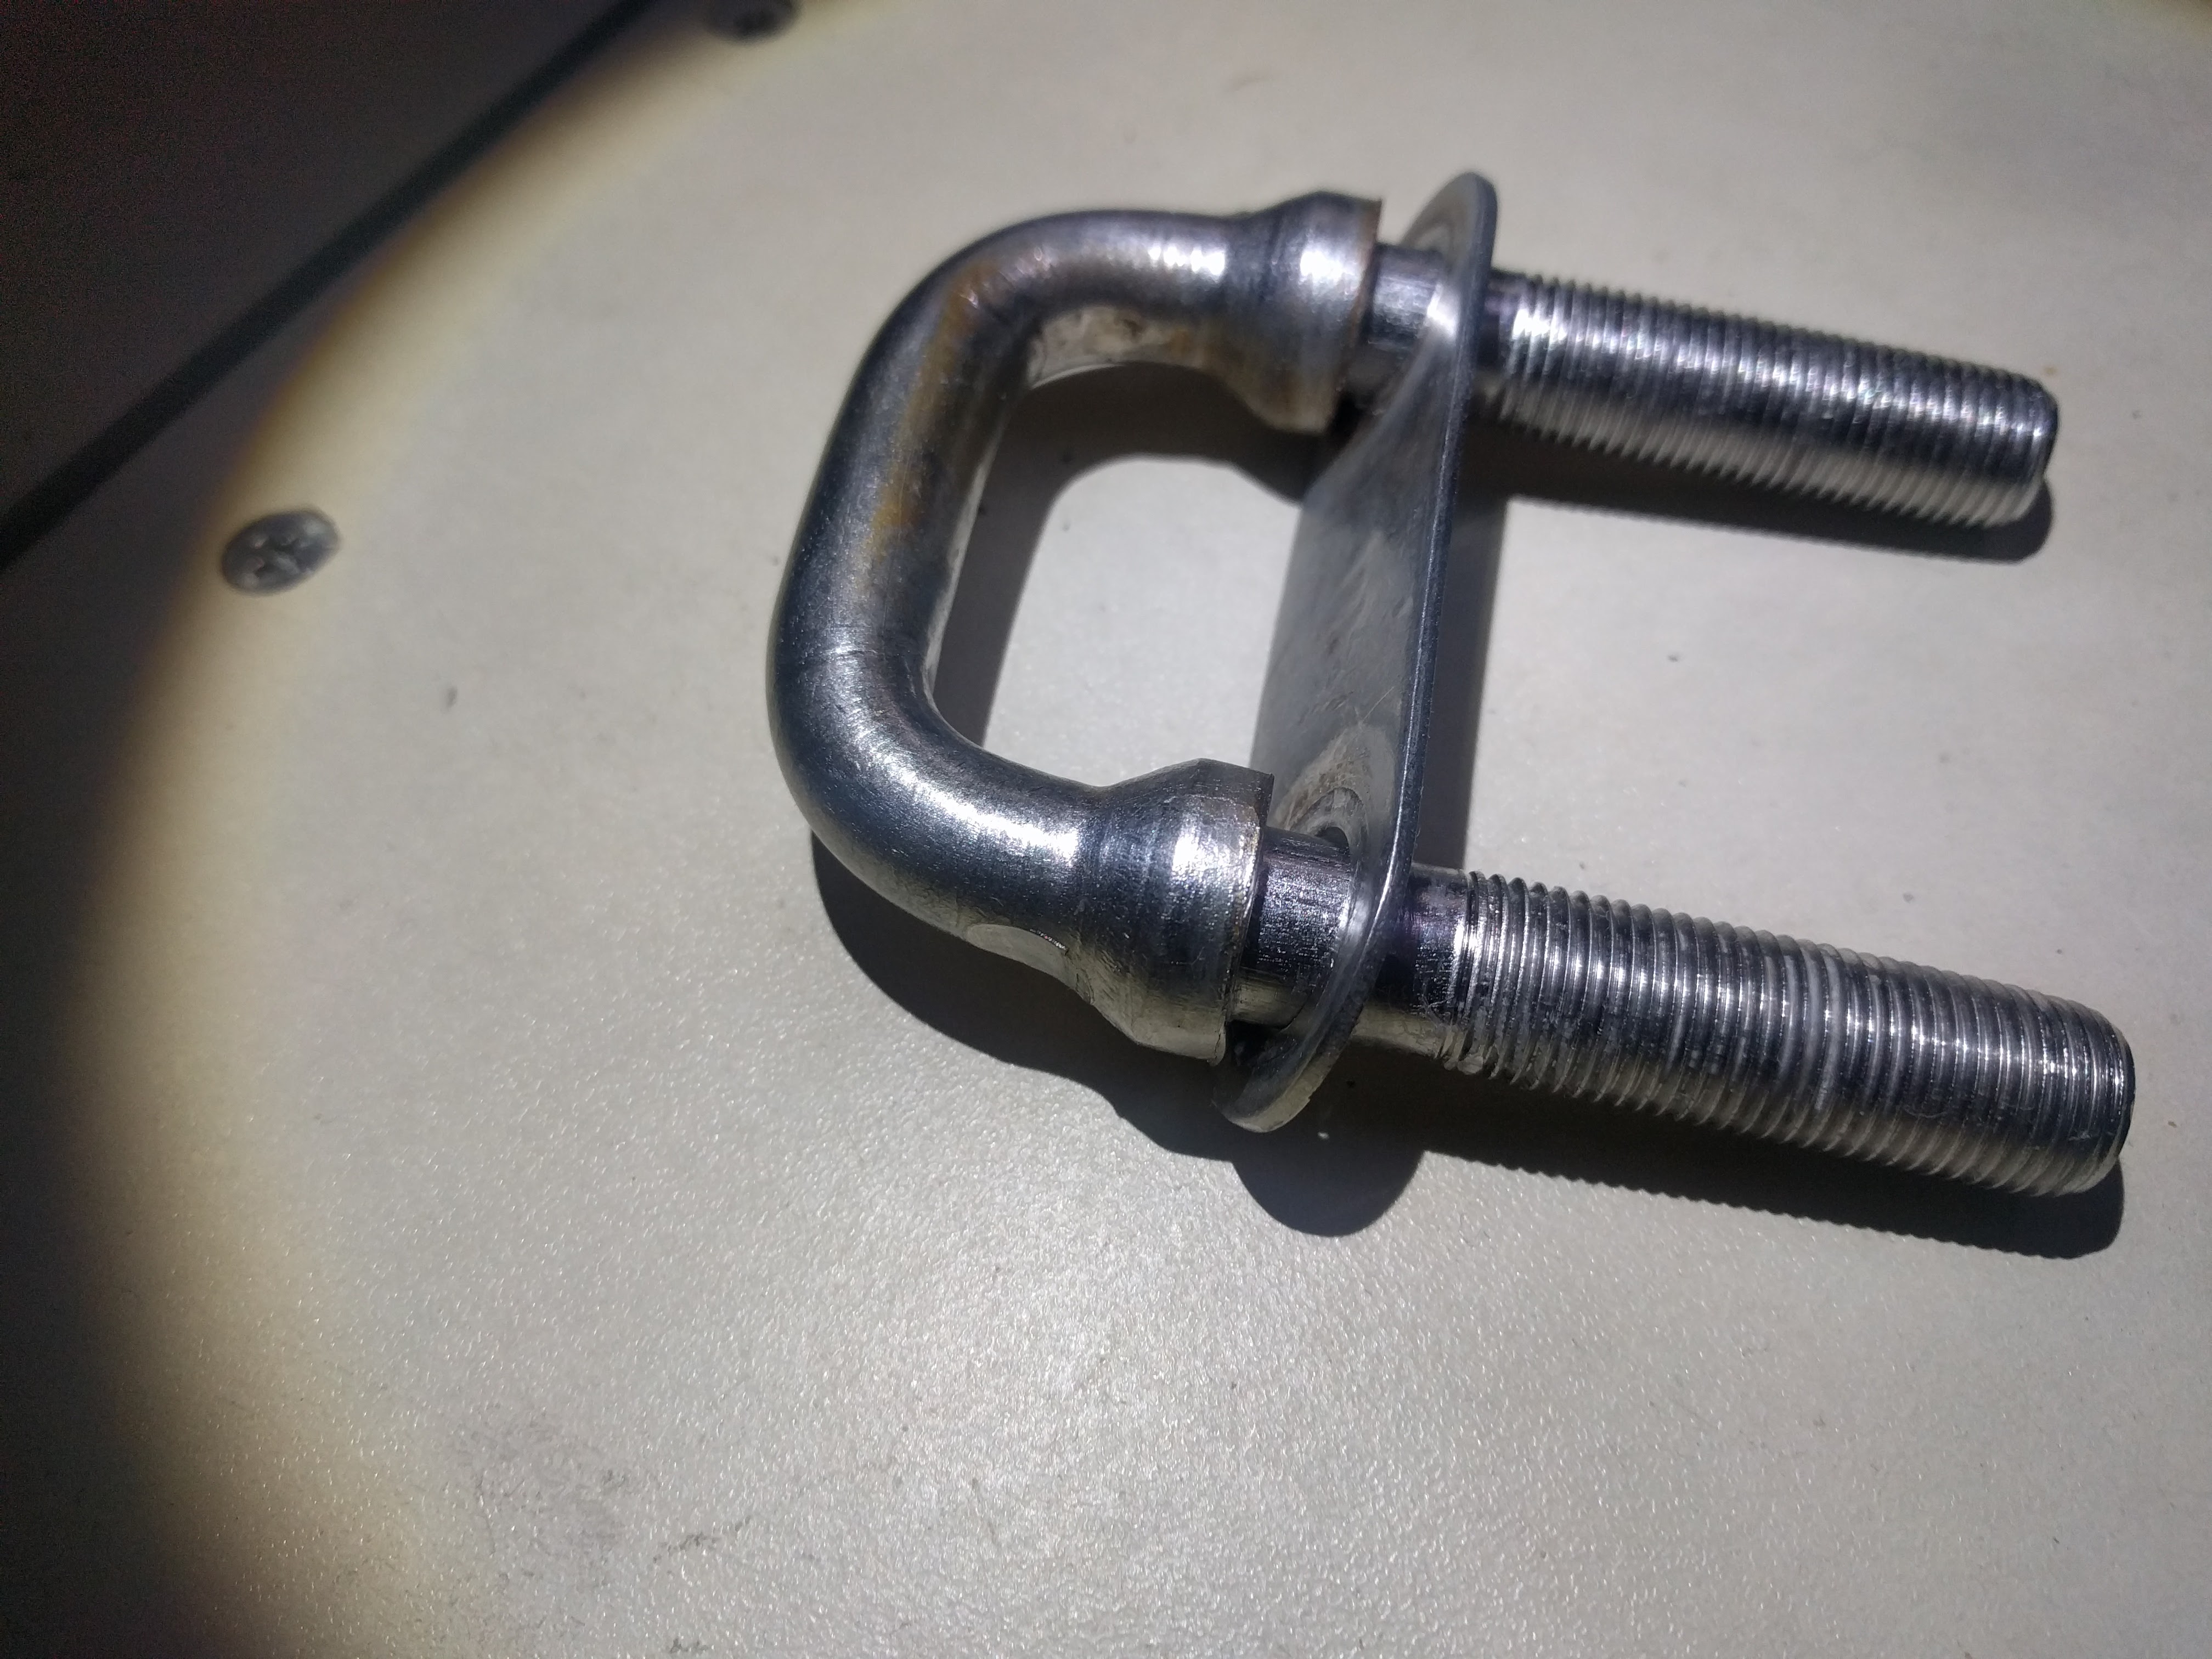
I did Lanocote on the threads where they pass thru the aluminum backing block, and butyl for the upper sealant.
Finishing up the new VHF cable
I mentioned previously that replacing the masthead VHF became part of the rerig. At that time I thought the VHF radio was attached to the spare VHF antenna mounted on our stern, because the radio was working even with the mast out of the boat and the cable from the mast base disconnected and sitting in the bilge.
But later, removing the old cable from the bilge and snaking the new one, I found the old one *was* attached to the radio, not the stern antenna’s cable. So somehow the VHF cable had been working for receiving WX weather stations with no antenna attached – just 20 feet of RG-8X cable with a PL259 connector on the end. Can anyone explain that?
I know FM/AM radio signals can be received with just a bare wire, but I thought coax cable didn’t function that way because the inner wire is isolated from the shield. So it shouldn’t receive any signal unless the shield is shorted to the inner conductor? Perhaps the old PL259 at the mast base was shorted out and that’s how it functioned as an antenna? After I cut off that connector and shortened the cable to ~8’, I was no longer able to receive weather stations.
Lessons Learned:
- Rod rigging is a big disadvantage when you need to replace or repair it. I would seriously consider avoiding it for a cruising boat.
- Trust but verify. Don’t assume a marine supplier will meet their time estimate. Double it, and then check with them weekly if you don’t want it to end up being triple.
- I really like rigging work. Other than the waiting, and difficulty sourcing parts, it’s one of the more fun types of boat projects.
I walked away from this project with a huge appreciation for how a sailboat’s rig harnesses the wind’s power. As I wrote in last summer’s wrap-up, wind is our motive force – so the rig is incredibly important. Now knowing every inch of it, it’s amazing how such a simple (yet well balanced) system harnesses wind ranging from very light to very strong.
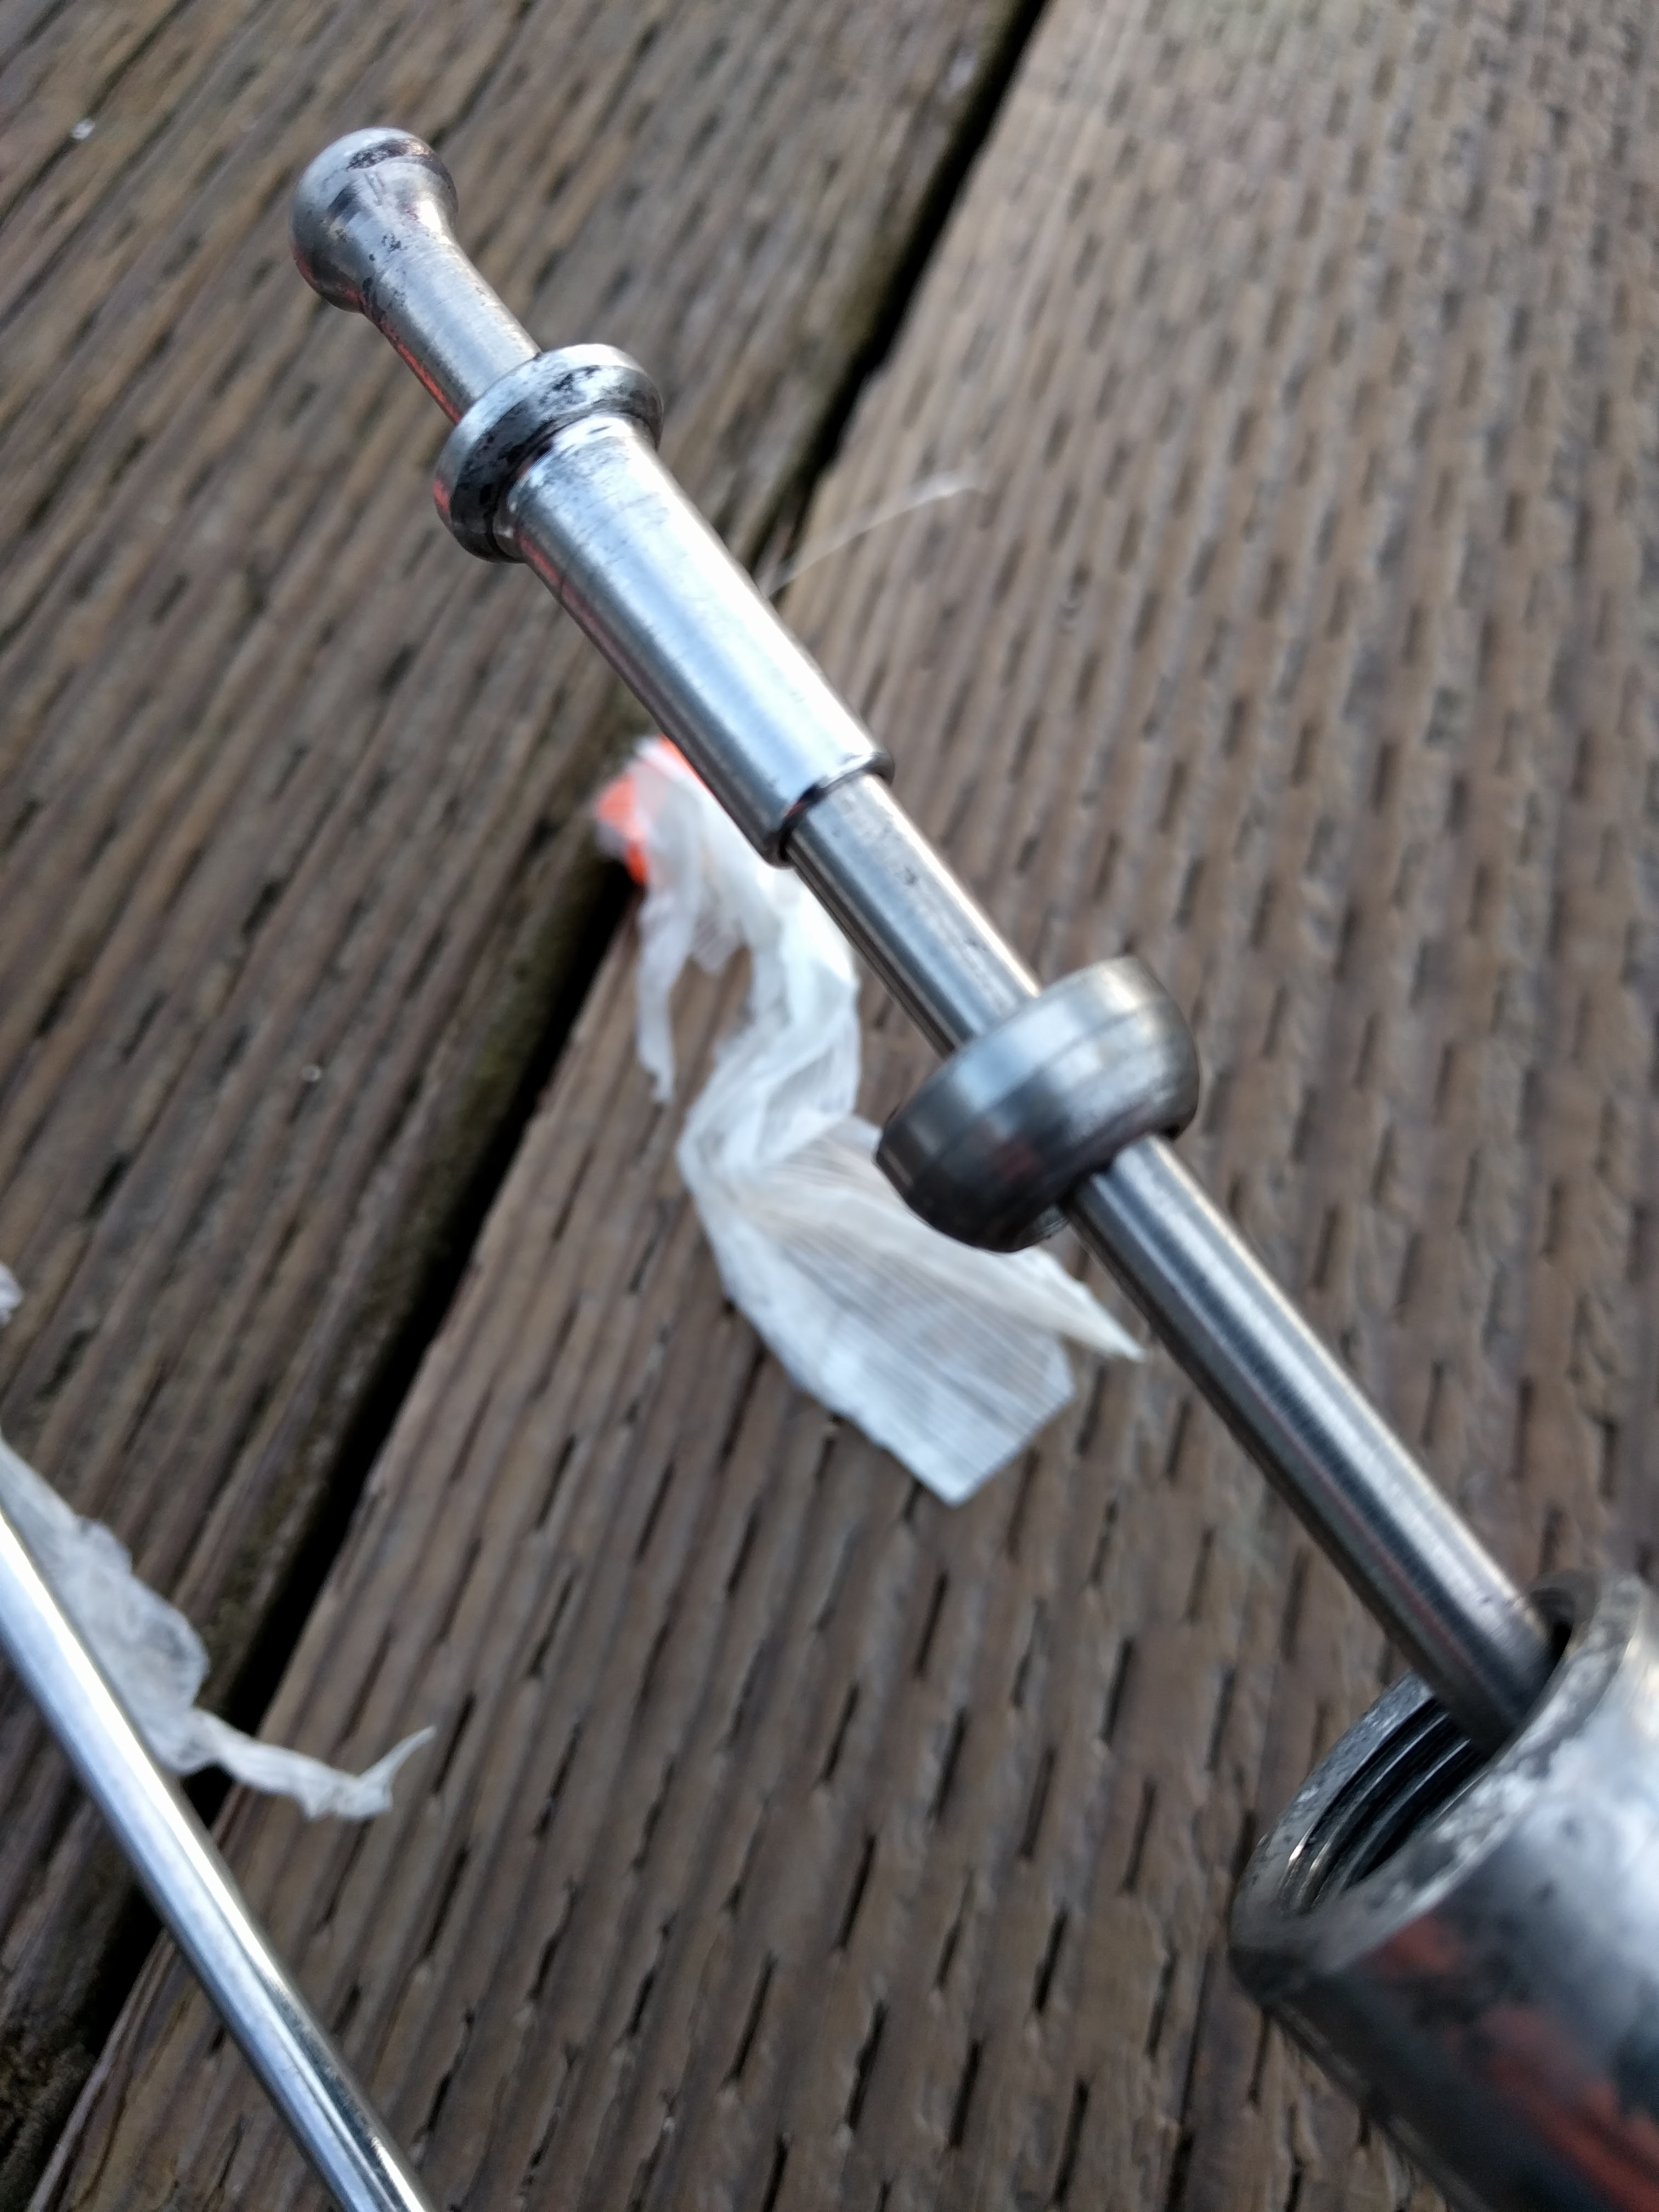
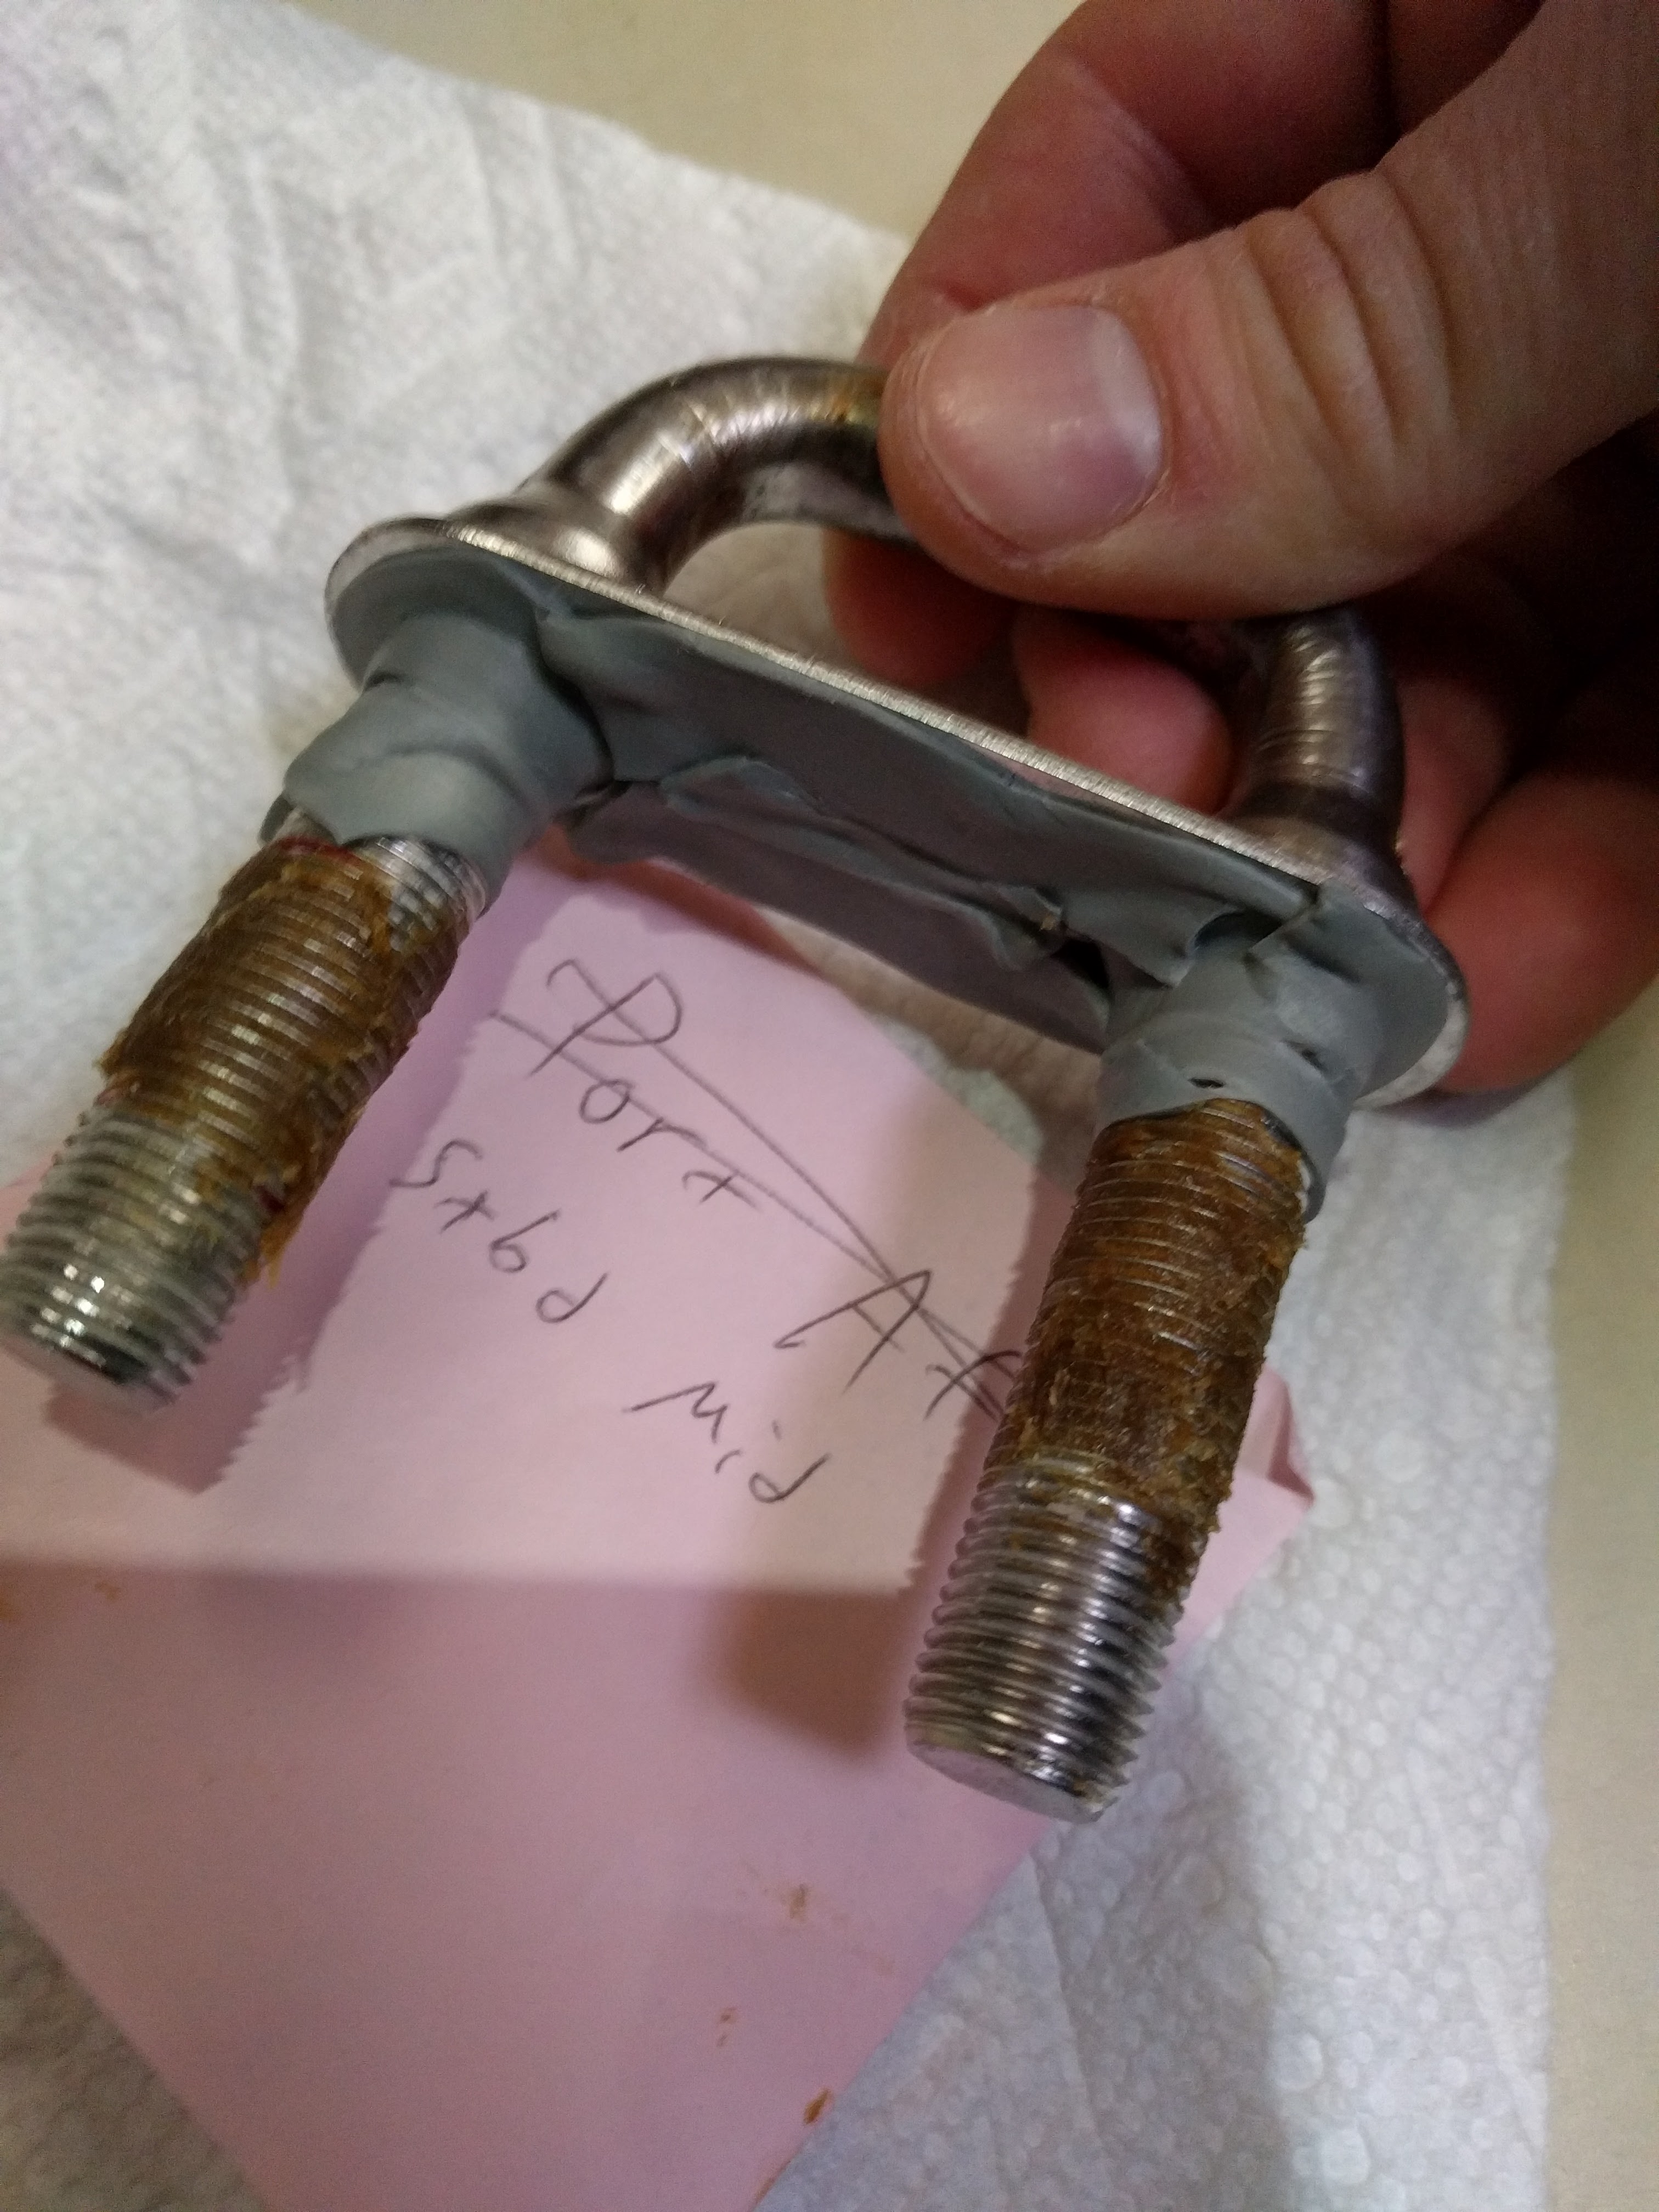
Many C&C owners and others with Navtec rigs wonder what the stemball washer and Navtang internals look like. The rod, sleeve and washer here are BSI, but look basically the same as the former Navtec ones. From upper left to lower right are: rod head, rod sleeve, stemball washer, Navtang K150 cup.
Congratulations! Must have a been a great feeling to raise the sails
Thanks! Super excited to be going sailing this weekend too.
Congratulations! A job well done is it’s own reward…that and the cruising that’s just around the corner!
A great summary. We are going to do the same this year, but I will probably get someone to do it for me. I think I will attempt to go along and help out though to learn how it all goes together.
Hey Patrick! Just found your site and am reading through all your great posts. I bought my 82 LF 38 in 2015 also and have completed a ton of projects, so it’s great read through all things you’ve done to yours.
I’m looking to put new rod rigging on mine soon too – what kind of a ballpark price am I looking at?
Happy sailing from Maine,
Gordon
It was about 7k in parts cost, not including the new furler but counting sales tax and some new tangs. Not counting yard cost for the mast pull. No labor because I did the labor myself.
Good luck with your LF38! It’d be great to hear what sailing in Maine is like sometime.
Thanks Patrick!
I’ve really enjoyed reading through all your posts – so many similarities in buying decisions and experiences!
Sailing in Maine is amazing and eerily similar to the NW.
You and I should chat at some point about projects. I’ve redesigned/replaced/relocated my bank, wiring/charging/monitoring systems (have Visio diagrams), built a custom glass holding tank, pulled/re-welded diesel tank, 1 gallon water pressure tank, strengthened stanchion bases, dripless stuffing, new folding prop… this winter it’s new lenses for the head/galley hatches, painting mast/boom/radar post and the list goes on!
Gordon S/V Cajetan (patron saint of gamblers and the unemployed)
Custom glass holding tank? Holy cow. I guess you really didn’t want to have an external tank monitor sensor. We may replace our tank soon too (under the nav station seat). Will go with Ronco, just need to figure out if we can fit a slightly bigger tank.
Finding a good fit was the hard part (and why I built my own). I have the starboard facing nav (not aft facing) and the tank is located in the forward/starboard portion of the engine compartment under the aft portion of the nav area. The new tank follows the contour of the hull and has a 38 gal capacity – which comes in handy on longer cruises and with kids using half the ocean for every flush!