
When I finished our rerig two and a half years ago (Parts 1, 2, 3, 4, Summary), it wasn’t supposed to have a part 5. But such is the way with boats. Anytime you think you’re done with something, something new eventually pops up.
In this case it was our lower spreaders – on a routine inspection last summer on the west coast of Vancouver Island I noticed the corrosion on our port spreader seemed to have accelerated. It didn’t look life threatening, but certainly didn’t look good.
The Science Behind Spreaders
The first question was did the spreader really need to be replaced? To understand that it’s good to understand how spreaders actually work. There are several good books on rigging, but Brion Toss’s The Complete Rigger’s Apprentice is one of the best.
Spreaders are essentially compression posts – on an upwind tack the windward spreader prevents the main shroud from collapsing inward towards the mast. So the primary force runs lengthwise, in a port-starboard direction – not very much in a fore-aft direction. Nor very much in an up/down direction, since the tension of the main shroud should be absorbing that (unless the spreader base is restricting the spreader’s up/down movement, which is the case a bit with ours).
Why Do They Corrode and How Bad is Too Bad?
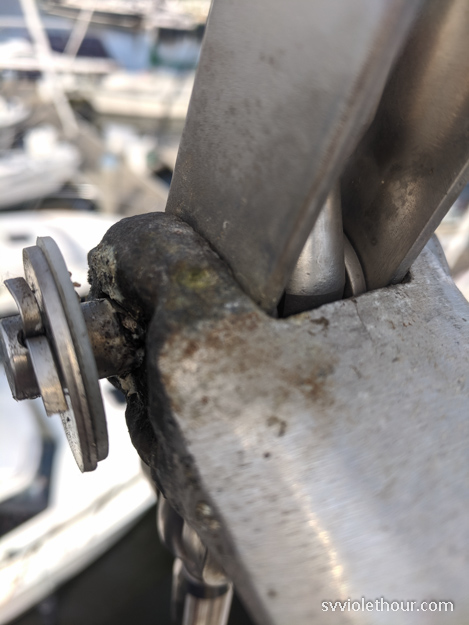
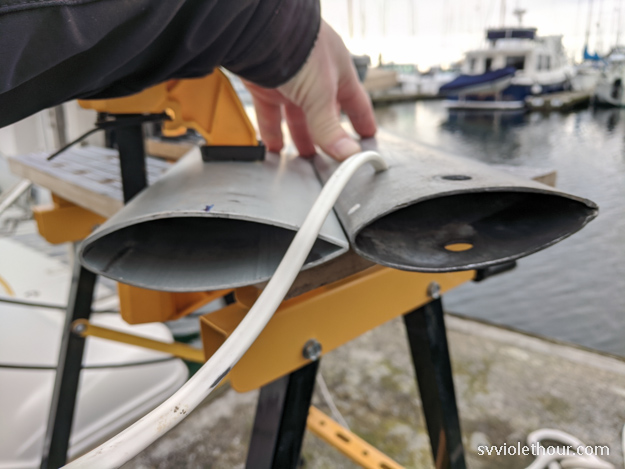
When I talked to Danny at Klacko Spars, the owner and original manufacturer of our spreaders in Canada, he said it’s common for these spreaders to suffer corrosion at the tips, after 30+ years especially. The spreader tip is a cast aluminum part welded onto the main spreader body (which is 6061 anodized aluminum) so they can interchange different types of tips. So that weld point is susceptible to corrosion (we’d already had it re-welded during our rerig).
Most of the white stuff is just Tefgel, which I applied near 3 years ago in an attempt to stop corrosion.
But, as Danny explained, the tip itself also is pretty vulnerable because it’s typically wrapped tightly in a spreader boot – so that sails don’t snag and tear on the metal clevis pins and cotter pins there. Depending on the type of spreader boot this can trap salt and moisture in there for extended periods of time.
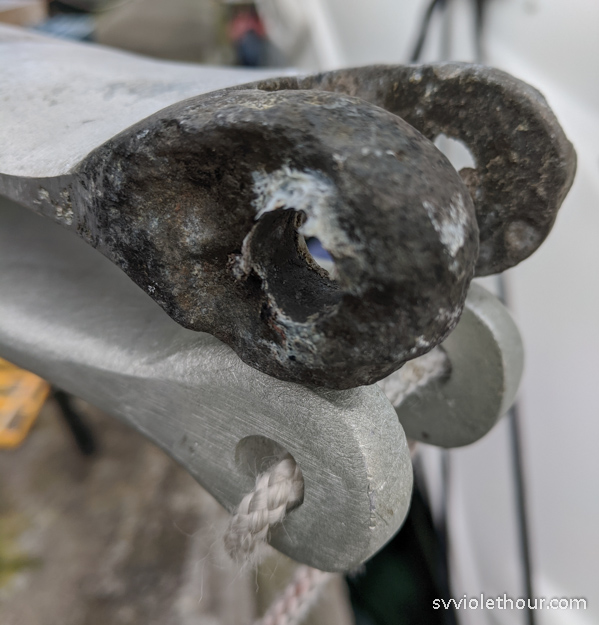
Despite the corrosion, in retrospect I’m not sure it was absolutely necessary to replace the spreader quite yet – although I estimated at least 25% of the tip thickness was gone, upon removal it looked like I still had at least 3/8” thickness (from 1/2” original). And since a spreader is a compression member, the force mostly pushes against the spreader foil, which was entirely intact. Would the spreader tip have broken? Hard to say. With sailboat rigging you go by “margin of safety” – which is to say that usually you want an ample margin of safety (ex, 2x the strength expected to be needed for normal operating stress).
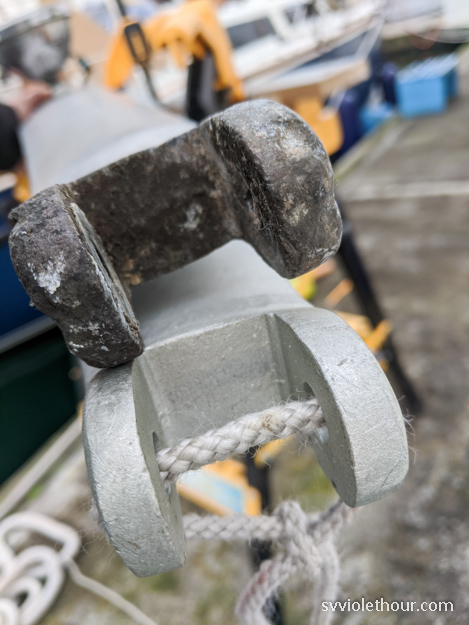
Old spreader and new one
Nevertheless, Klacko’s price for two new spreaders was very reasonable, so it was worth it for the peace-of-mind and margin of safety. The rig is the last thing I’d want to gamble with. Our starboard spreader didn’t really need to be replaced (much less corrosion) but the cost for them to make 2 was about the same as 1, so I replaced both at the same time (and the stbd one likely would’ve reached a similar state eventually).
Replacing with the Mast Up
It would’ve been a lot easier to replace the spreaders while we had the mast down in 2017. I already had the spreaders off anyway to get spot welding repairs done. In retrospect, doing new lower spreaders then would’ve saved some money and time. As they say though, hindsight is 20/20.
It wasn’t worth taking the mast down again since that’s a substantial undertaking (and additional expense), so the plan was to stabilize the mast with a halyard and replace each spreader in the marina slip. I had fears that this would be quite difficult to do, especially in the winter when we’d be having cold, rainy weather and occasional gales that I would have to work around.
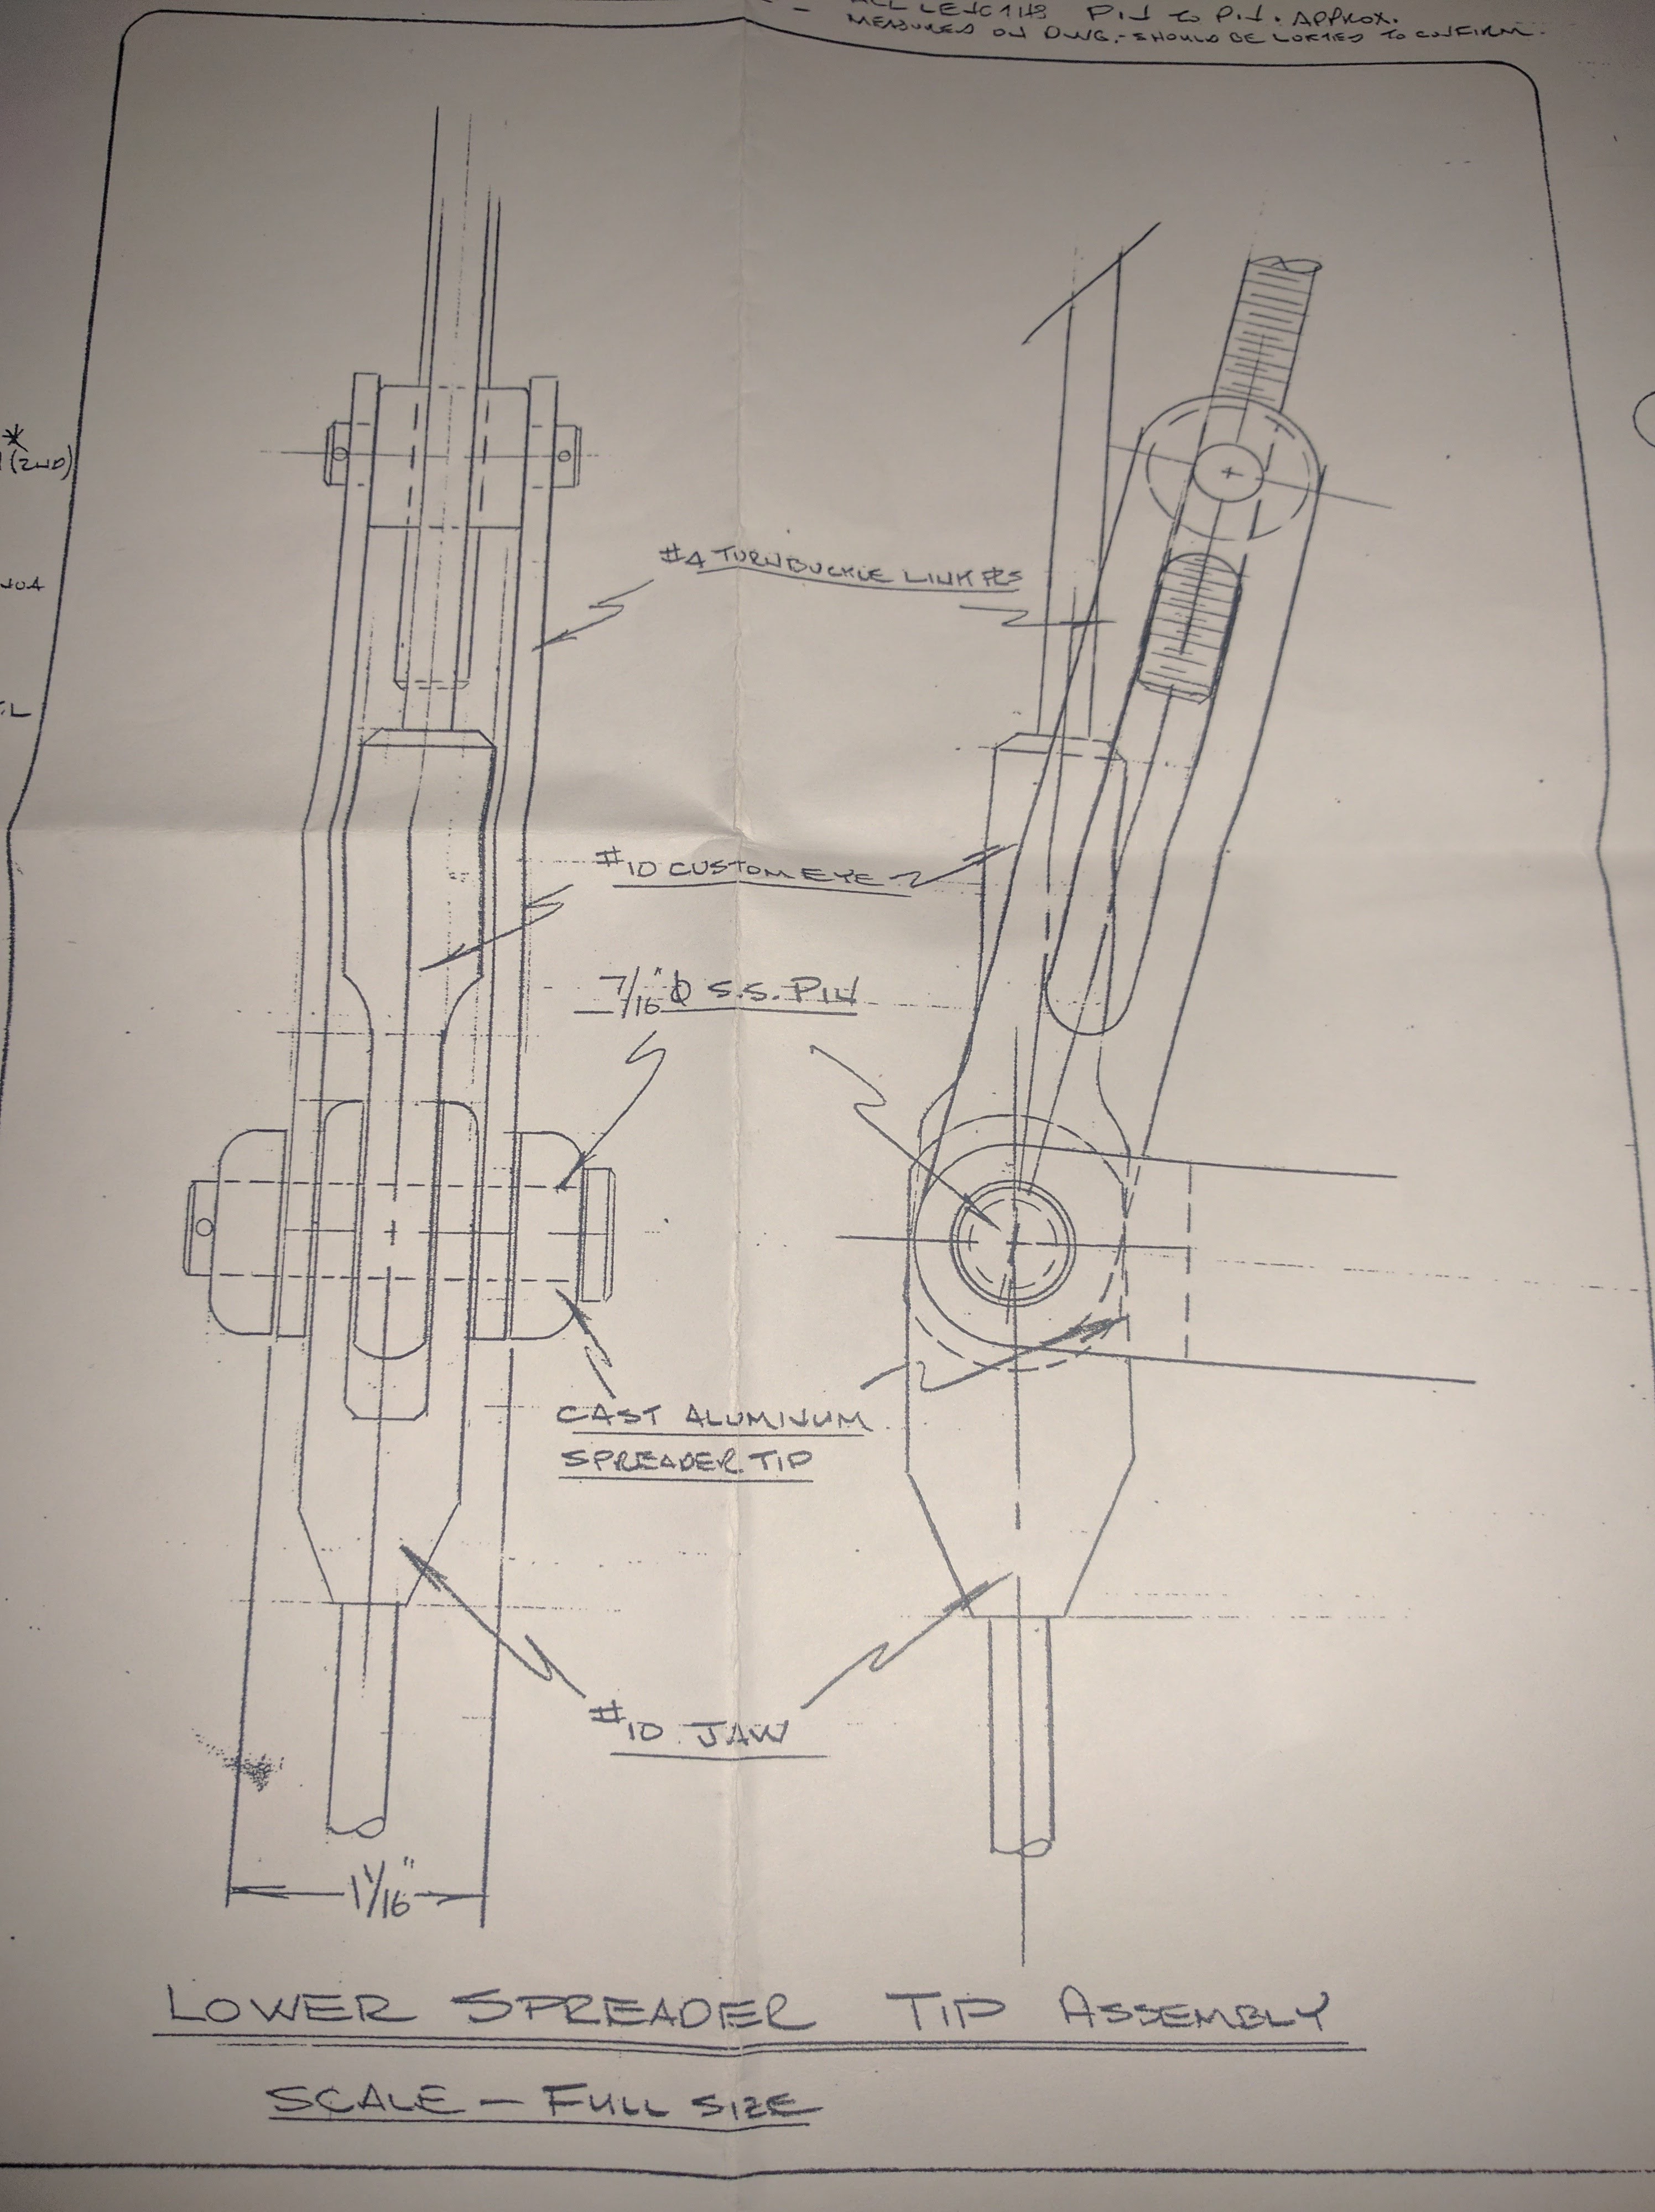
Original C&C schematics for the lower spreader tip assembly
Our lower spreaders form what’s called a discontinuous shroud (rather than continuous) because there’s a break or junction in the main shroud at this point. This makes it a little tricky since there are 3 components that need to connect in the spreader jaw: two parts of the main shroud (V1 + V2) and the turnbuckle connector for the D2 (diagonal shroud between lower spreader to mast at upper shroud).
Steps and Process
Fortunately, the replacement wasn’t as hard as I expected. It definitely helped that I was already very familiar with the spreader tip assembly, having disconnected / reconnected it during the rerig. It required 6 trips up the mast – 2 per spreader and one setup plus one for cleanup. Only the setup and cleanup were to the top though (to setup a dedicated stabilizer halyard), the other 4 were only to the lower spreaders. For each spreader I had to remove the old one, tie together the shrouds so they didn’t fall or bang, and then measure and drill clevis pin holes to the new spreader on dock. On the next climb I installed the new spreader.
Everything went pretty smoothly except for one stupid mistake – I spilled some of the contents of my tool bag while working up the mast. I carry tools in a canvas bag tied to my climbing harness, which is a bit risky if the bag accidentally inverts. Stupidly, this happened and several items plummeted to the deck: vice-grips, rigging tape, and a large Sharpie marking pen.
Tools plummeting from 25’ up can easily break a window, and fortunately Natalie wasn’t on deck. The vice-grips and tape bounced into the water, but the worst was the Sharpie pen – it exploded, spewing permanent ink in a splatter pattern on the deck. Washing off the permanent marker was very difficult and I still haven’t been able to remove it all.
I had to drill 1/2″ clevis pin holes for the spreader bases, because they’re shipped without that since it would be difficult to match the hole location correctly from afar. I also drilled + tapped our flag halyard running block.
Conclusion
As part of the spreader replacement, I didn’t re-install the old deck lights we had, as they were rarely used. This allowed pulling out some electrical wiring from the mast. It’s always good to simplify things if you can.
Overall this project wasn’t too hard, and worth it for the peace of mind.