
The time has come to replace the standing rigging on our 33-year-old C&C. C&C’s like ours have Navtec rod rigging – which lasts much longer than wire rigging, but it doesn’t always give clues when it’s about to fail. While we could probably push it a few years longer (and know many sailors doing exactly that), the type of sailing we do (lots of upwind, and fairly remote areas like the west coast of Vancouver Island), plus some issues noticed in my rig inspections motivated the decision to do it now.
We’d rather do it now than wait and regret it later (when the mast comes down, and I don’t mean with a crane!). A dismasting can be dangerous (even lethal if someone gets hit in the head by the mast), so it’s not a risk worth taking. Racers do it (push their boats to smaller margins of safety, which is why racing boats have more dismasting than cruising boats) – but they’re in a very different situation. A dismasting with a crew of 6, in a populated area, is pretty different from a dismasting with a crew of 2 in a remote area.
So better safe than sorry. But a rerig is a pretty expensive and time consuming project. So it’s no wonder people delay it as long as possible.
First it’s important to note I’m not doing this completely on my own. I got advice from a number of riggers and other sailors (to whom I’m very grateful), and am working with a local rigger for a few of the key parts (ordering and inspection).

Rod vs Wire
Most C&C’s have Navtec rod rigging instead of the more common stranded wire rigging. Rod rigging is awesome when you don’t need to replace any of it. It’s strong, long lasting, highly corrosion resistant, lightweight (less weight aloft improves boat handling) and has low stretch (which makes the boat sail a bit better, and you don’t have to tune it very often).
But rod is a huge pain if you need to replace it, or want to switch to wire. It’s expensive (especially in the fittings – tangs, stemballs, and turnbuckles), can’t be sized and swaged onsite (with wire you can cut it to length and use swageless fittings, right at the boat), and there are only a small number of rigging shops in the US that can even make rod rigging (it requires expensive rod heading machines and dies).
So switching to wire could make some sense, especially since our boat is more of a cruiser than a racer. But there would still be some tricky parts to work out – how to change the mast tangs for wire, and how to rework the spreader tips for wire. All this extra work, plus the risk the boat might not handle as well, or might have reduced resale value, steered me towards choosing to stay with rod.
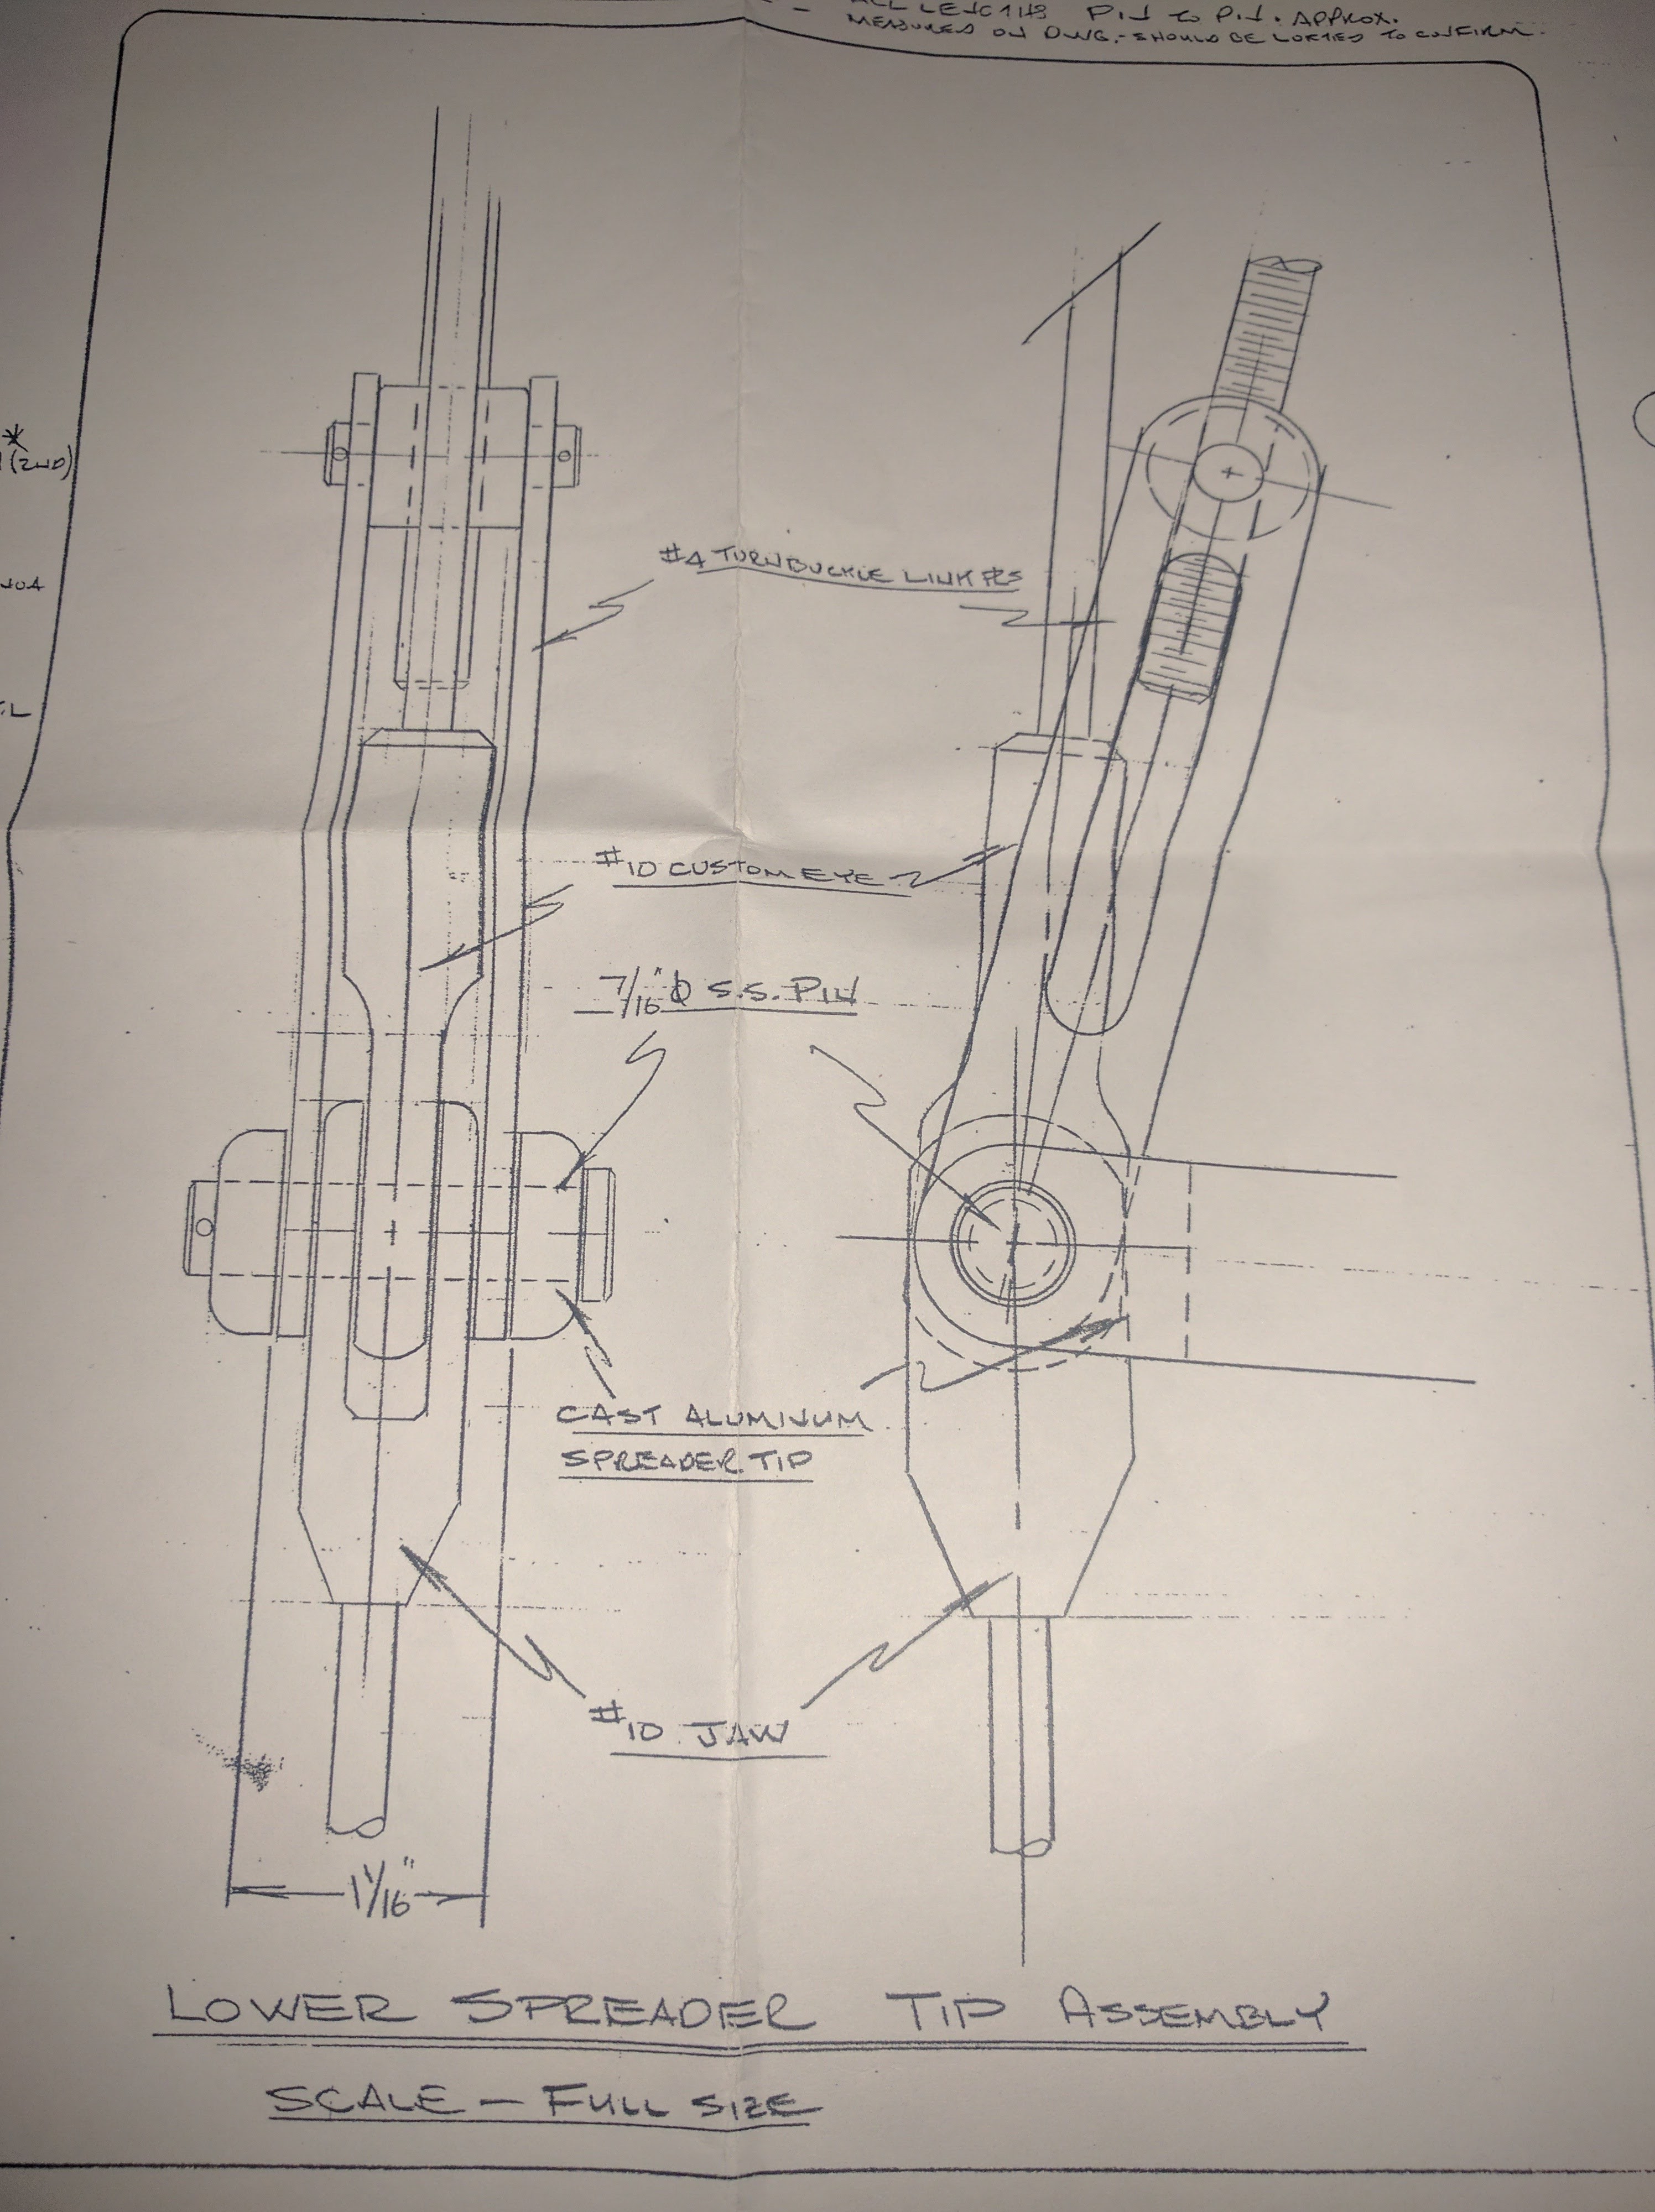
The original C&C rig plans I have, thanks to a prior owner’s forethought.
Which Kind of Rod?
With the decision to stick to rod, I assumed Navtec would be the manufacturer. Later, I was surprised to discover there’s a big competitor to Navtec making just as much rod or more: BSI, based out of Denmark (with a US factory in Rhode Island).
Navtec is the company most people are familiar with because they’re the company that made all the rod rigging on boats that were built in the 70’s and 80’s. And those are the boats that are coming due for rerigs now. But in recent years (10-15 years is “recent” in the marine industry), BSI has become the rod manufacturer of choice for many spar (mast) manufacturers and is often used on superyachts.
I kept hearing that Navtec has been going through up and downs with their business for years, and sometimes has trouble with availability of parts. And there aren’t many Navtec distributors – it was difficult even to get a quote for the cost of parts. (one distributor on the east coast promised to for weeks, and said it would be no problem each time I called, but never sent it).
So the choice was made for me – when one company doesn’t want to sell their product, go with the one that does!
To Pull the Stick or Not?
One other big question with a rerig is whether to do it with the mast (stick) up or down. Taking the mast down is called unstepping the mast, and putting it back up is called stepping it.
Initially I really wanted to do it with the mast up, for a few reasons:
- I’m good at climbing the mast and don’t mind it.
- Pulling the mast is $600 (in Seattle, including 4 weeks of mast storage), and adds 2 days of labor (mine). That two day estimate includes 2-3 hours for motoring the boat through the Ballard Locks to the yard.
- I could replace the rig in stages, and still go sailing in between when I have delays (due to shipping rod to/from the rigger) or just because the weather is nice and I feel like getting some sailing time in.
- My intermediate shrouds were already replaced last year with the mast up, and the navtangs unscrewed easily (which lent me hope that the other navtang mast fittings would as well).
I even found a few stories of people who had rerigged with the mast up (this crazy guy did it off dock, while on a mooring ball!). But they’re by far the exception rather than the norm.
The trickiest part would be the upper main shrouds, which would have to be released simultaneously, because the navtang goes through the mast with a tie rod. This meant the top of the mast would need to be secured in two directions with halyards. And if any of the navtangs were really stuck, I could end up needing to pull the mast anyway.
I would be doing all of this work in the chill of January, with chemical hand warmer packets in my pockets, and would have to time the work around weather (no going up the mast when there’s a wind storm coming through).
In the end I decided it was more sensible to just pull the mast and pay the extra cost in terms of time and money, in exchange for decreased risk and a whole lot more comfort while doing the job.

K150 Navtang with my old D2 shroud. You can see the crack in the rod, below the sleeve. We replaced these rods before last summer.
Choosing a Rigger
Finding a rigger or rigging supply shop to work with is tricky. A sailboat’s rig is really important (a dismasting can be life threatening if the mast falls on someone’s head; and that’s not even getting into the risks afterwards, which get worse the more remote you are).
Yet, I found some riggers used the seriousness of a rerig as an excuse to talk down to me, and assumed that I was going to cut corners.
They started from a position of assuming: A) I didn’t know what I was doing, B) I was going to screw everything up, C) I was going to cut corners to save money. I don’t know where they got these ideas from, but it feels really discouraging to have marine professionals basically talk down to you. My #1 priority is always safety, and I told them this from the start.
So you might need to talk to several riggers, to figure out who you can most easily work with. Some riggers in Seattle are extremely overbooked (one had a 6 month wait), and some riggers help install rigs, some can make swaged wire/rod, and some do only one of those but not both.
What Does A Rerig Consist Of Anyway?
One thing I definitely didn’t expect before getting into this is that it’s not even clear what the definition of a rerig is! Riggers don’t agree on it, and sailors don’t either. When one sailor says they “rerigged”, it could have a very different meaning from someone else who rerigged.
To some people, it means just replacing the wires or rods between all the fittings – and reusing tangs, turnbuckles, toggles, clevis pins, chainplates, the backstay hydraulic adjuster (if any), and roller furler (which has a turnbuckle in it). To some it means replacing all of that, even the chainplates. This can get really expensive. And many of the parts you’re replacing will have no signs of corrosion (for a boat kept in non-tropical locations).
While you’re at it, you might as well replace the spreaders too, and the mast as well. Heck, why not just buy a new boat? Clearly, you have to draw the line somewhere.
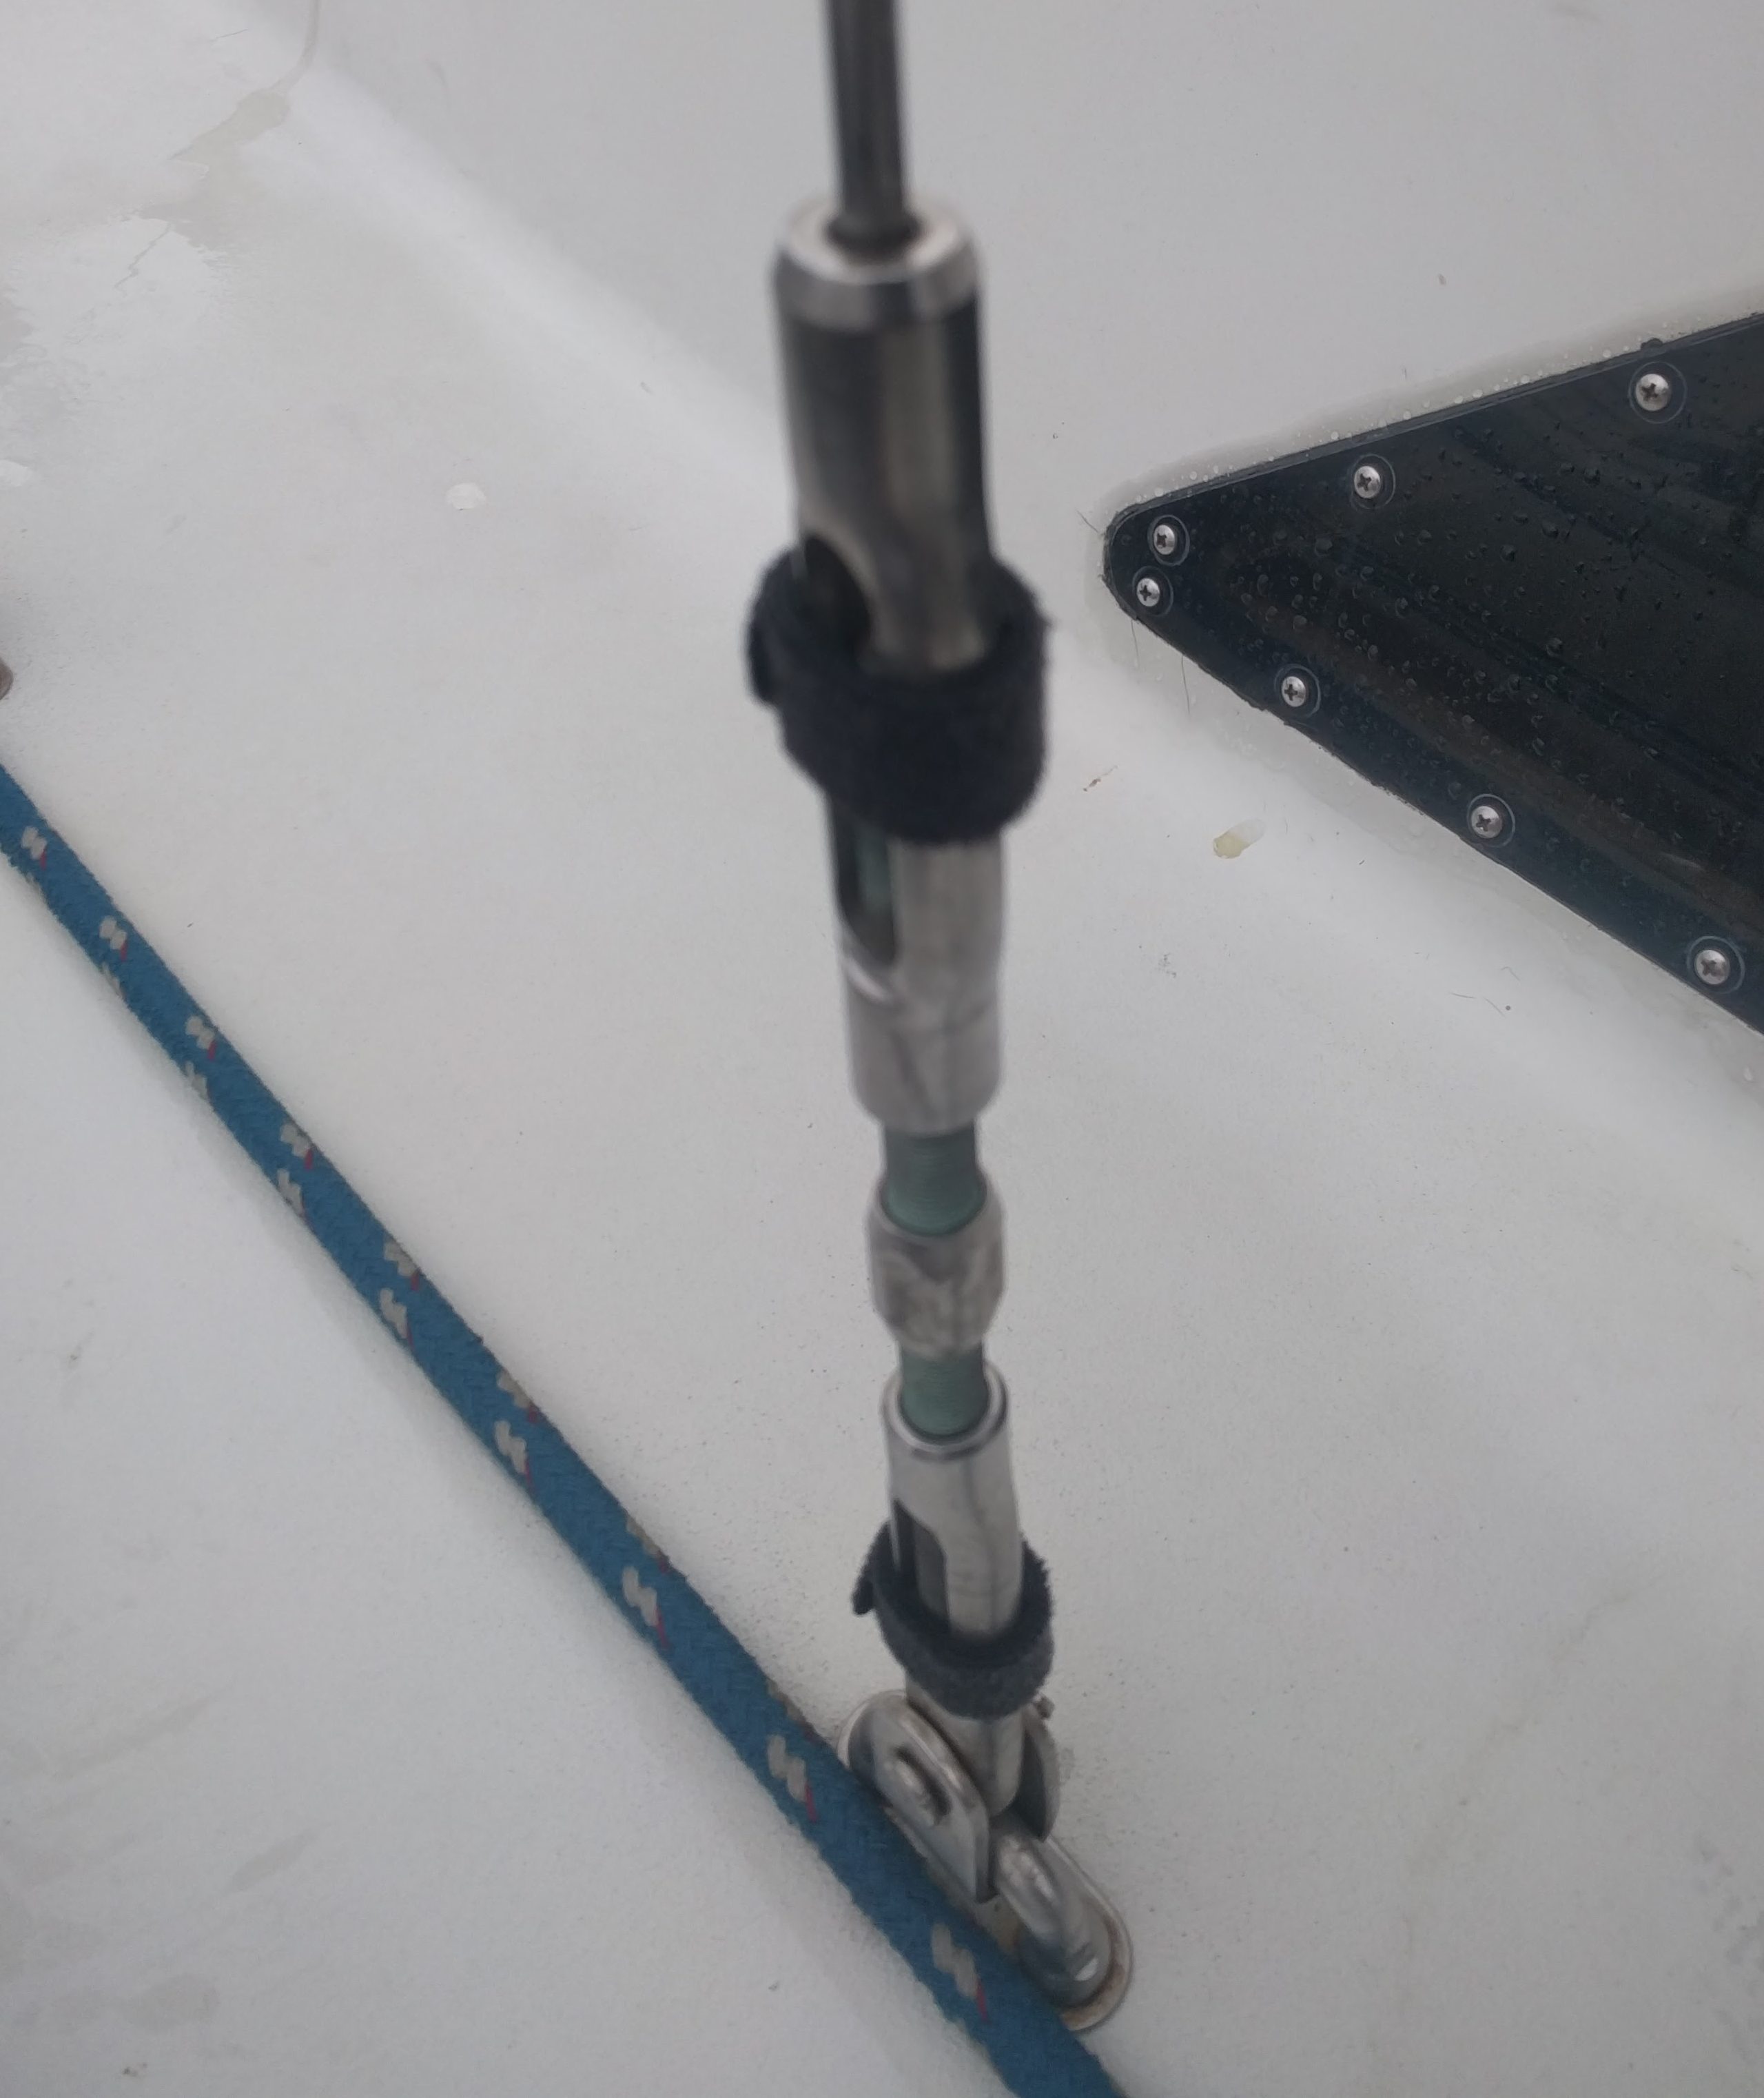
The center screw turnbuckles we’ll be replacing
So what does a rerig consist of? Ultimately you have to decide for yourself, based on the condition of the parts, intended use of the boat, and your comfort level. This brings us to the next point…
Margin of Safety
The tricky thing about rigging is that no one really knows how strong is strong enough. There are too many variables that affect a sailboat to be able to compute an equation guaranteeing you’ll never have a rig failure. This is why boats are built with what’s called a “margin of safety.” The parts have 3x – 5x more strength than needed (according to the equations). Some boats have a lower margin of safety though (because they’re prioritizing performance more) – the Vendee Globe IMOCA 60’s for example probably have a much lower margin of safety than our cruising boat.
Brion Toss’s book The Rigger’s Apprentice is super helpful and is where I read about margin of safety. Although I haven’t met Brion Toss (it’s kind of like getting a meeting with the pope – he’s a bit of a celebrity here), in his book he seems to have a very practical attitude towards this – he understands everything in sailing is about tradeoffs, and what’s right for one boat (or sailor) isn’t necessarily right for all.
Because margin of safety is difficult to measure, and everyone has different risk tolerances, there’s a lot of disagreement in the boating world on what a rerig consists of.
For me the best place is somewhere in between the two extremes. When I meet someone with a very rigid mindset who thinks everything is black and white and there is only one right way to do things, alarm bells start going off in my head. If there’s one thing sailing teaches you, it’s that a flexible mindset can get you out of all sorts of situations where a rigid mindset would have you boxed into a corner, forever insisting your way is right instead of trying something new.
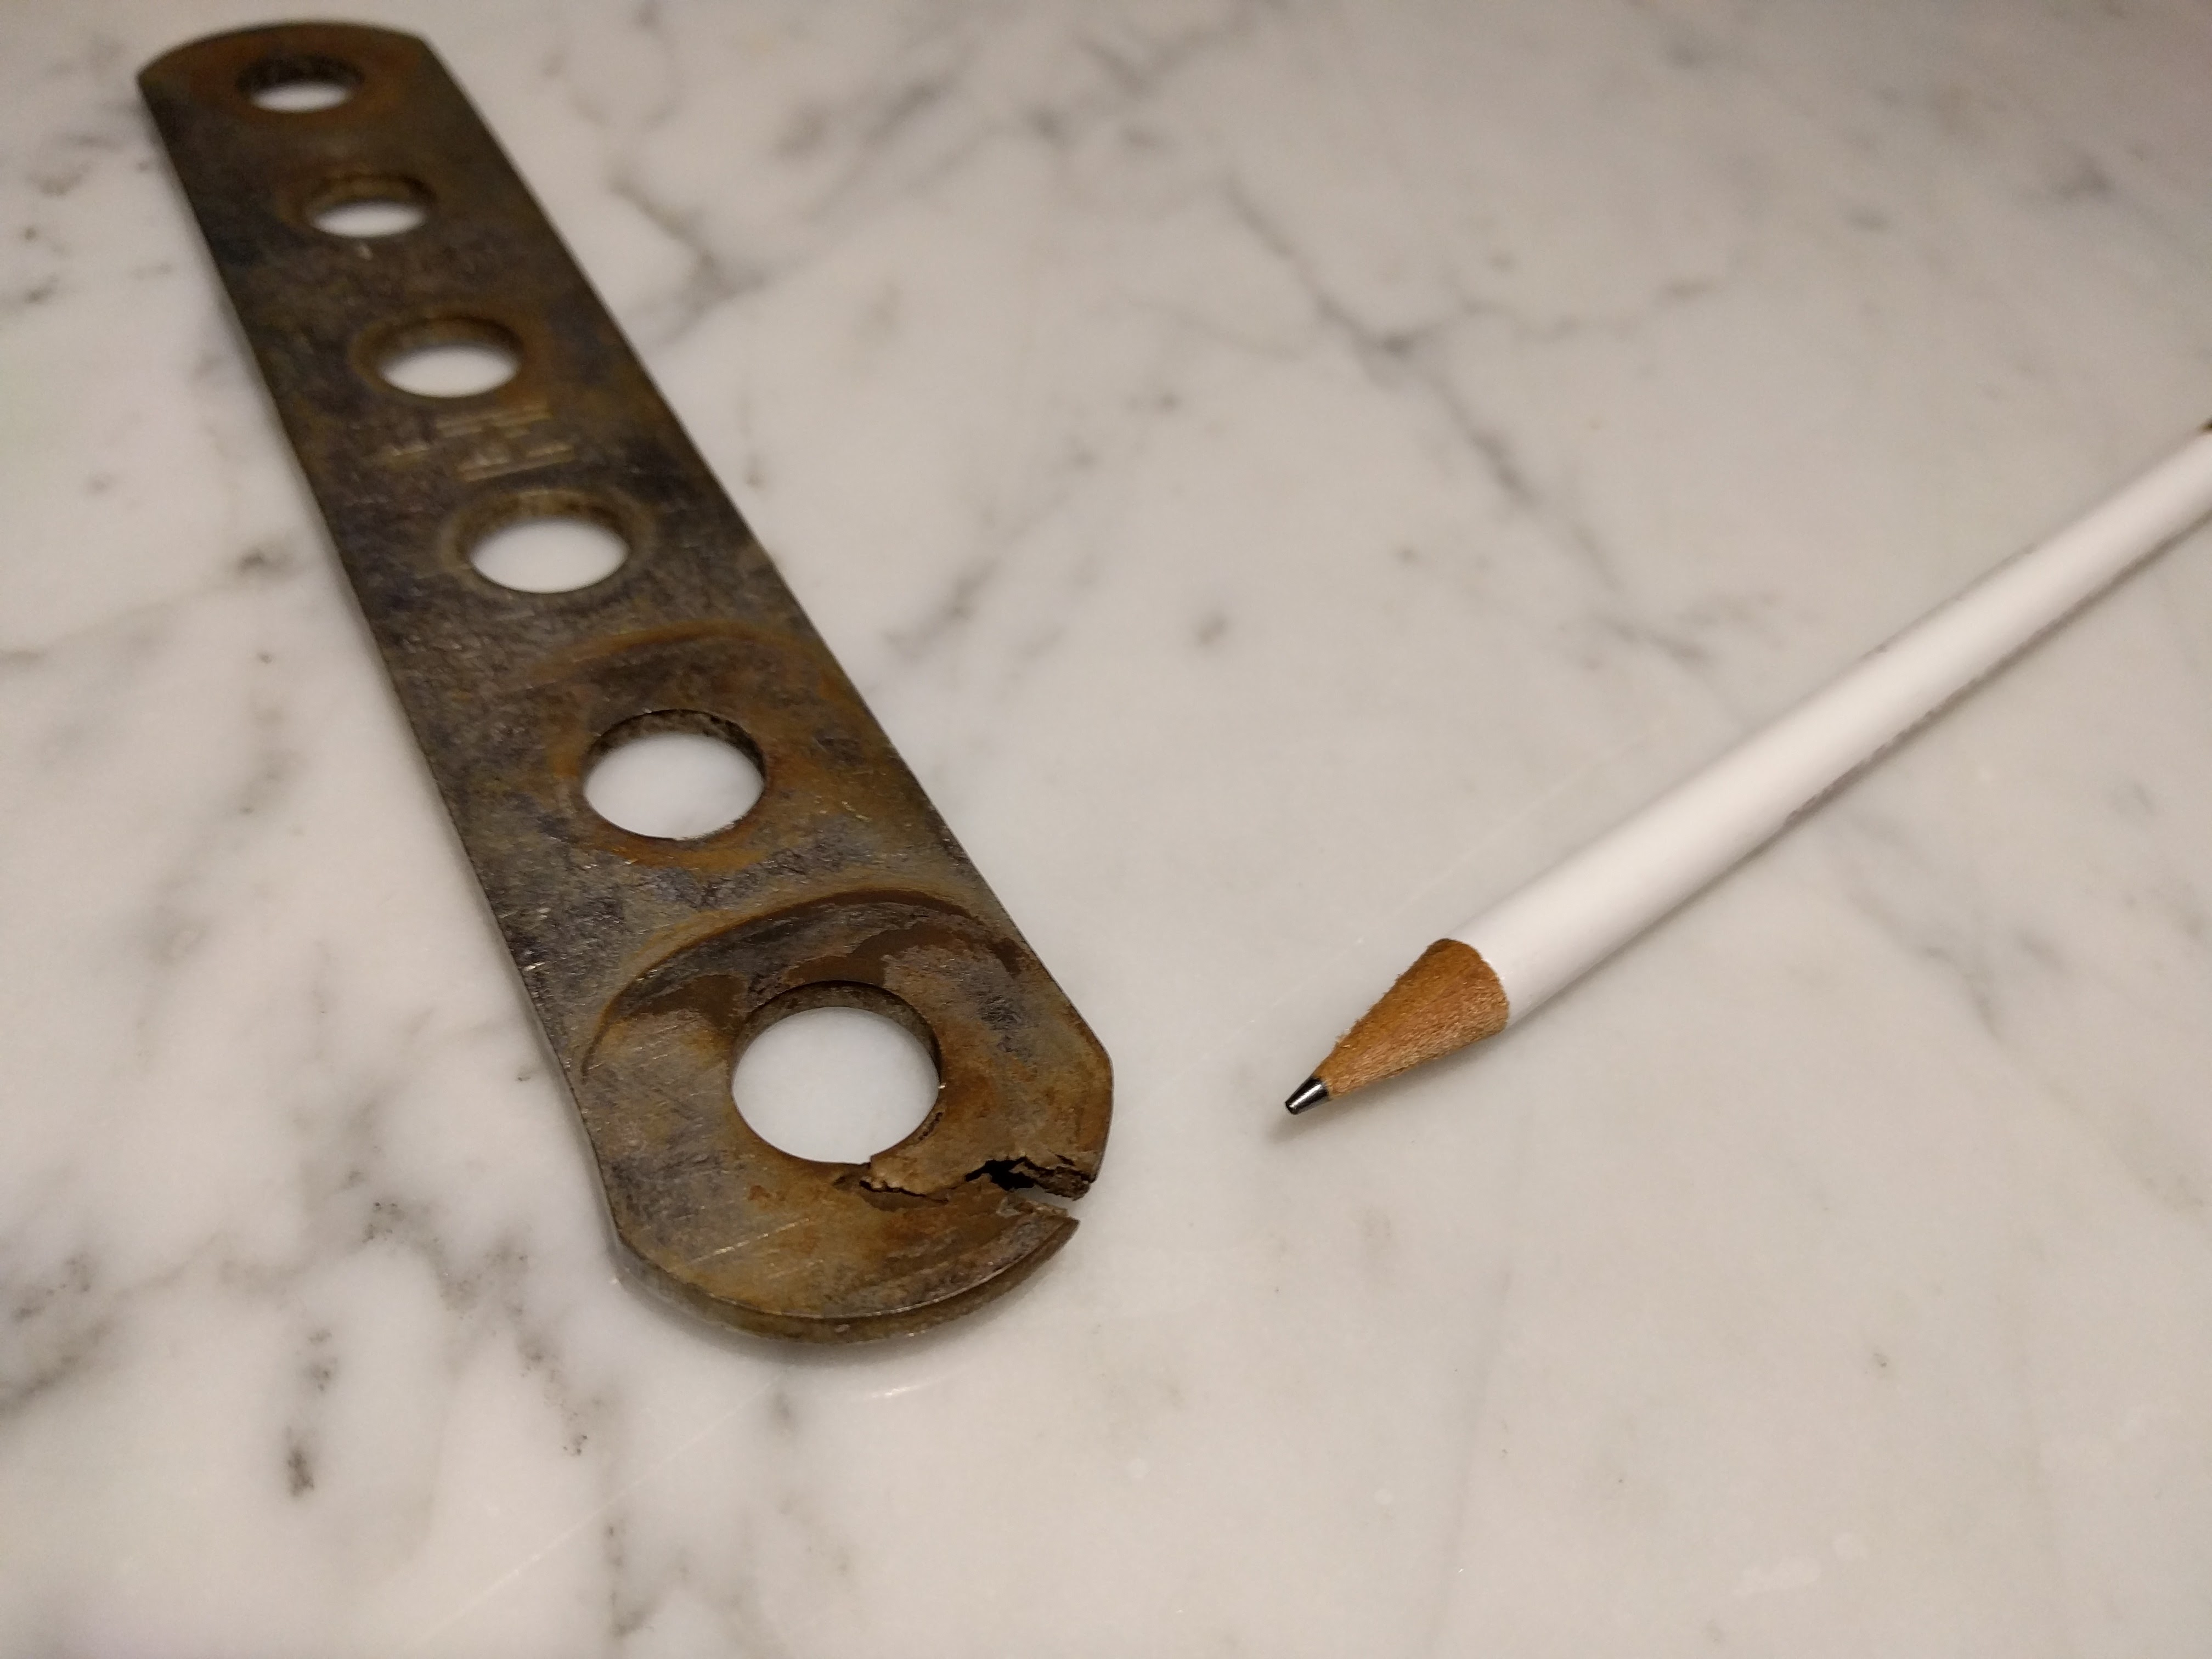
A clearly inadequate margin of safety. The cracked forestay link plate I discovered and replaced last year, with a much stronger design.
Rod vs Wire… Or Dyform???
Let’s revisit the Rod vs Wire debate from earlier. As if matters weren’t already complicated enough, there’s a third choice! It was formerly sold under the brand name Dyform, so most people are familiar with that name, but Dyform no longer is sold or produced – therefore let’s call it by its proper generic name: compact strand wire.
Compact strand wire is a pretty ingenious engineering innovation where they pack the wires closer together, producing greater strength (for a given weight) and lower stretch. Compact strand sort of lives in between rod and wire, combining some of the advantages of each, with only a couple disadvantages.
Advantages over Standard Wire:
- Stronger – this means you can have less weight aloft and thinner wire.
- Less stretch (almost as low as rod).
Advantages over Rod:
- Cheaper. The price is more than standard wire, but easily less than rod (which is basically a premium priced product).
- You can use swageless fittings, like Hayn’s Hi-Mod designed specifically for metric sized compact strand wire. Swageless fittings are a big deal if you care about serviceability. If you’re thinking of sailing to the South Pacific and something breaks in the standing rigging, with swageless fittings you can fix it yourself, at anchor. Good luck doing that with rod.
Disadvantages:
- More abrasive than standard wire (and rod). So if you use it for your side shrouds it could chafe your sails.
- You probably shouldn’t use compact strand in applications where the standard rigging is free to rotate. With turnbuckles or furlers this isn’t an issue, but is with a hydraulic backstay adjuster. Sailtec put out a technical note on it: http://www.sailtec.de/pic/upload/dyform_and_hydraulics_technical_notice.pdf
If you read the full note though, I believe they’re not actually saying you can’t use compact strand with a hydraulic adjuster – just don’t be a dumba** and install it with the hydraulic adjuster on one end, and an unsecured threaded swage fitting on the other end. - More difficult to swage. Some riggers don’t do it, but it can be done. And swageless fittings are available in the Hayn Hi-Mod line.
So the abrasiveness and swaging difficulties seem like the only disadvantages. The other problem, which is more of a supply issue, is for some reason compact strand wire is difficult to find. Now that Dyform is no longer produced, there’s only one manufacturer making compact strand wire for boats, and many rig shops don’t have it regularly available.
Coming up next: Part 2 (pulling the mast, measuring and inspecting), and Part 3 (installing new rod, restepping the mast).
Thanks for sharing Patrick. Looking forward to learning more in your upcoming postings!
Great post. We are going to take our mast out next year. Look forward to your learnings!
Having worked as a rigging assistant, I can say from experience that the riggers got ideas A, B and C because they deal with those sailors on a very regular basis. Unfortunately, it’s almost the baseline. I’ll share some great stories over beers next time I see you!
That said, hope all is going well with pulling the mast, measuring, etc!
I can definitely see that. I need to start collecting a Youtube Fails list of some of the scary things I’ve seen people doing while rerigging. It’s not the type of thing to try as a beginner, or without a bunch of pre-planning and some prior smaller-scale experience.
We replaced the rod shrouds in the 90’s after a fatigue failure of one of the lowers. We had the same style of upper fitting that you show. We were on the west coast of Vancouver I with no way to ship new rod, so we cobbled a new wire shroud from aircraft cable, cable clamps, and a humongous galvanized turnbuckle. There was no practical way to ship a new rod. We did get a rod adapter which allowed us to attach a cable. Merely $500 of Uncle Sam’s finest, nearly twenty years ago.
Later, when we replaced rod shrouds, I bored out the bosses on the mast a bit to allow an aluminum tube gun drilled for a 5’8″ bolt to attach the tangs. We have two pairs of tangs for the lower shrouds and a single tang for the uppers, so three bosses.
We did not change the forward and aft stays because they already have marine eyes on the mast fitting to allow us to attach a replacement cable. We did rework the rod end fittings.
When the lower failed I’m assuming it was at the rod head (stemball)? That would be a pain in a remote area. I’d like to hear the full story sometime!
It was one hell of a bang. Yes, it was the upper end. Since the mast was still standing it took a while to see what happened. More later.
Thank you for a straight up no nonsense discussion. So many of these articles seem like a know-all macho trip. So refreshing to have some basic logic to ponder and help with decision making. Rigging has become so complex, – so far away from the old, easily understandable swaged wire and tangs. Thank you.