
The hardest part of boat repairs is often just finding the part you need. A lot of parts aren’t exactly sold on Amazon.com with 2-day Prime delivery. For the more unusual parts, for old diesel engines or custom rigging, local and online marine stores may simply not carry it.
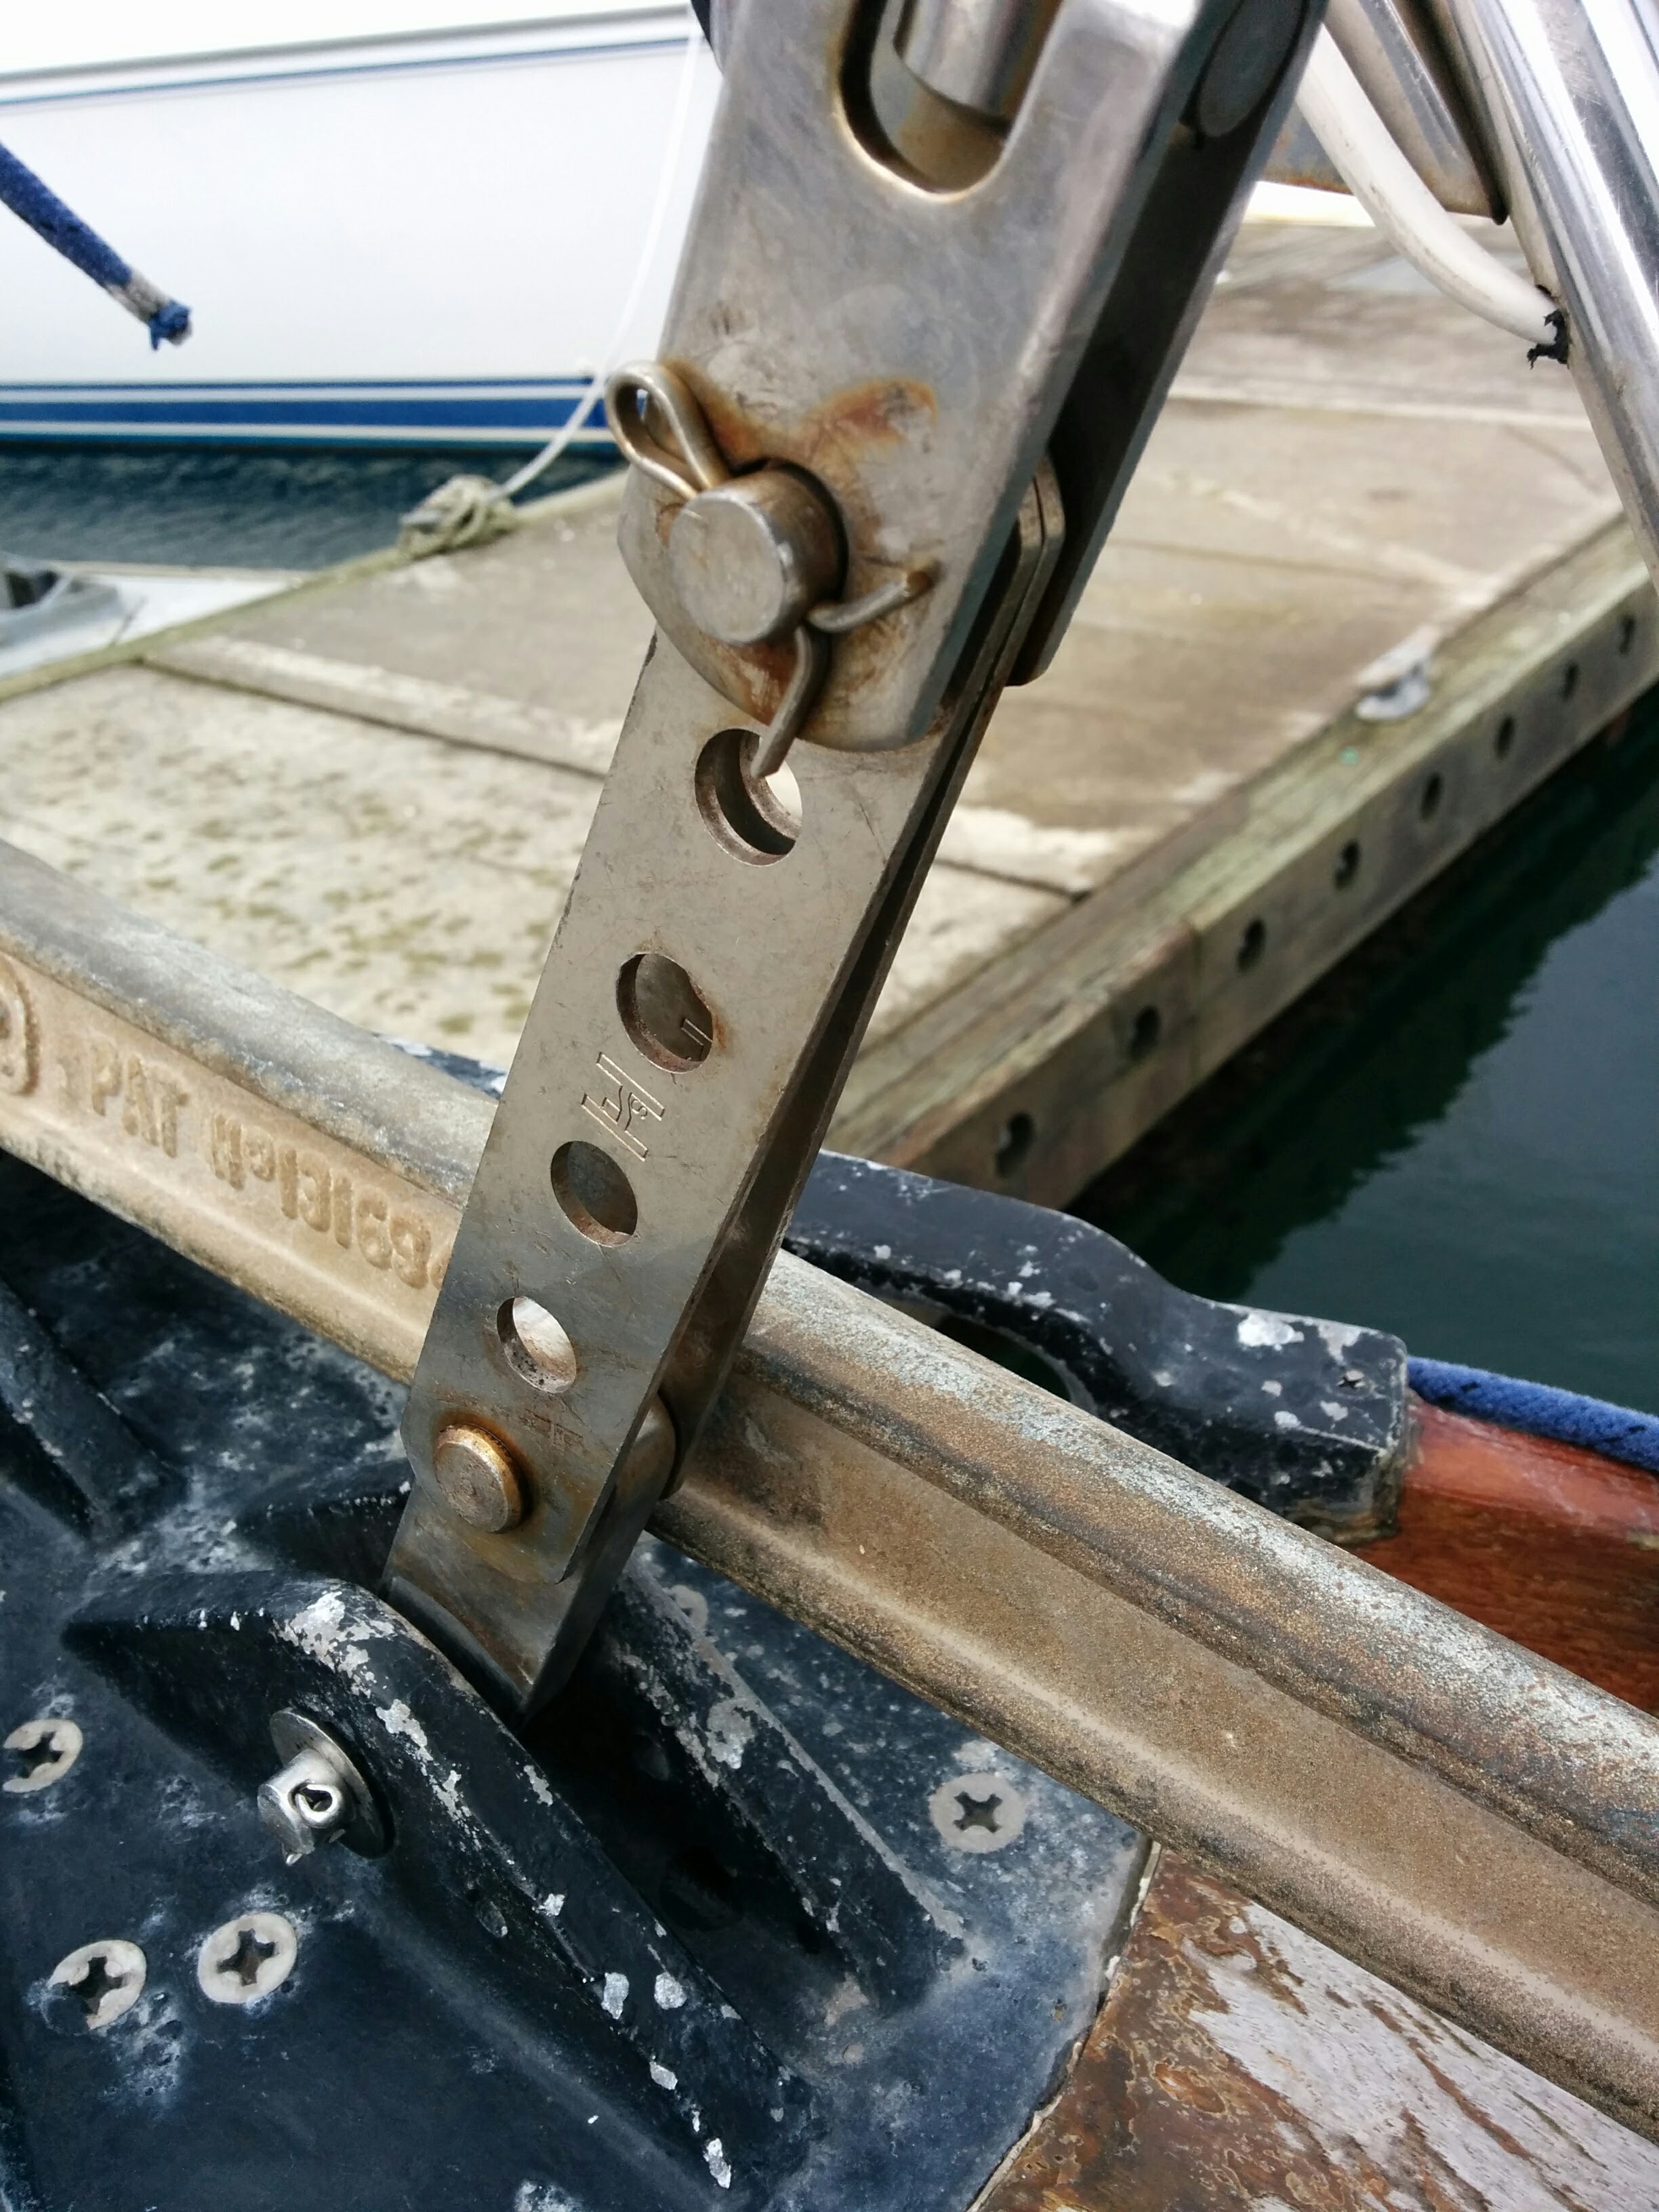
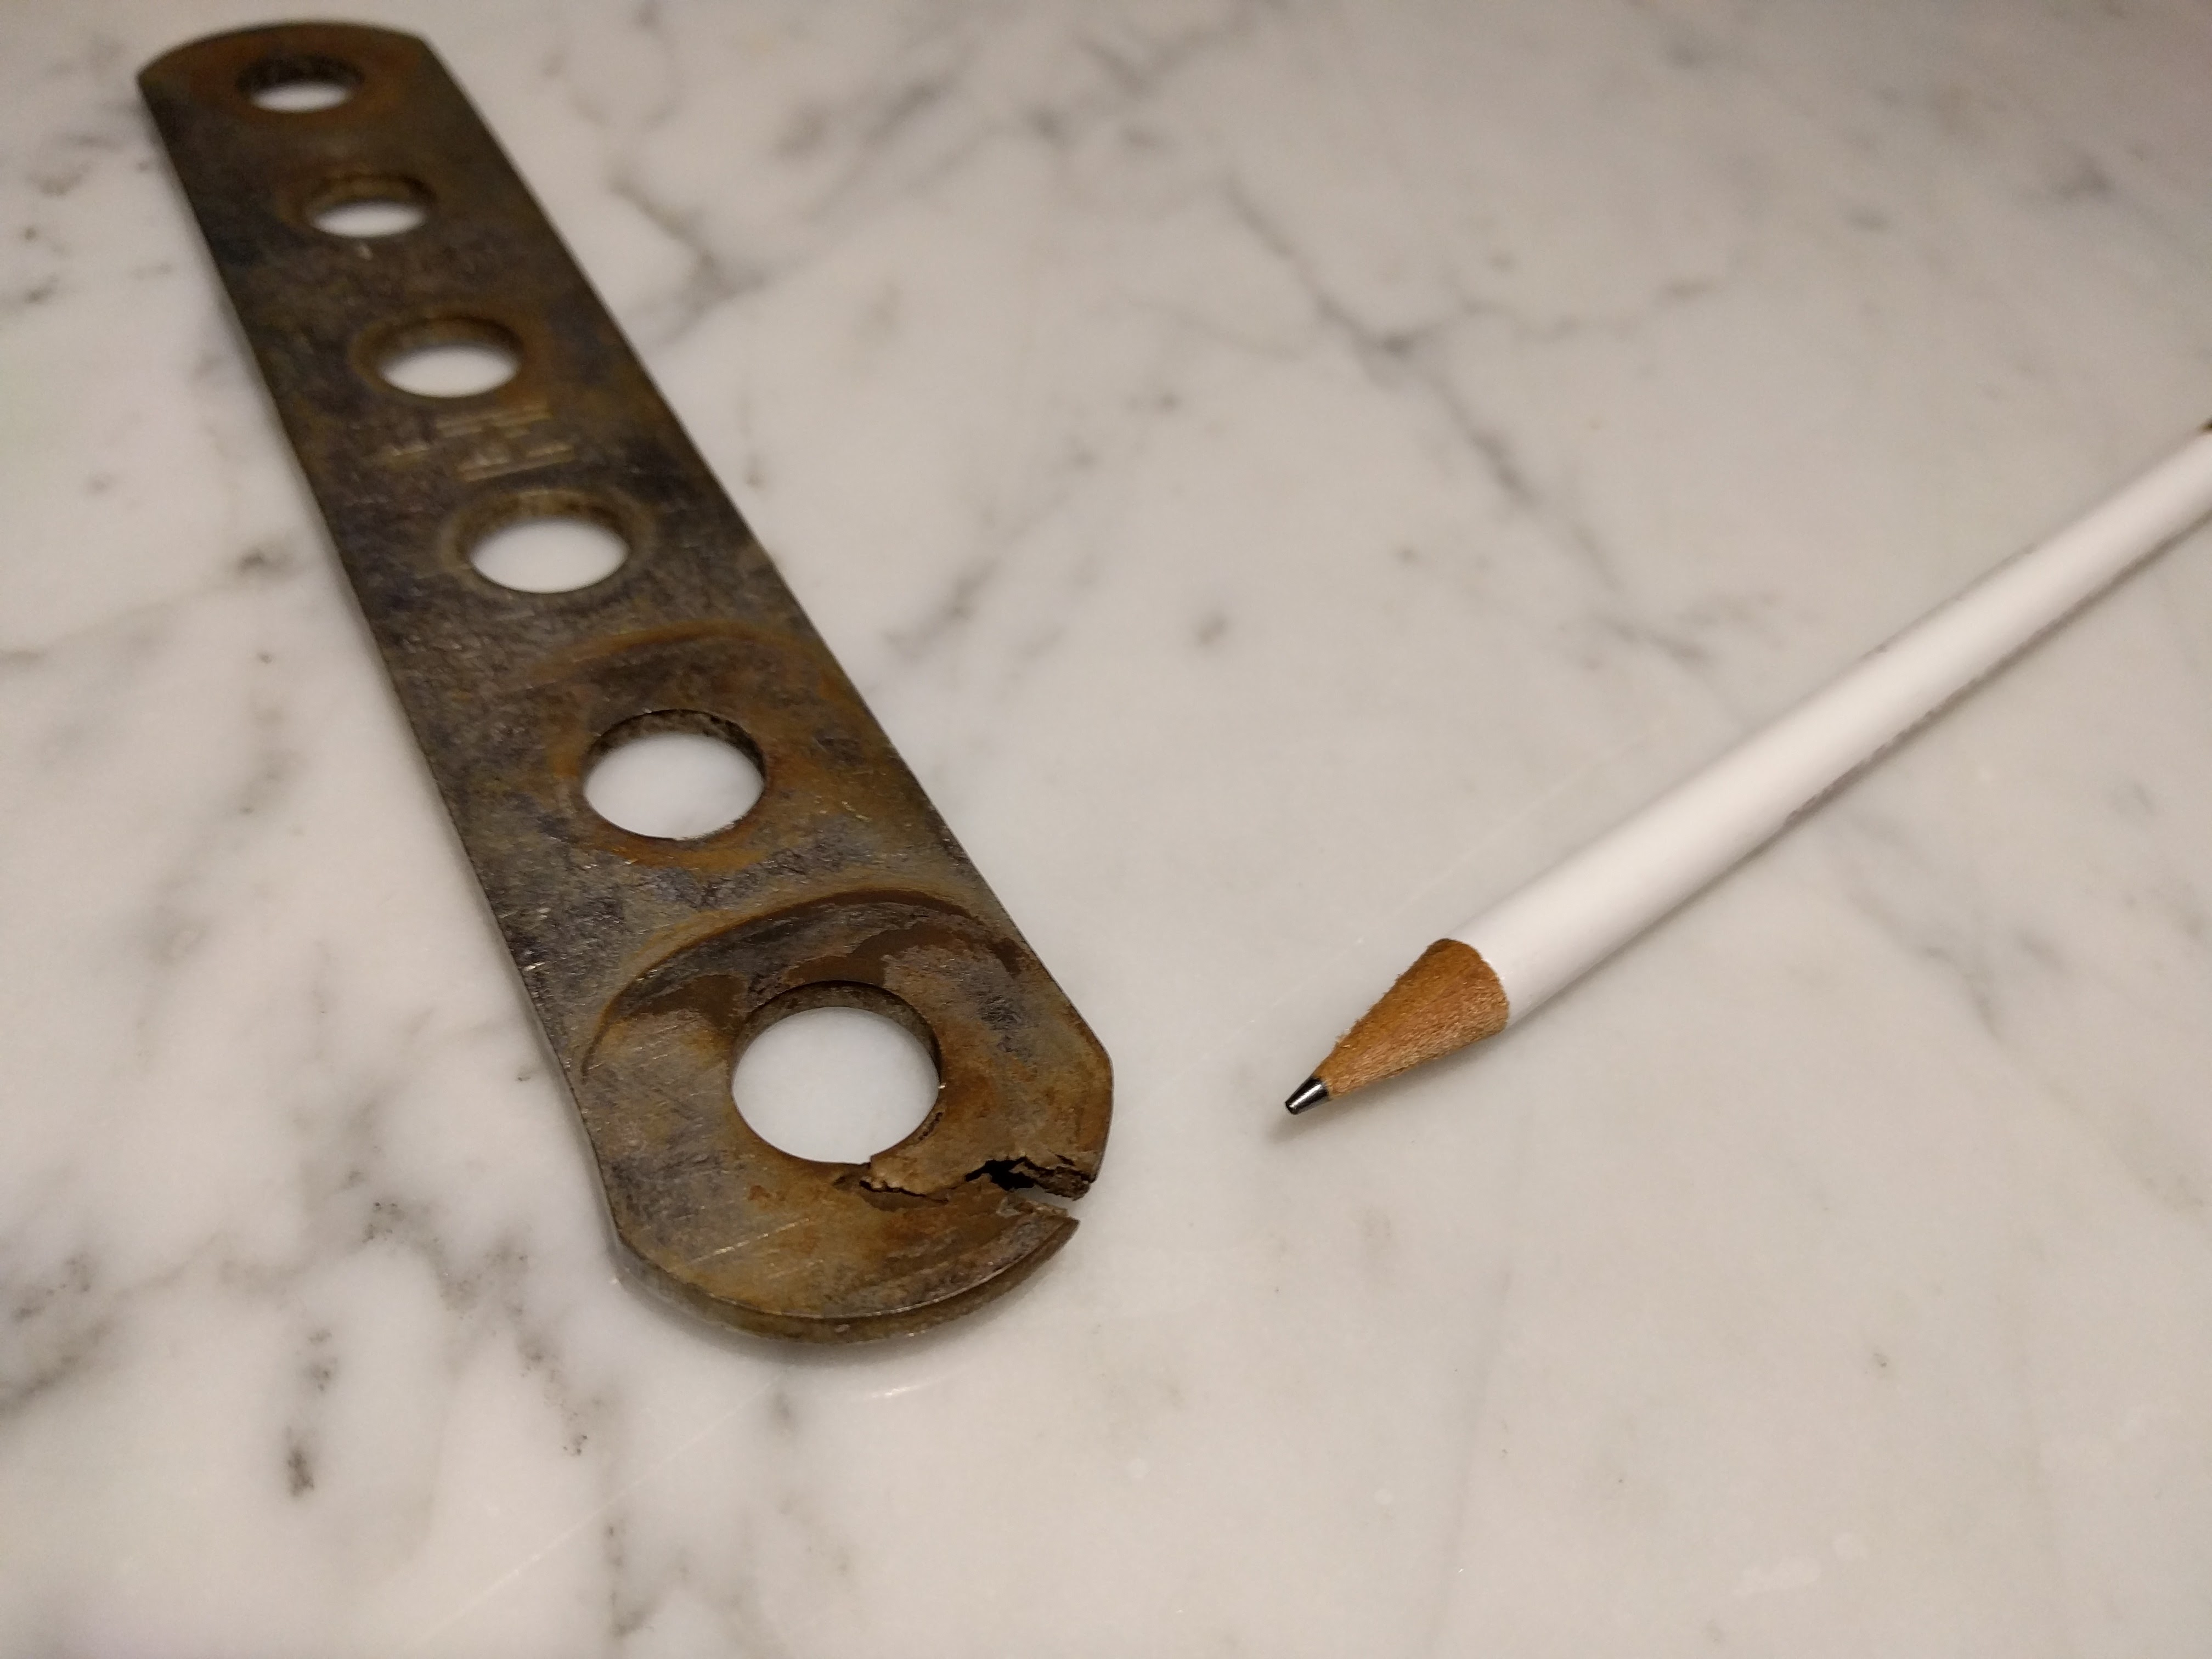
When I discovered this crack in the link plate connecting my forestay to the boat, I knew it was time for replacement:

In fact I was already working on replacing this – a rigger hired for the rig survey last spring had recommended replacement with a stronger piece, and I agreed it was definitely the weak link in the forestay.
Spoiler Alert: In the end, I don’t end up getting the part fabricated.
Discovering this crack made this replacement more urgent. This plate was basically ready to give way – a strong blow on the wrong tack upwind could pull the clevis pin out, leaving only one link plate holding the forestay. Whether that remaining good link plate would hold is a risk I wouldn’t want to take.
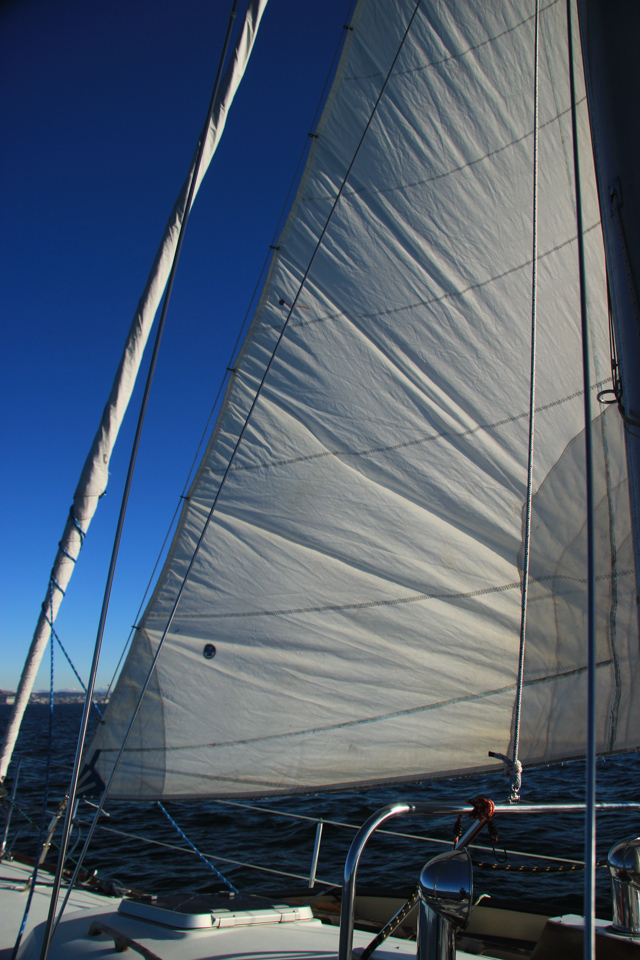
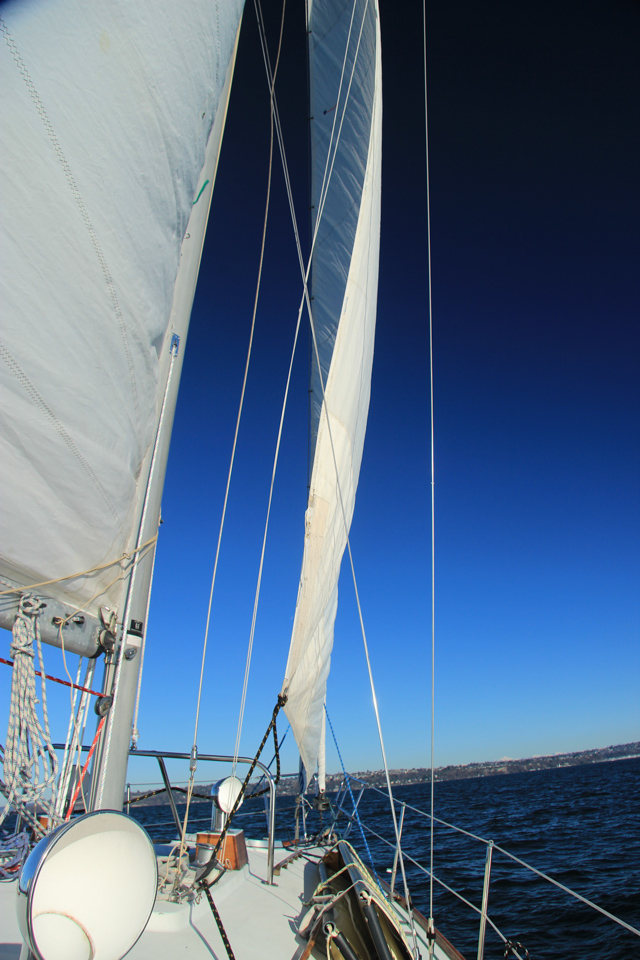
That didn’t stop us from going sailing though! We had a New Year’s Eve sail planned, and with a 6-8 knot wind, out came the storm jib for our inner forestay (solent stay). The boat sailed better than expected with the 67% jib, and we made 3.5 – 4 knots upwind. It was a good chance to practice rigging the storm sail in easy conditions (something we’ve only practiced once before, and never have used in actual gale conditions).
This was a typical one-thing-leads-to-another boat project:
Problem: the forestay is too loose, resulting in headsail sag and even forestay sag at the dock when a 40 knot winter storm blows through.
Resolution:
- Take down the genoa, open up the furler and adjust the furler turnbuckle.
- Now since the genoa is down, this was also a good time to add some reefing telltales, and lube / refurbish the 31-year-old furler (it’s missing a few screws but otherwise in decent condition).
- Now since the furler was opened up, it meant it was also a good time to replace those link straps that my rigging surveyor had recommended replacing. They’re the weak link in the forestay.
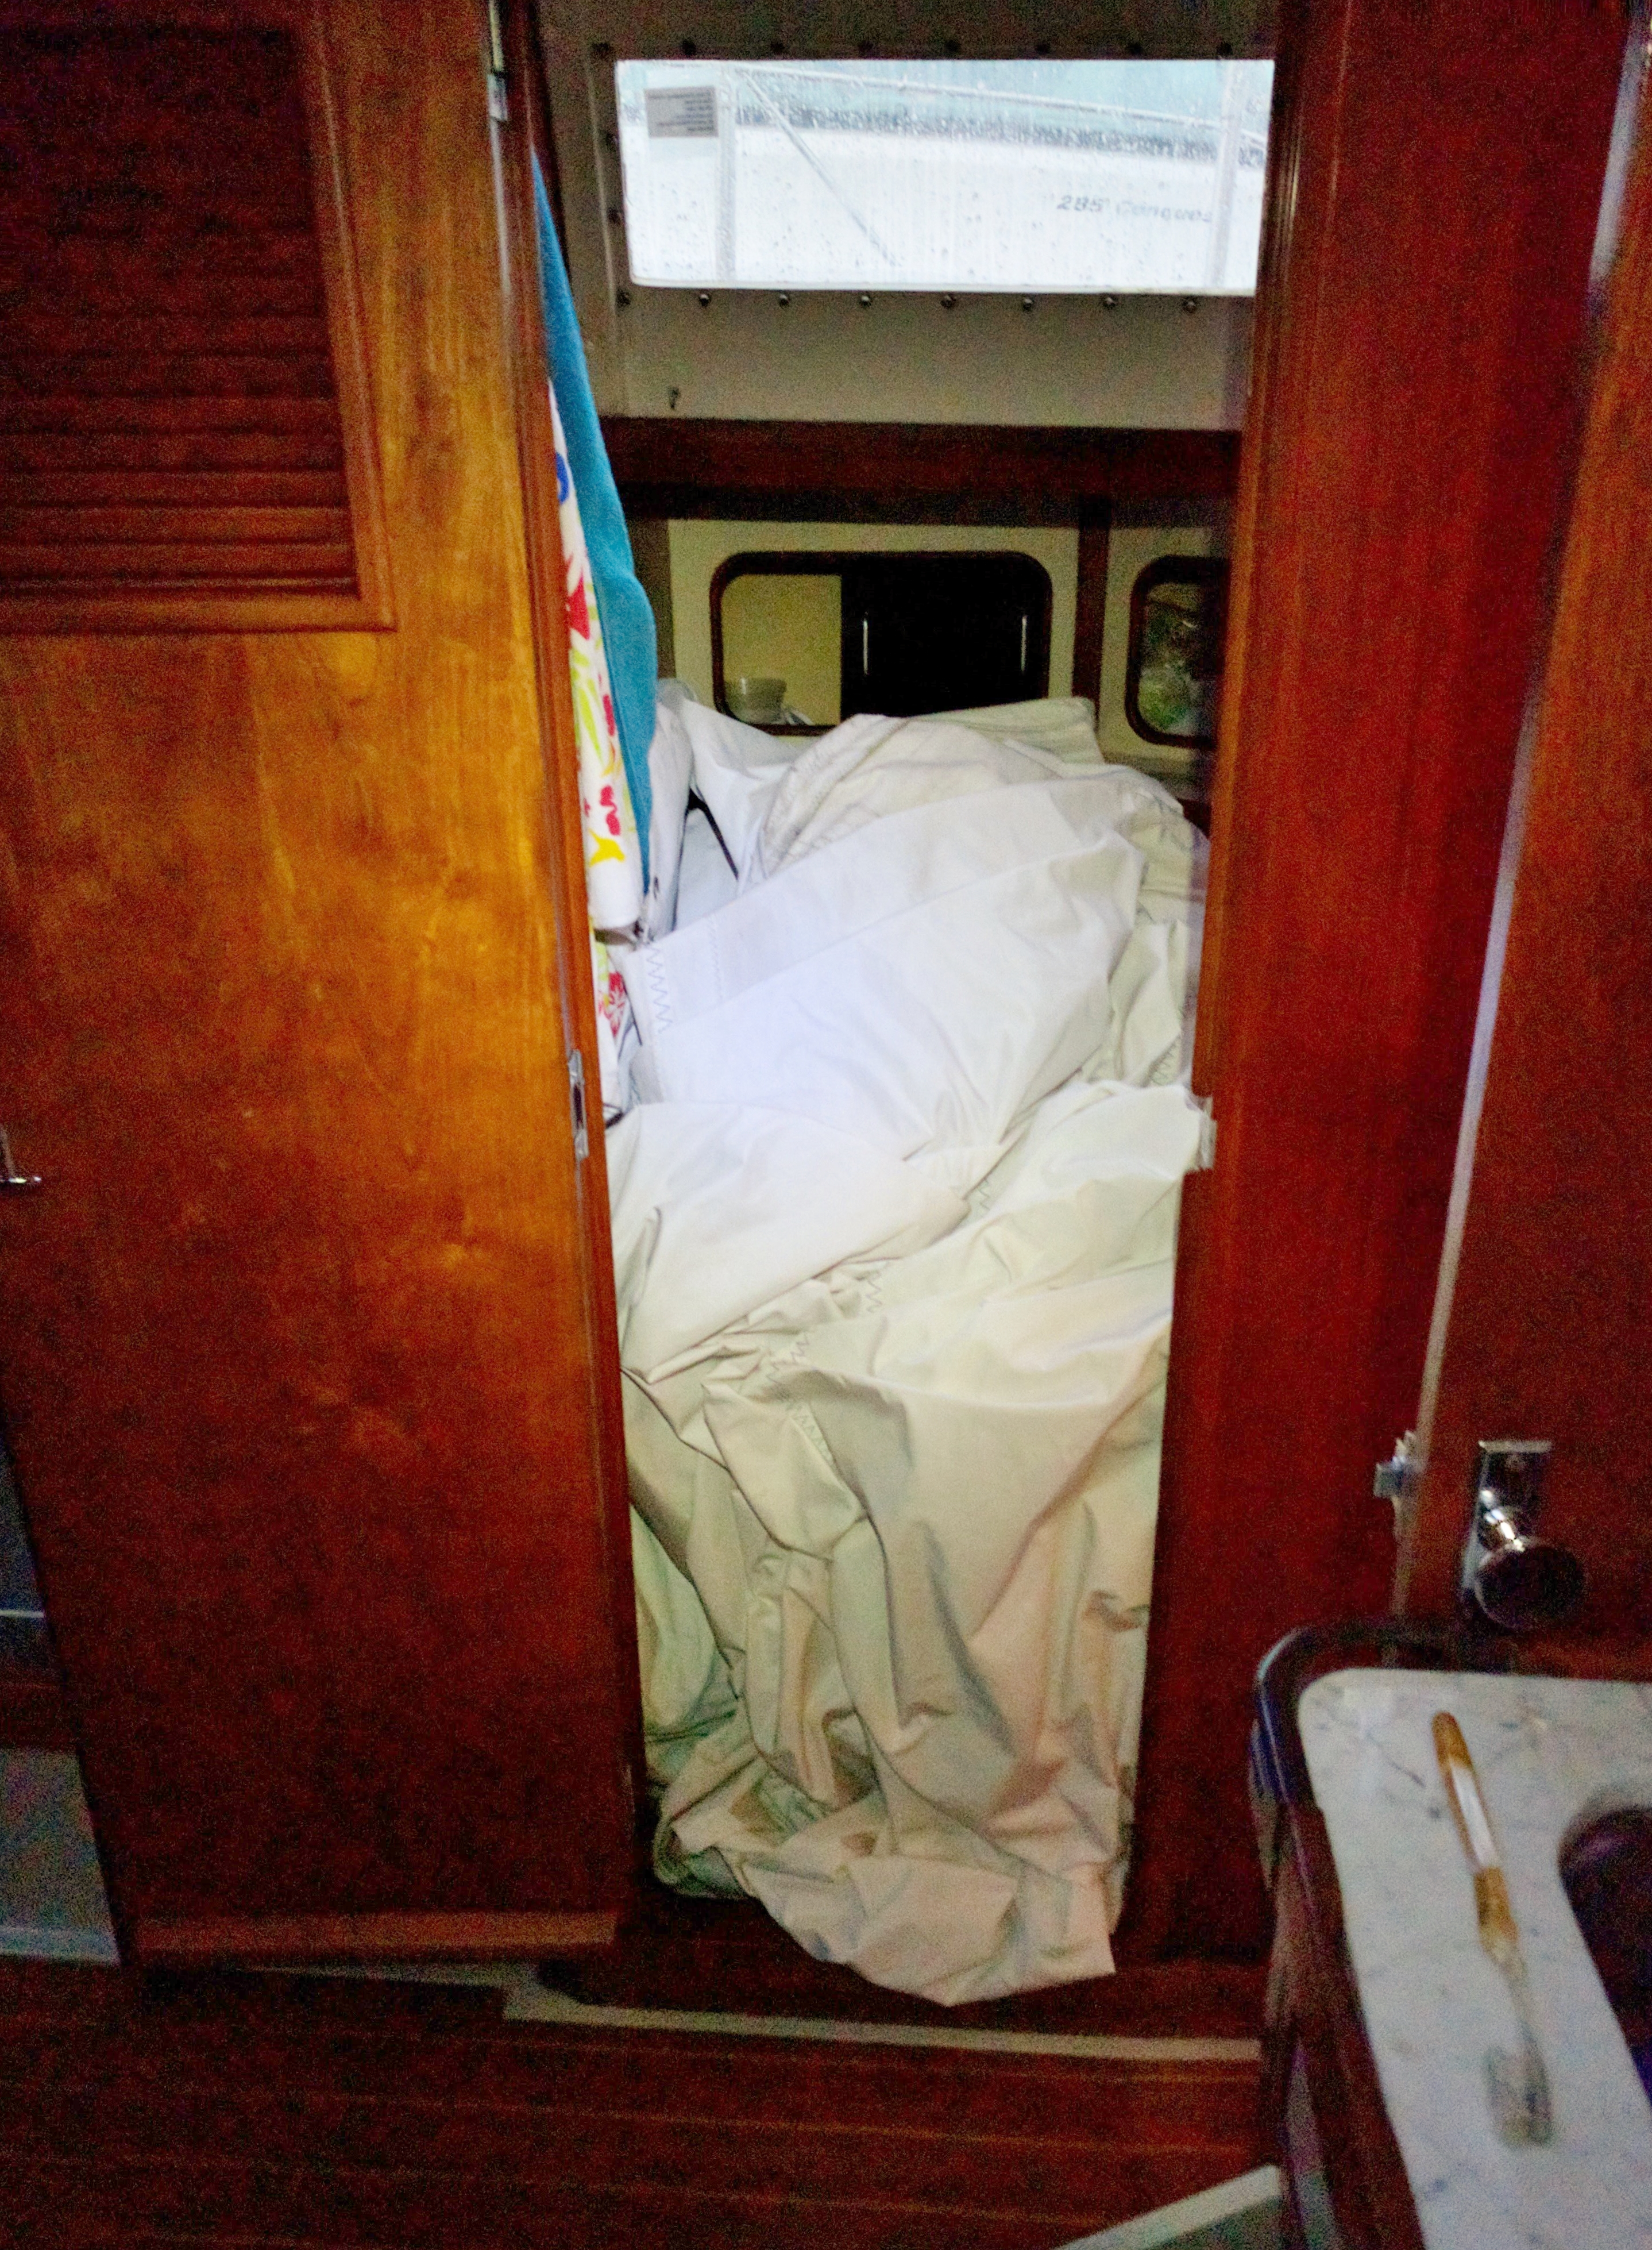
This was the first time we had taken the genoa down! Dumbly, we didn’t fold it, and found lugging a heavy unwieldy large sail into the cabin was really difficult. And the head was the best place to store it out of the way of other projects!
Here’s what I needed:
A ⅜” – ½” thickness stainless steel bar, about 1 ¼” width by 10” length, with a ½” hole drilled in each end. Preferably in polished 316 grade SS with the corners radiused (rounded).
Finding this proved to be much harder than expected.
The 2 link straps with the holes in them are what need replacing, and while at it we might as well do the bottom solid bar too, replacing with one continuous piece.
Finding a Machine Shop
My rigger who did the inspection last year had mentioned a machine shop could make up a new solid stainless steel bar no problem for about $80-90. I had also heard other sailors recommend machine shops for this sort of thing, and books like Capn Fatty’s Buy, Outfit, Sail had gushed about how machine shops can easily fabricate almost anything you can think of for a great price.
Seattle is a large city with a big marine industry, so I thought I’d have no problem finding one to do the job.
Here’s what I learned:
- Machine shops aren’t readily familiar with marine needs. Their business is making metal for construction and land building projects. Most shops didn’t have 316 grade stainless on hand, and none had polished (finished) stainless.
- Seattle machine shops are nowhere near as cheap as my Anacortes rigger thought.
- A $300 job isn’t too high on the priority list for most shops which generally do jobs for large building contractors on the order of 10’s or 100’s of thousands of dollars.
- Polished 316 stainless steel in higher thicknesses is hard to find.
A Quick Tutorial on Stainless Steel
During this 3 week process I learned a lot more about stainless steel (SS). The wikipedia entry on stainless steel explains this in great detail. Here’s the short version of what you need to know:
- The grade of stainless tells you it’s composition, and for boat rigging you want 304 or higher. 304 is also commonly referred to as 18-8, which is the percentage of chromium and nickel in it. 316 grade is like the gold standard for marine rigging. It’s the most corrosion resistant (ignoring for the moment specialty grades like Nitronic 50 which are even more rare and hard to find). It’s also harder to find than 304.
- The finish of SS is important to its corrosion resistance.
- Mill finished steel is how it comes straight from the steel mill – unprocessed and slightly bumpy. Mill steel is less corrosion resistant on a boat, presumably because it’s not smooth – little salt crystals will happily take up residence in that textured surface.
- Mirror polished or brushed polish finish is smooth and mirror-like, and this is what’s preferred for marine rigging. Walk around your marina and you’ll notice most forestay plates are mirror polished.
- There’s also a finish called 2B, which an electropolishing shop recommended if I couldn’t find mirror polished. However I was unable to find a machine shop with 2B finish either.
- Electropolishing is a means of finishing steel (without mechanically sanding/grinding it) that increases its corrosion resistance. Rail Makers in Everett and Art Brass in SODO can do electropolishing. Art Brass never returned my voicemail.
- Unpolished stainless can be turned into polished by mechanically sanding with a procession of grits, but it’s very time consuming. No machine shop I talked to wanted to do it, and implied it would be prohibitive in labor cost.
A forestay tang will take frequent salt water baths from wave spray washing over the bow, so I wanted to do this right and do it once – not settle for a quick fix which might start corroding 5-10 years from now. If the finish were just about aesthetics I wouldn’t care too much, but the 2-3 riggers I talked to all said the finish was important to corrosion resistance.
Machine Shops Near Seattle
In the end I called 3 to 4 machine shops from Seattle to Everett, and 2 metal finishing shops that can do electropolishing.
- Pacific Sheet Metal. Matt was very helpful and we had a series of emails and phone calls to figure out if he could get 316 SS and/or polished SS. Ultimately though he wasn’t able to get polished SS, and I would’ve had to wait several weeks to combine my order with a bigger one to hit minimum order requirements with the supplier.
- Pacific Industrial Supply didn’t seem like they really wanted to do this small job. They only had mill grade too and in order to get polished they said I’d have to order 1000 feet (I only needed 10 inches).
- Eckstroms in Everett.
- Ballard Mill Works. I didn’t call them due to bad Yelp reviews – a sailboat on its way to Mexico had their fabrication job fail.
MacGyver’ing It with Off-the-Shelf Products
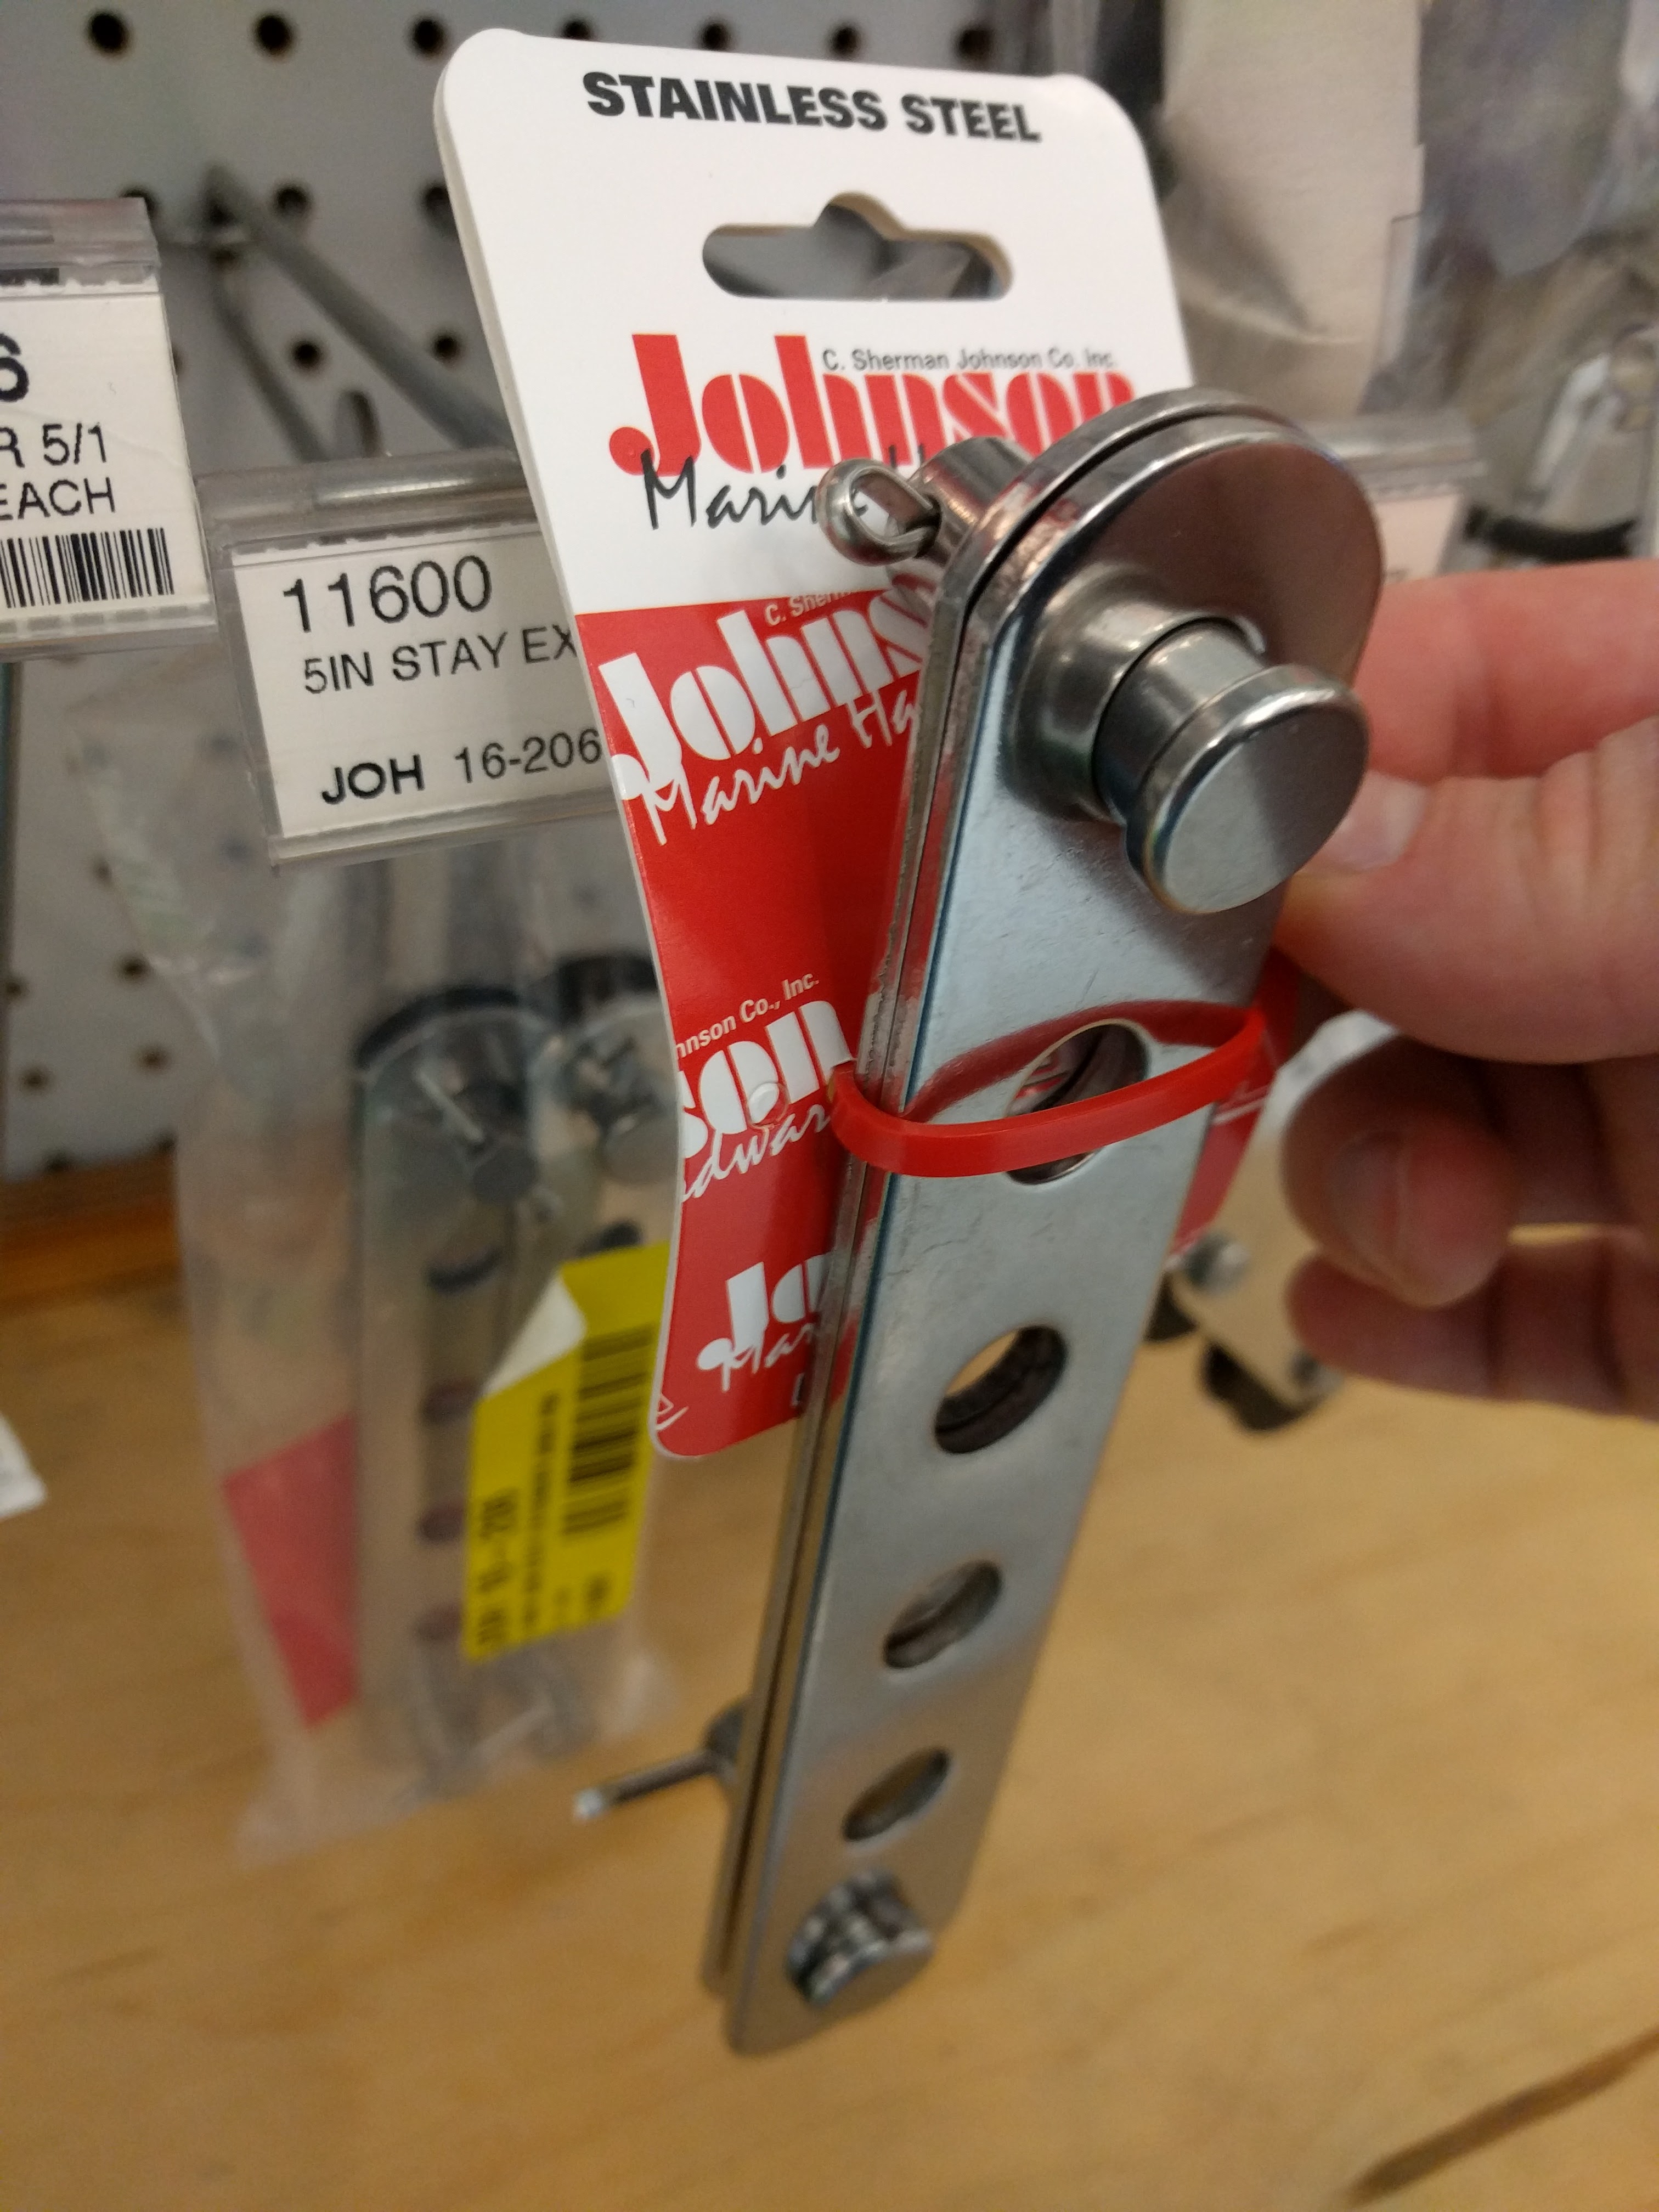
Another option suggested by one of the riggers I talked to was using an off-the-shelf Schaefer “integral toggle link.”
The problem was only a few lengths are available – either 10 ⅛” or 12 ⅛” at the ½” pin size (and the 10 ⅛” is only ¼” thickness, intended for smaller boats). I needed 8 ½” pin-to-pin length. My furler toggle didn’t have a lot of room left to thread in more, and a rigger pointed out that adding ~2″ extension would raise the furler and genoa head by 2″, which might mess up the sail shape or the halyard clearance at the top.
Later I realized Fisheries also sells Schaefer’s “standard” sized toggle links which are 4 ⅝” pin-to-pin for the ½” pin. *If* I left my bottom link in the stemhead fitting, I needed 5 ⅝” pin-to-pin, so that’d get me within an inch – within adjustment range of my furler turnbuckle!
And tada – it worked: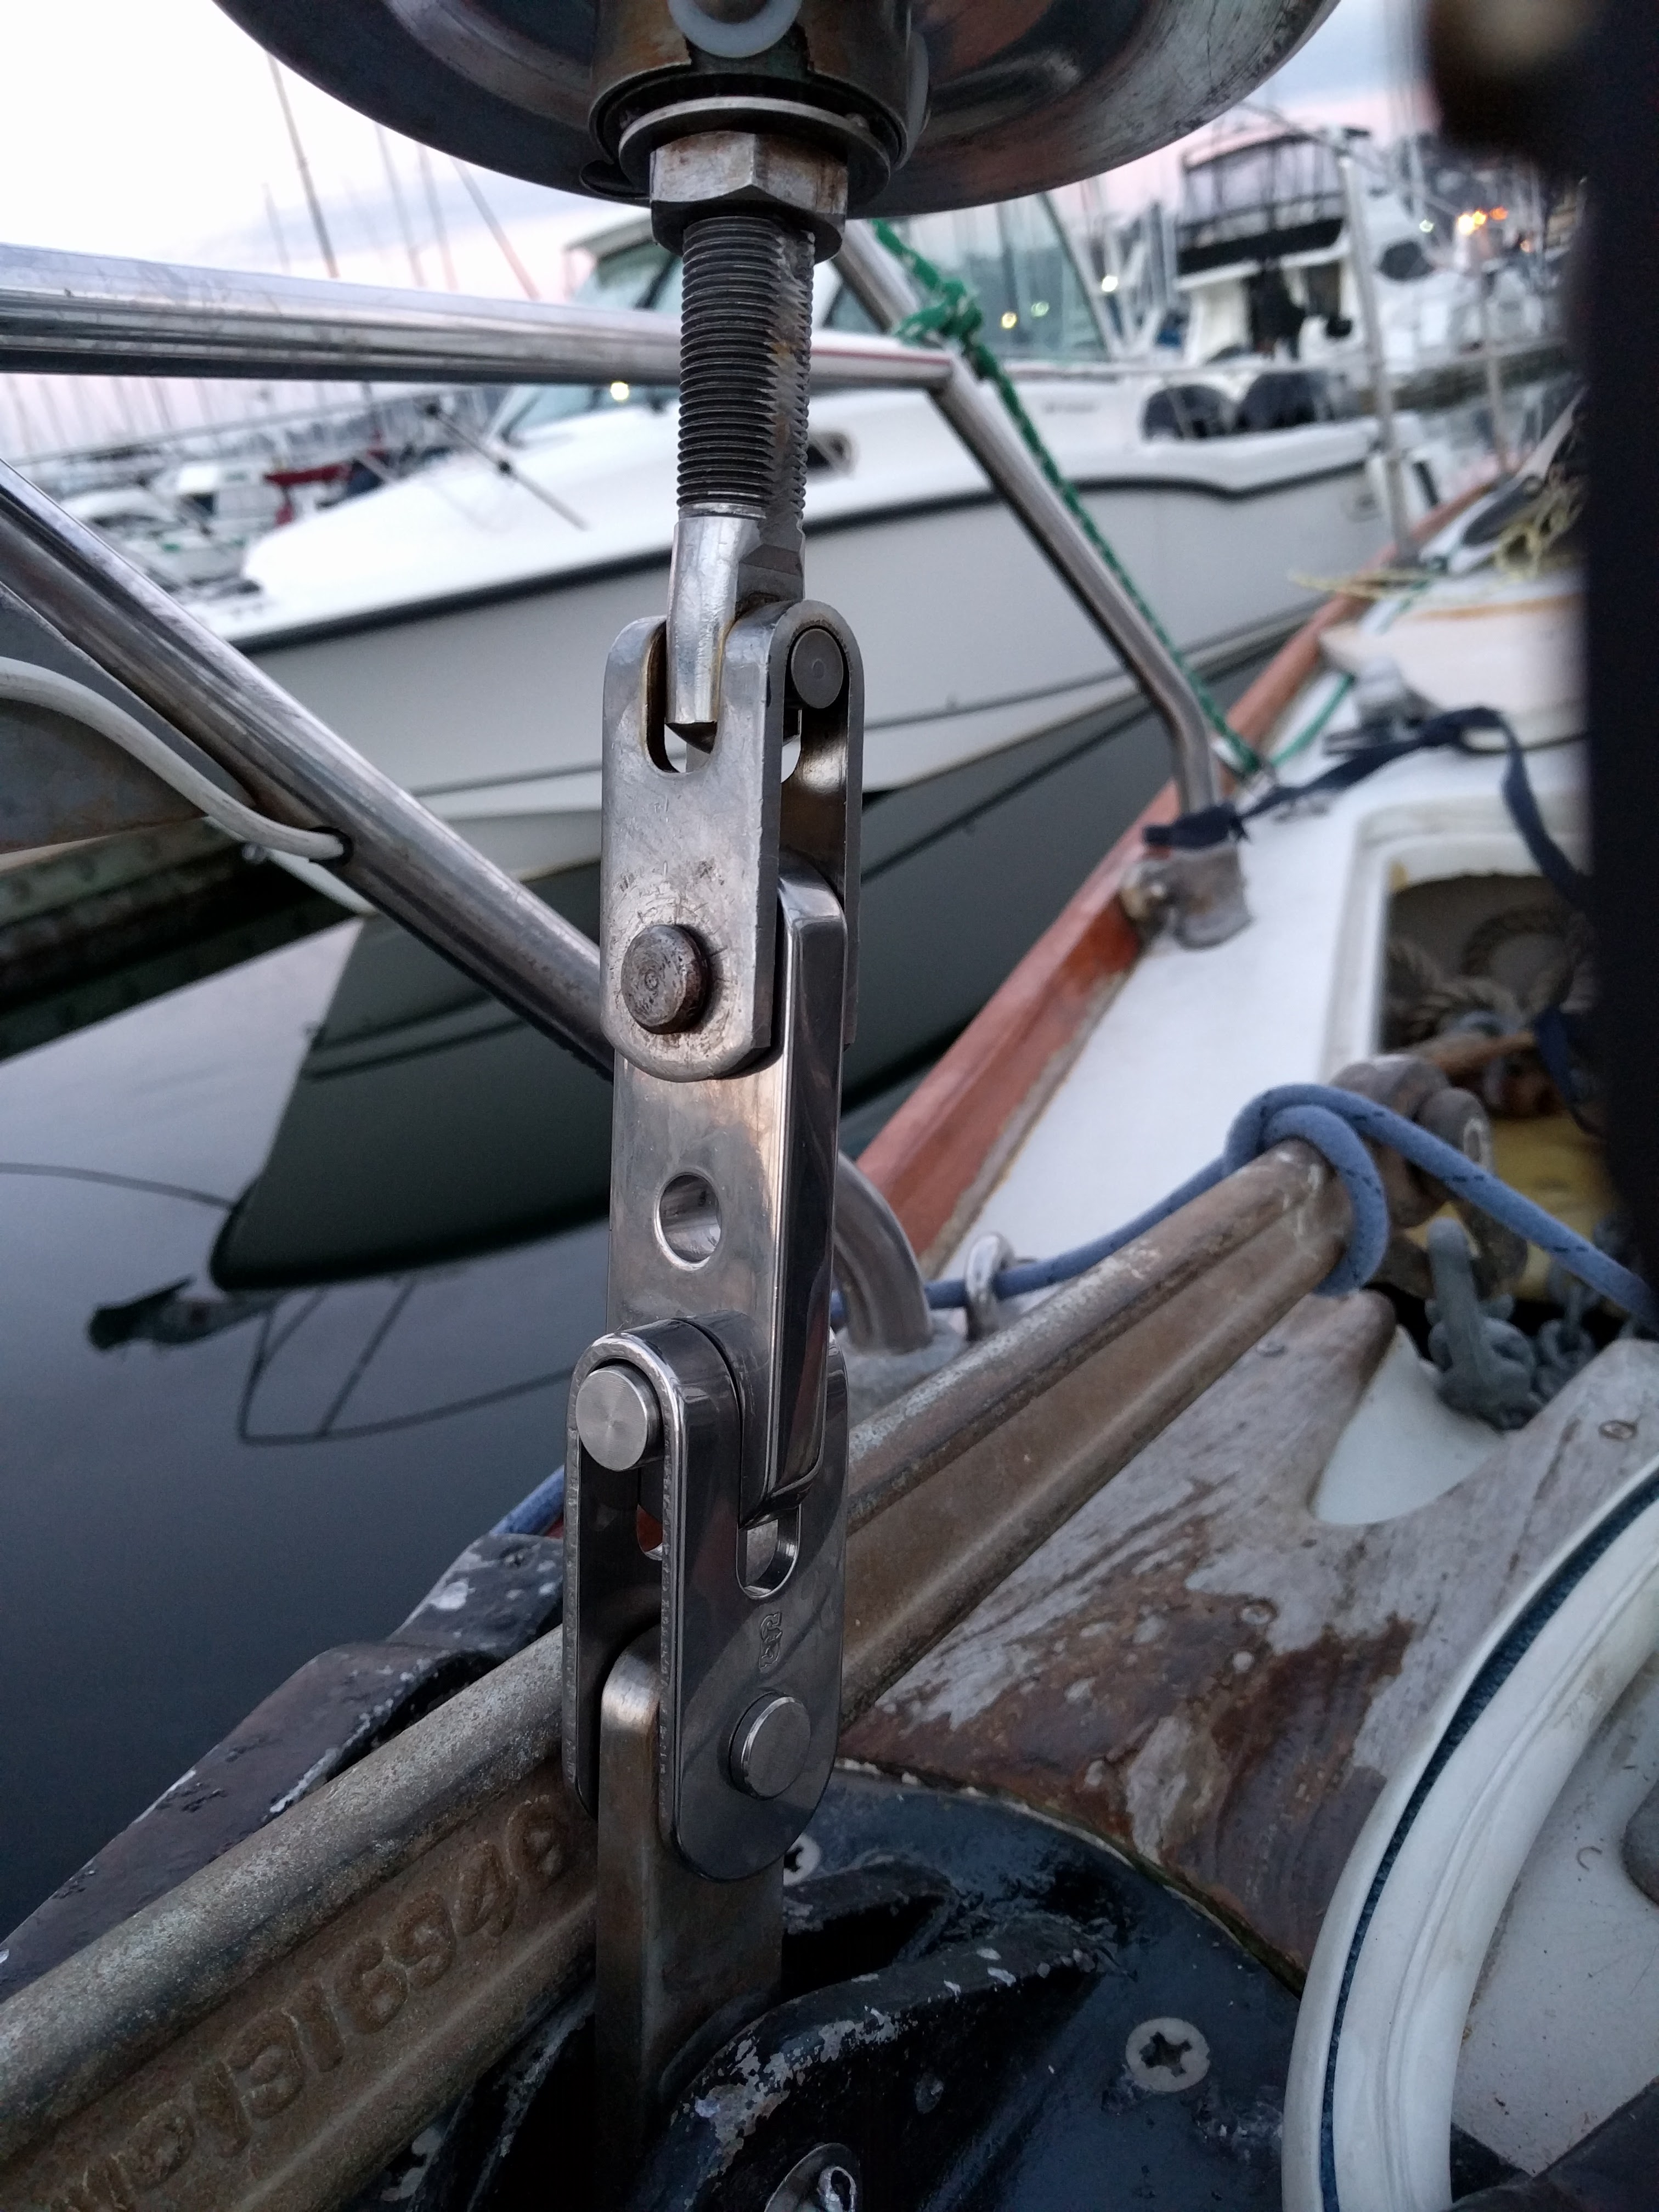
I also realized if necessary I could adjust the length with additional off-the-shelf toggle links. Most toggle links are about 2”, so I could always extend the stay by 2” if needed – adding redundant 2-axis flex, but it wouldn’t really matter as long as the forestay was kept properly tensioned.
Inspect Your Rig!
I’ve seen other boats in the marina with similar thin link tangs like this connecting their furler to their stemhead. I’m surprised these plates are even sold – in my opinion they’re far too inadequate for the purpose they’re intended to be used for. Also in most installs they tend to torque and lever against the clevis pins in odd ways that are bad for metal fatigue / work hardening.
Lessons learned here:
- Inspect your rig carefully and often (every 3 months at least). I do this but had missed this crack because it was in a spot that is difficult to view. You really need to get your head within 2 feet or so of every clevis pin and termination. Inspecting from a standing position isn’t good enough.
- Machine shops might work for some people, but in practice I found few machine shops know much about sailboat requirements and many aren’t eager to do small jobs.
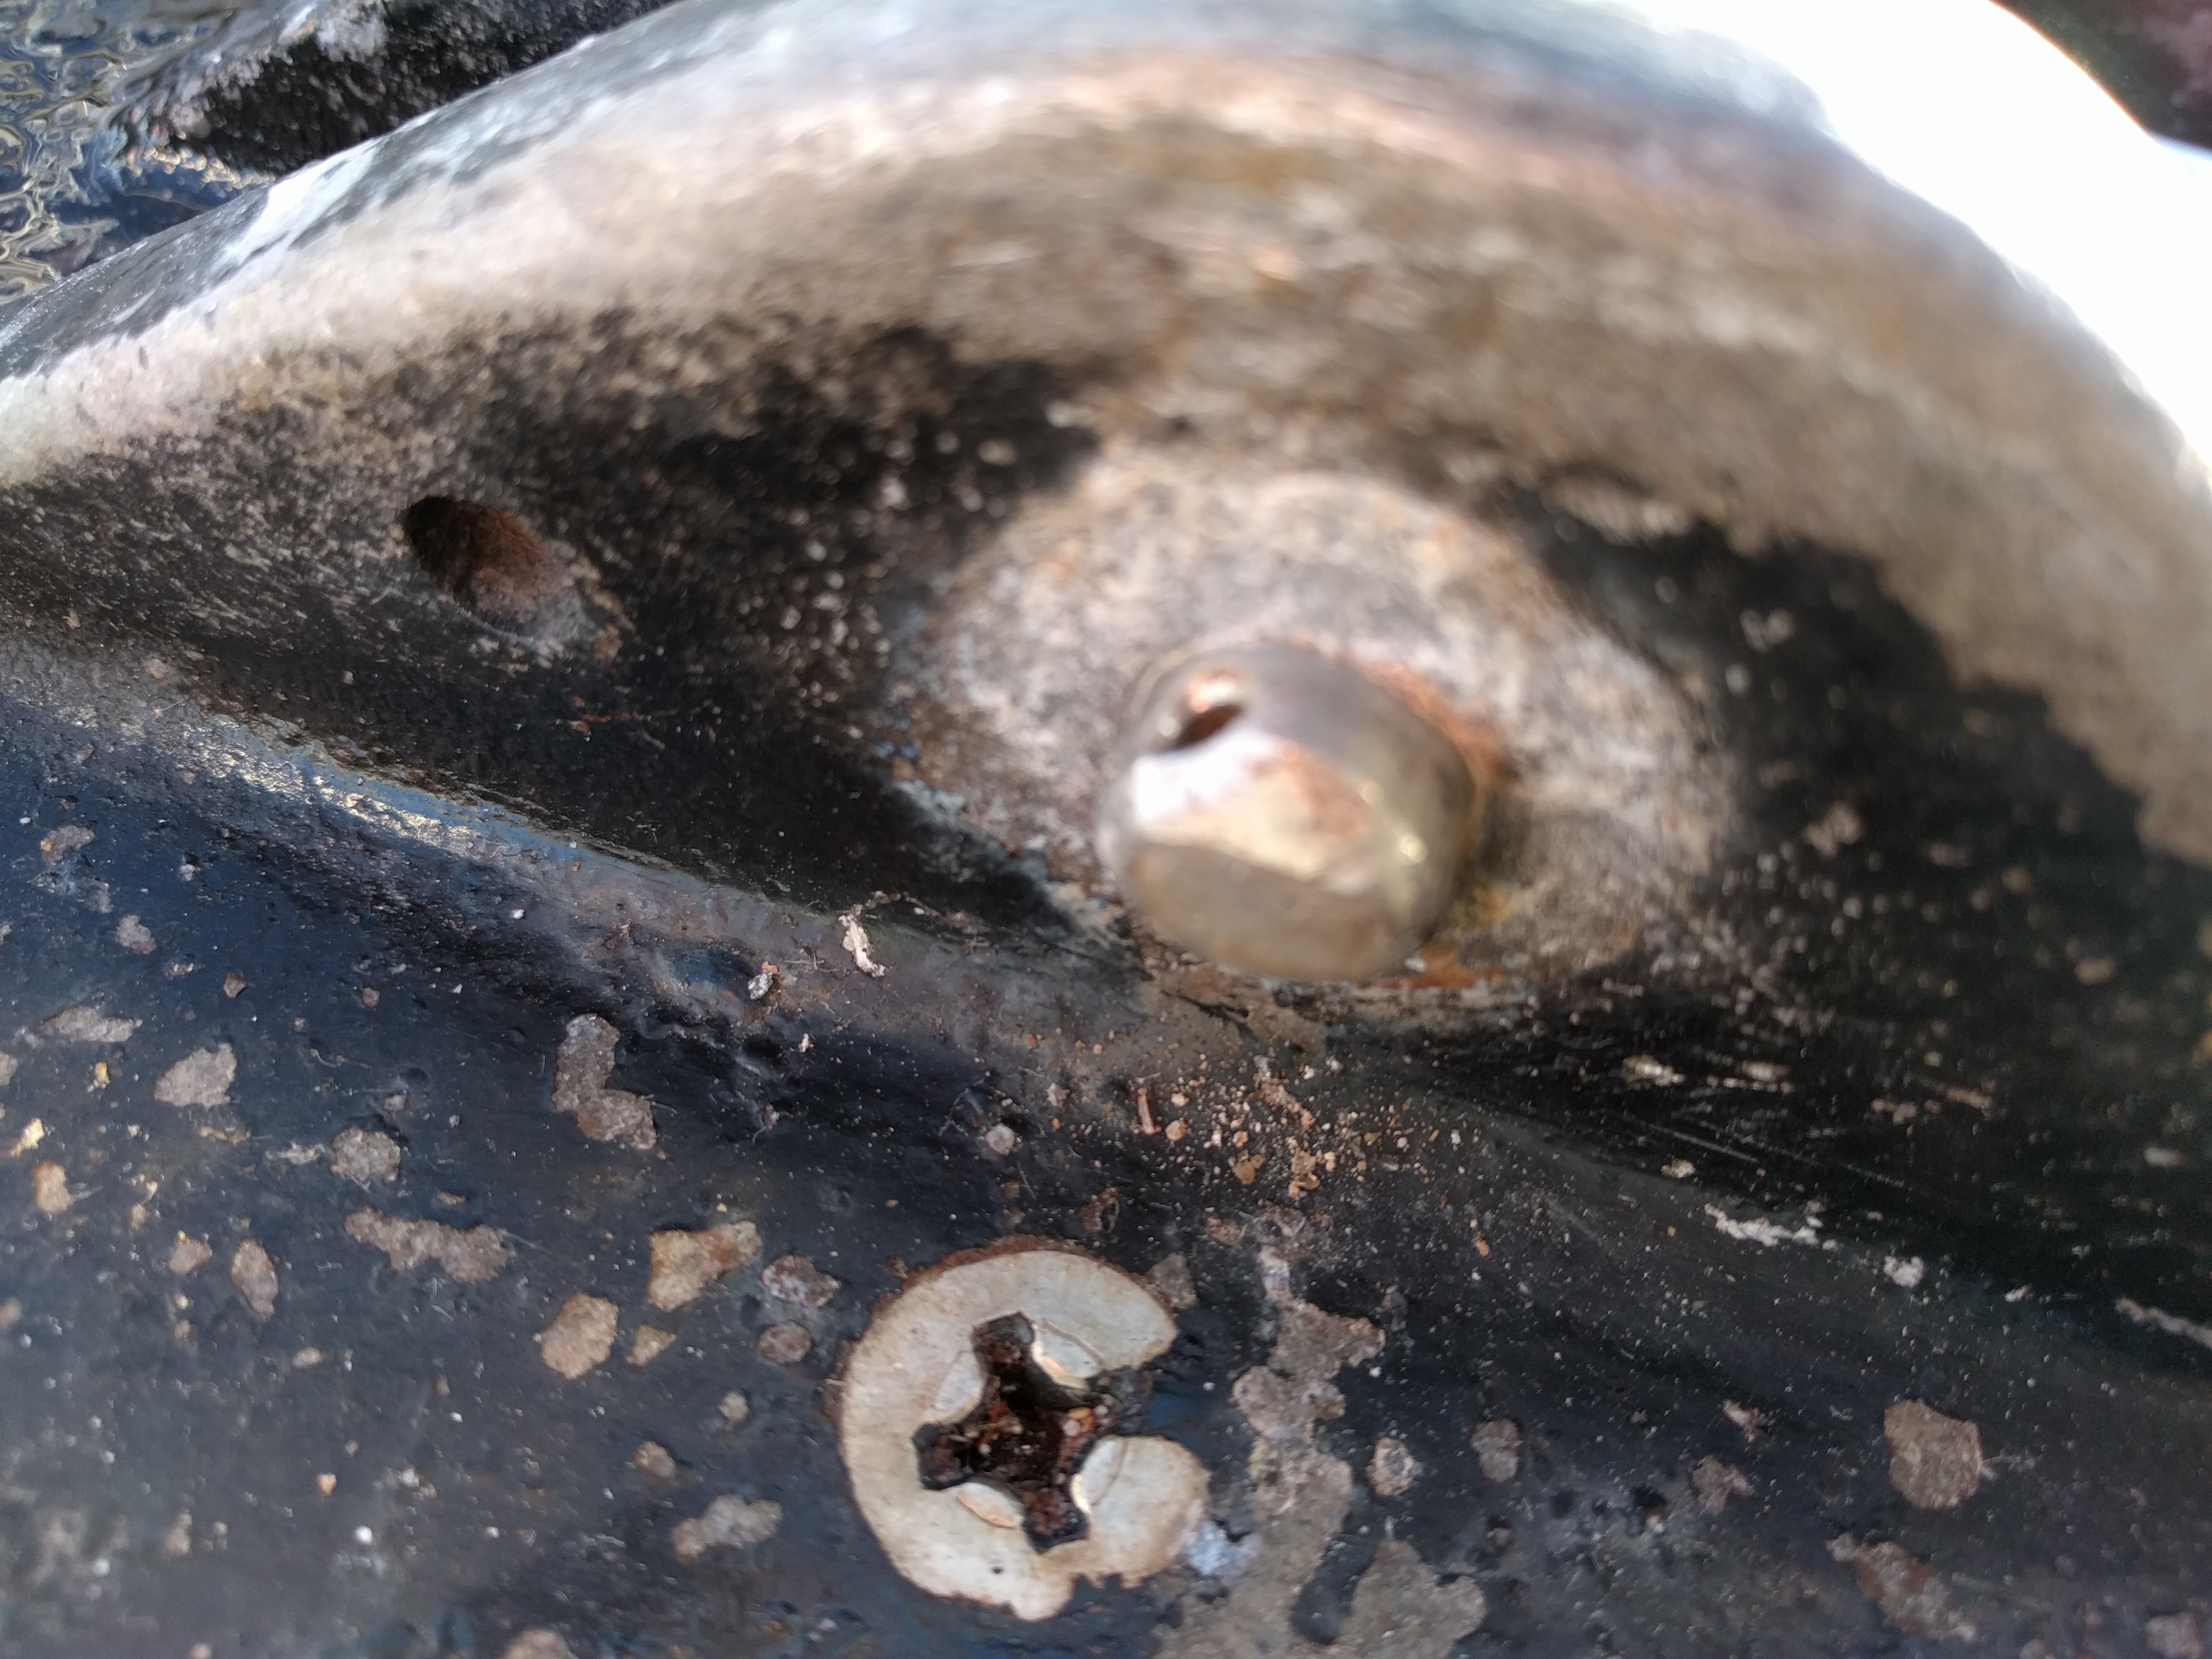
Remaining Problems:
- One thing I still haven’t figured out is how to get the bottom clevis pin out of the aluminum stemhead. If anyone has any ideas I’m all ears. I’ve tried PB Blaster, heating with a 1200 watt heat gun, and hammering. I don’t have good access for a drill because straight line access would have to go through the chocks (and am not sure that would even work – drilling ½” stainless steel is really hard).
Patrick: good post! I can’t see the crack in your first photo but I’m going to check mine ASAP.
On removing the clevis pin, I would first drill a small hole thru the center of the pin (maybe 1/8″ or less) using a right angle drill (you can rent them from Home Depot) and use a cobalt bit (slow speed and use cutting oil)–this will be easy. Then gradually increase the size of the drill bit until you can remove it. Don’t drill into the aluminum! Hope this helps!
Great post. I had a similar experience with machine shops when trying to get a custom dock roller fabricated for a Thistle. These struggles have made me decide to slowly start increasing my metalworking skills in the hope that I may eventually be able to fabricate some of my own parts.
Short of drilling, I think the only (and preferable) option is to press that pin out. Get yourself a large C clamp and a socket big enough to surround the pin. Put the socket over one side and clamp it down with the other arm of the C clamp on the pin. Then start turning.
Clever idea for using a C clamp. I wouldn’t have thought of that. I think I may try drilling first, since I really don’t want to risk breaking the aluminum stemhead fitting (getting that refabricated would be even more expensive and time-consuming!). And if I can drill out enough of the clevis pin middle then I can use a Dremel sanding/grinding drum to clean out the hole. Thanks for some good ideas to work with now.
If you tightly fill the gap between the two stemhead flanges with a piece of metal or dense wood the compression of the C clamp won’t do any harm.
Patrick, Loctite makes a spray product, Freeze and Release, that freezes the subject part and also introduces a lubricant. It is Loctite part # 996456 and is available at Ballard Industrial (Ballard Hardware and Supply) as well as others. This will take a lot because of the mass you are working with. It will still take a fair amount of force to move and you must be careful not to crack the aluminum.
If you do damage the aluminum, consider grinding off the padeyes and replacing them with a long tang or rod led through the stem and anchored outside the stem. You will see this occasionally as you walk the docks. Schaeffer make a long tang for their roller snarler rigs, or you can have one made at Ballard Sheet Metal who also polish it very nicely.
Frankly, I would replace the aluminum padeyes with rod or tang anyway. Aluminum has a low maximum cyclical load limit, and a headstay fitting will reach that maximum rather quickly.
If you need marine grade stainless steel check with Onlinemetals.com, located here in Seattle. They’ve got a great selection and will fill very small orders.
smaller fabrication shops are better. there are several in Port Townsend, and Seattle. Peters Marine, Whitefab, Hjorth consulting, Collins machine. Boat yards can also do the work, Miller and Miller, Brion Toss. Also polising stainless is fairly easy but labor intensive. Can be done with tools available at Home depot.
pressing the item out is great idea, use a smaller heat source and cold. you want to only heat the aluminum (hole gets bigger) and chill the stainless (pin gets smaller). dry ice or a wart freeze off tool, and a small butane torch. Don’t start a fire!
Wow, never would have found some of those on my own. It’s amazing how much of the marine industry is still advertised by word of mouth and the Yellowpages rather than AdWords.