Warning: This post is pretty technical. In the last week a lot has gotten done – assembled the wire forestay, a new Harken furler, removed the spreaders, cut out a seized clevis pin, got out a second seized clevis pin for a masthead sheave, ran new VHF coax cable through the mast, sanded and painted the mast collar, and did a whole bunch of cleaning.
Assembling a Hayn HiMod Swageless Fitting
I decided to use a Hayn HiMod swageless fitting for the forestay lower connection so that I could measure / cut the forestay to length, not have to get a wire swaged on site, and have a fitting that could be inspected or shortened in the future if needed.
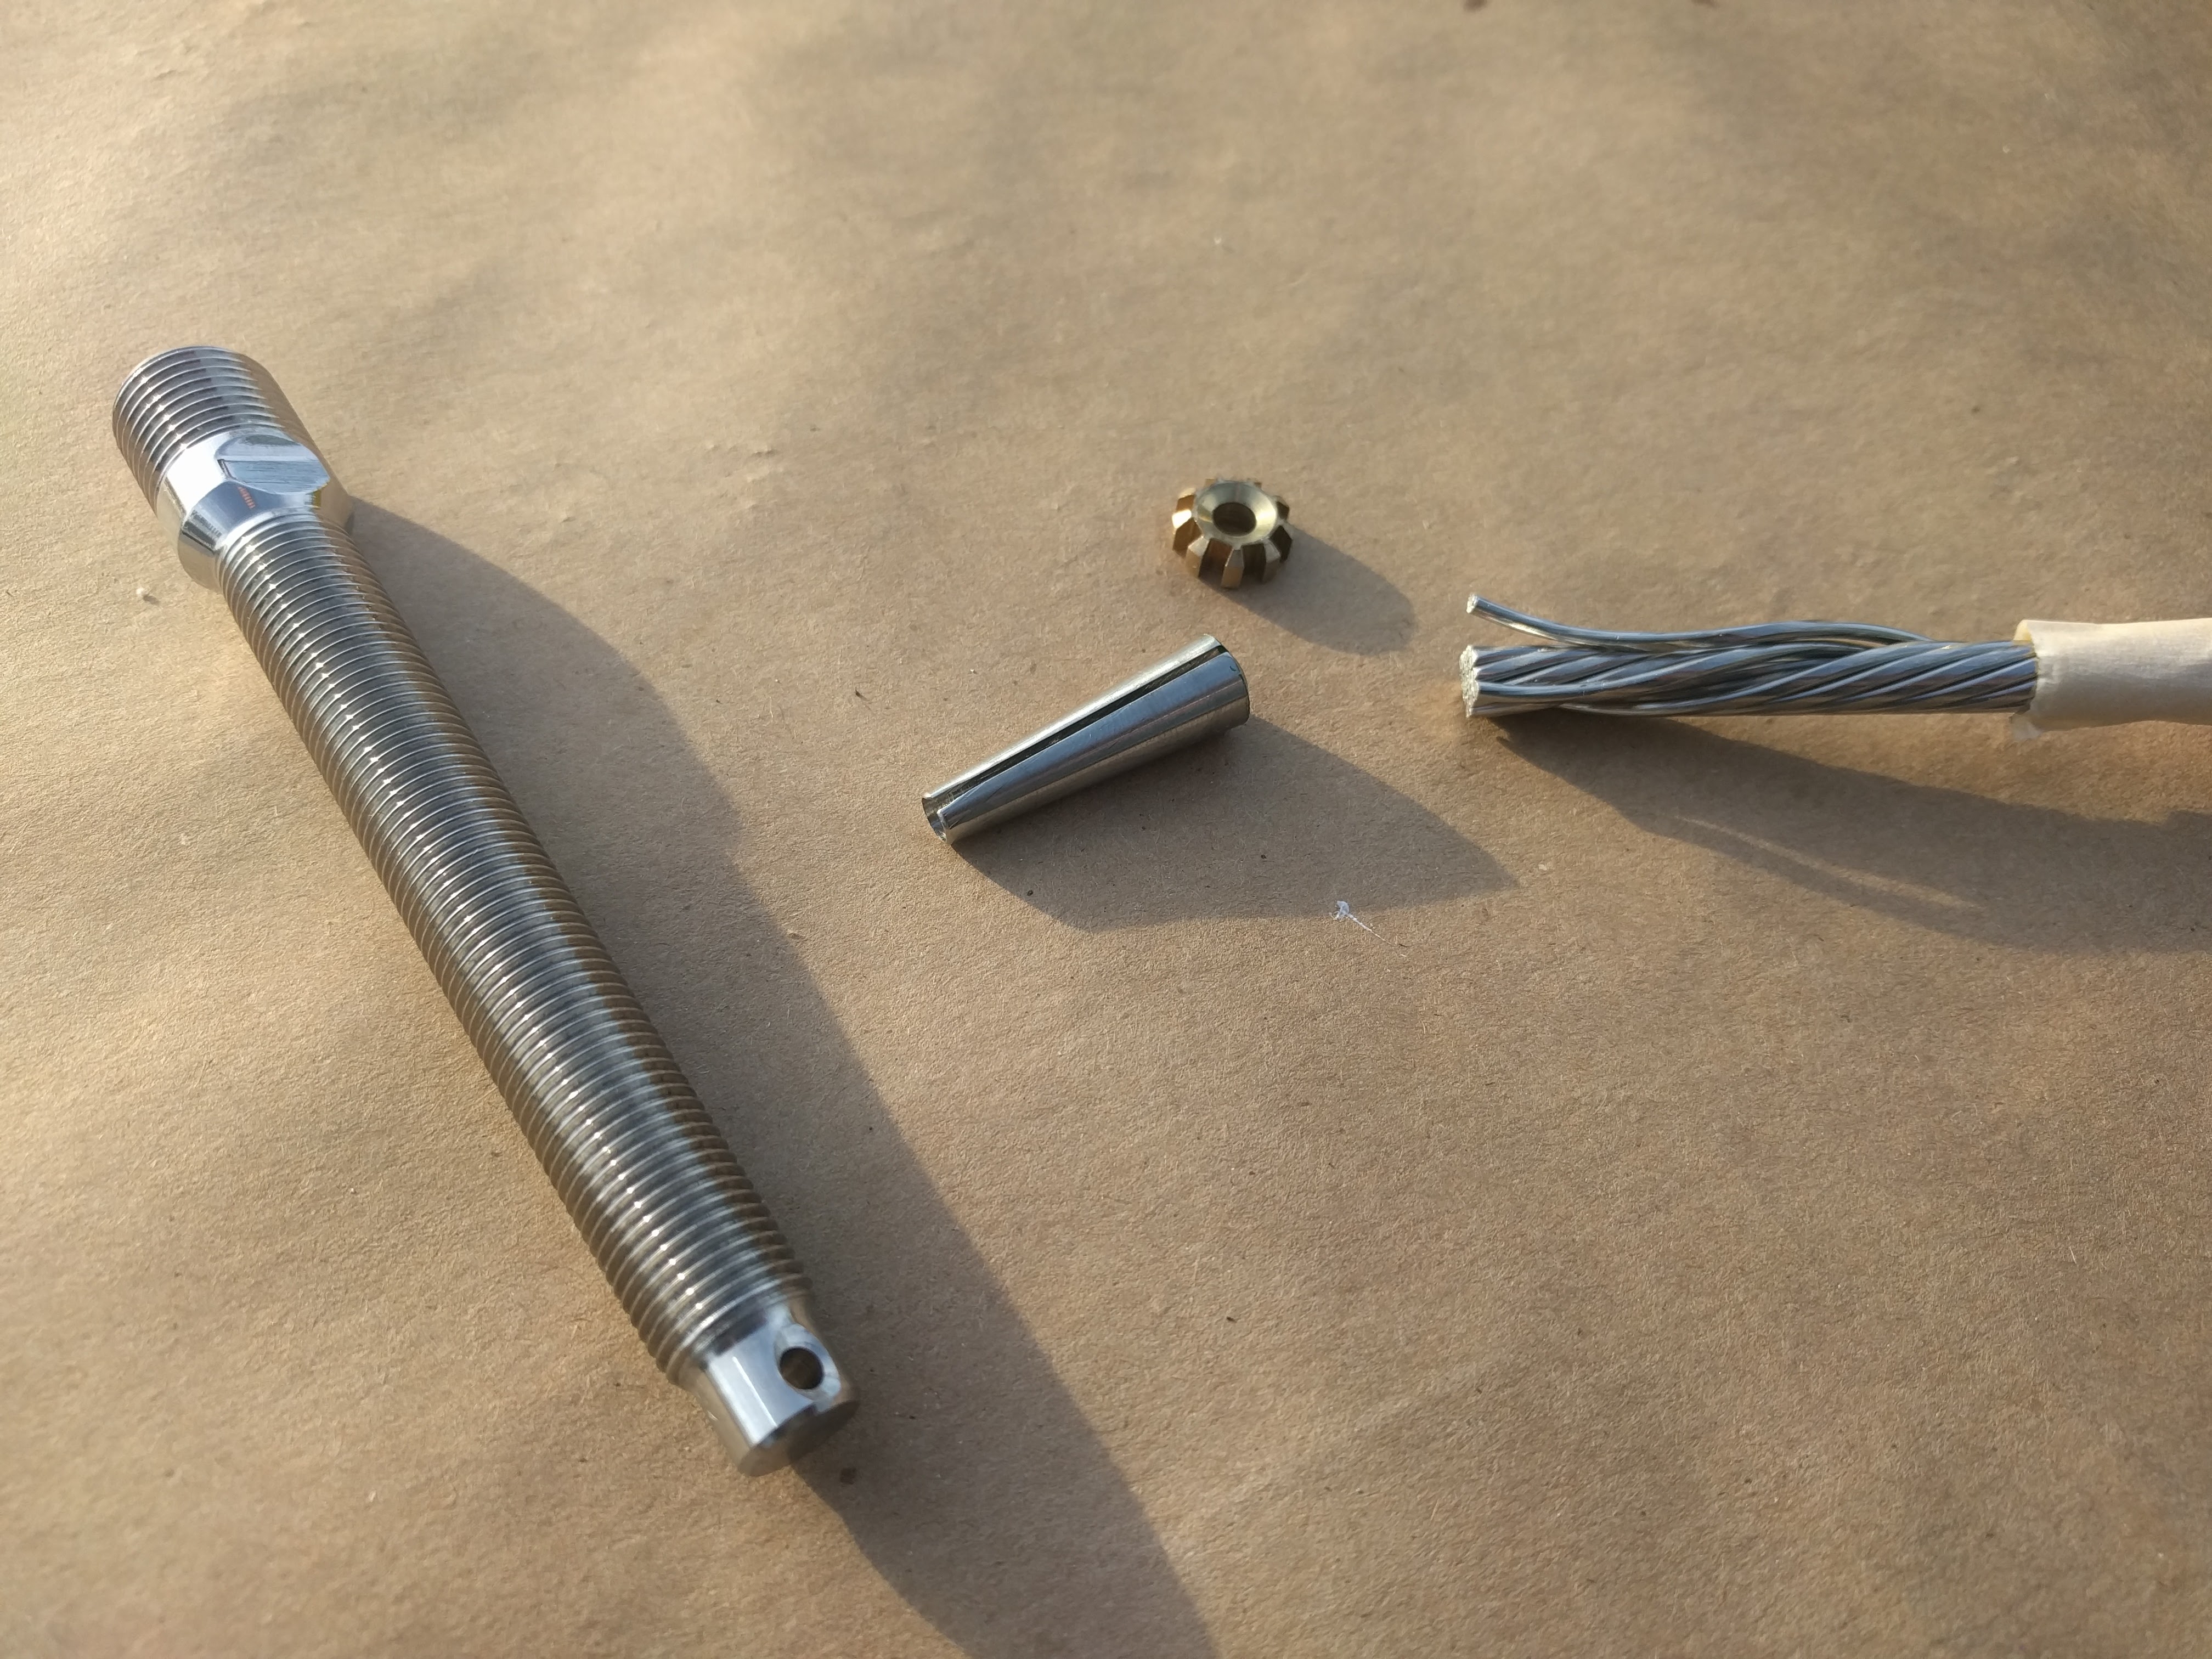
Hi-Mod components: threaded stud, cone, and crown ring. (The body, not shown, is already on the wire)
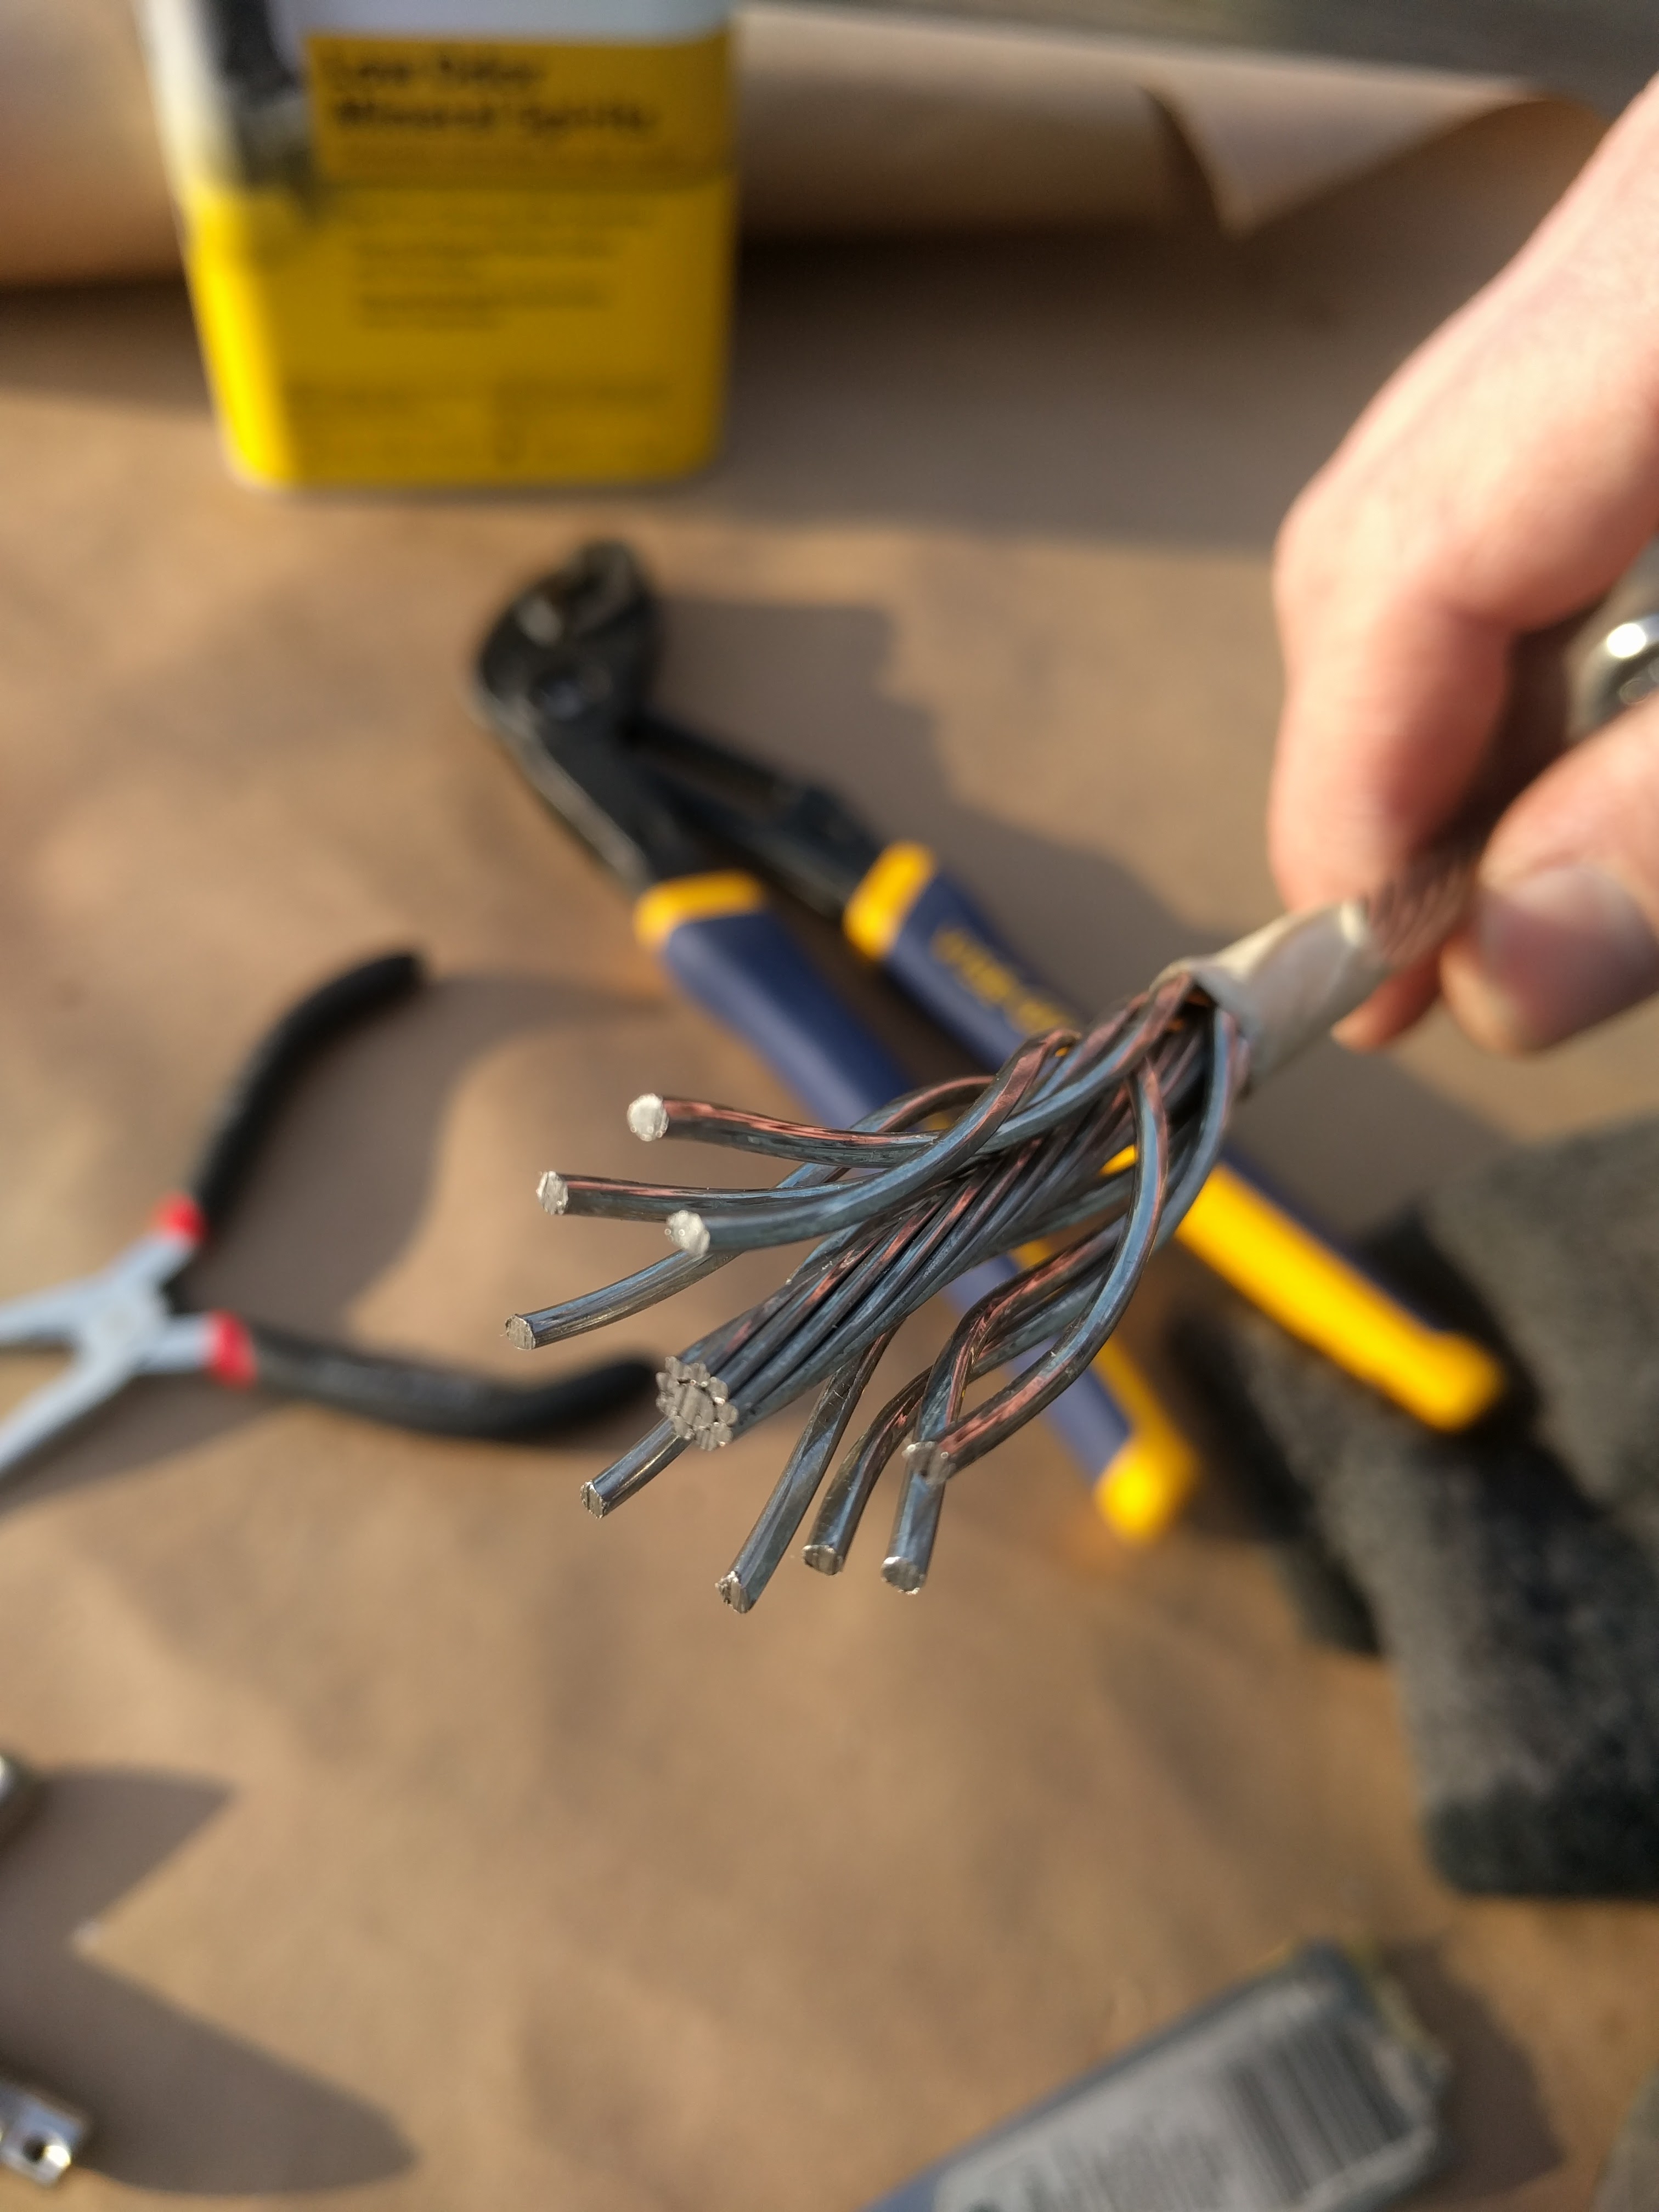
Unlaying the compact strand wire around the core
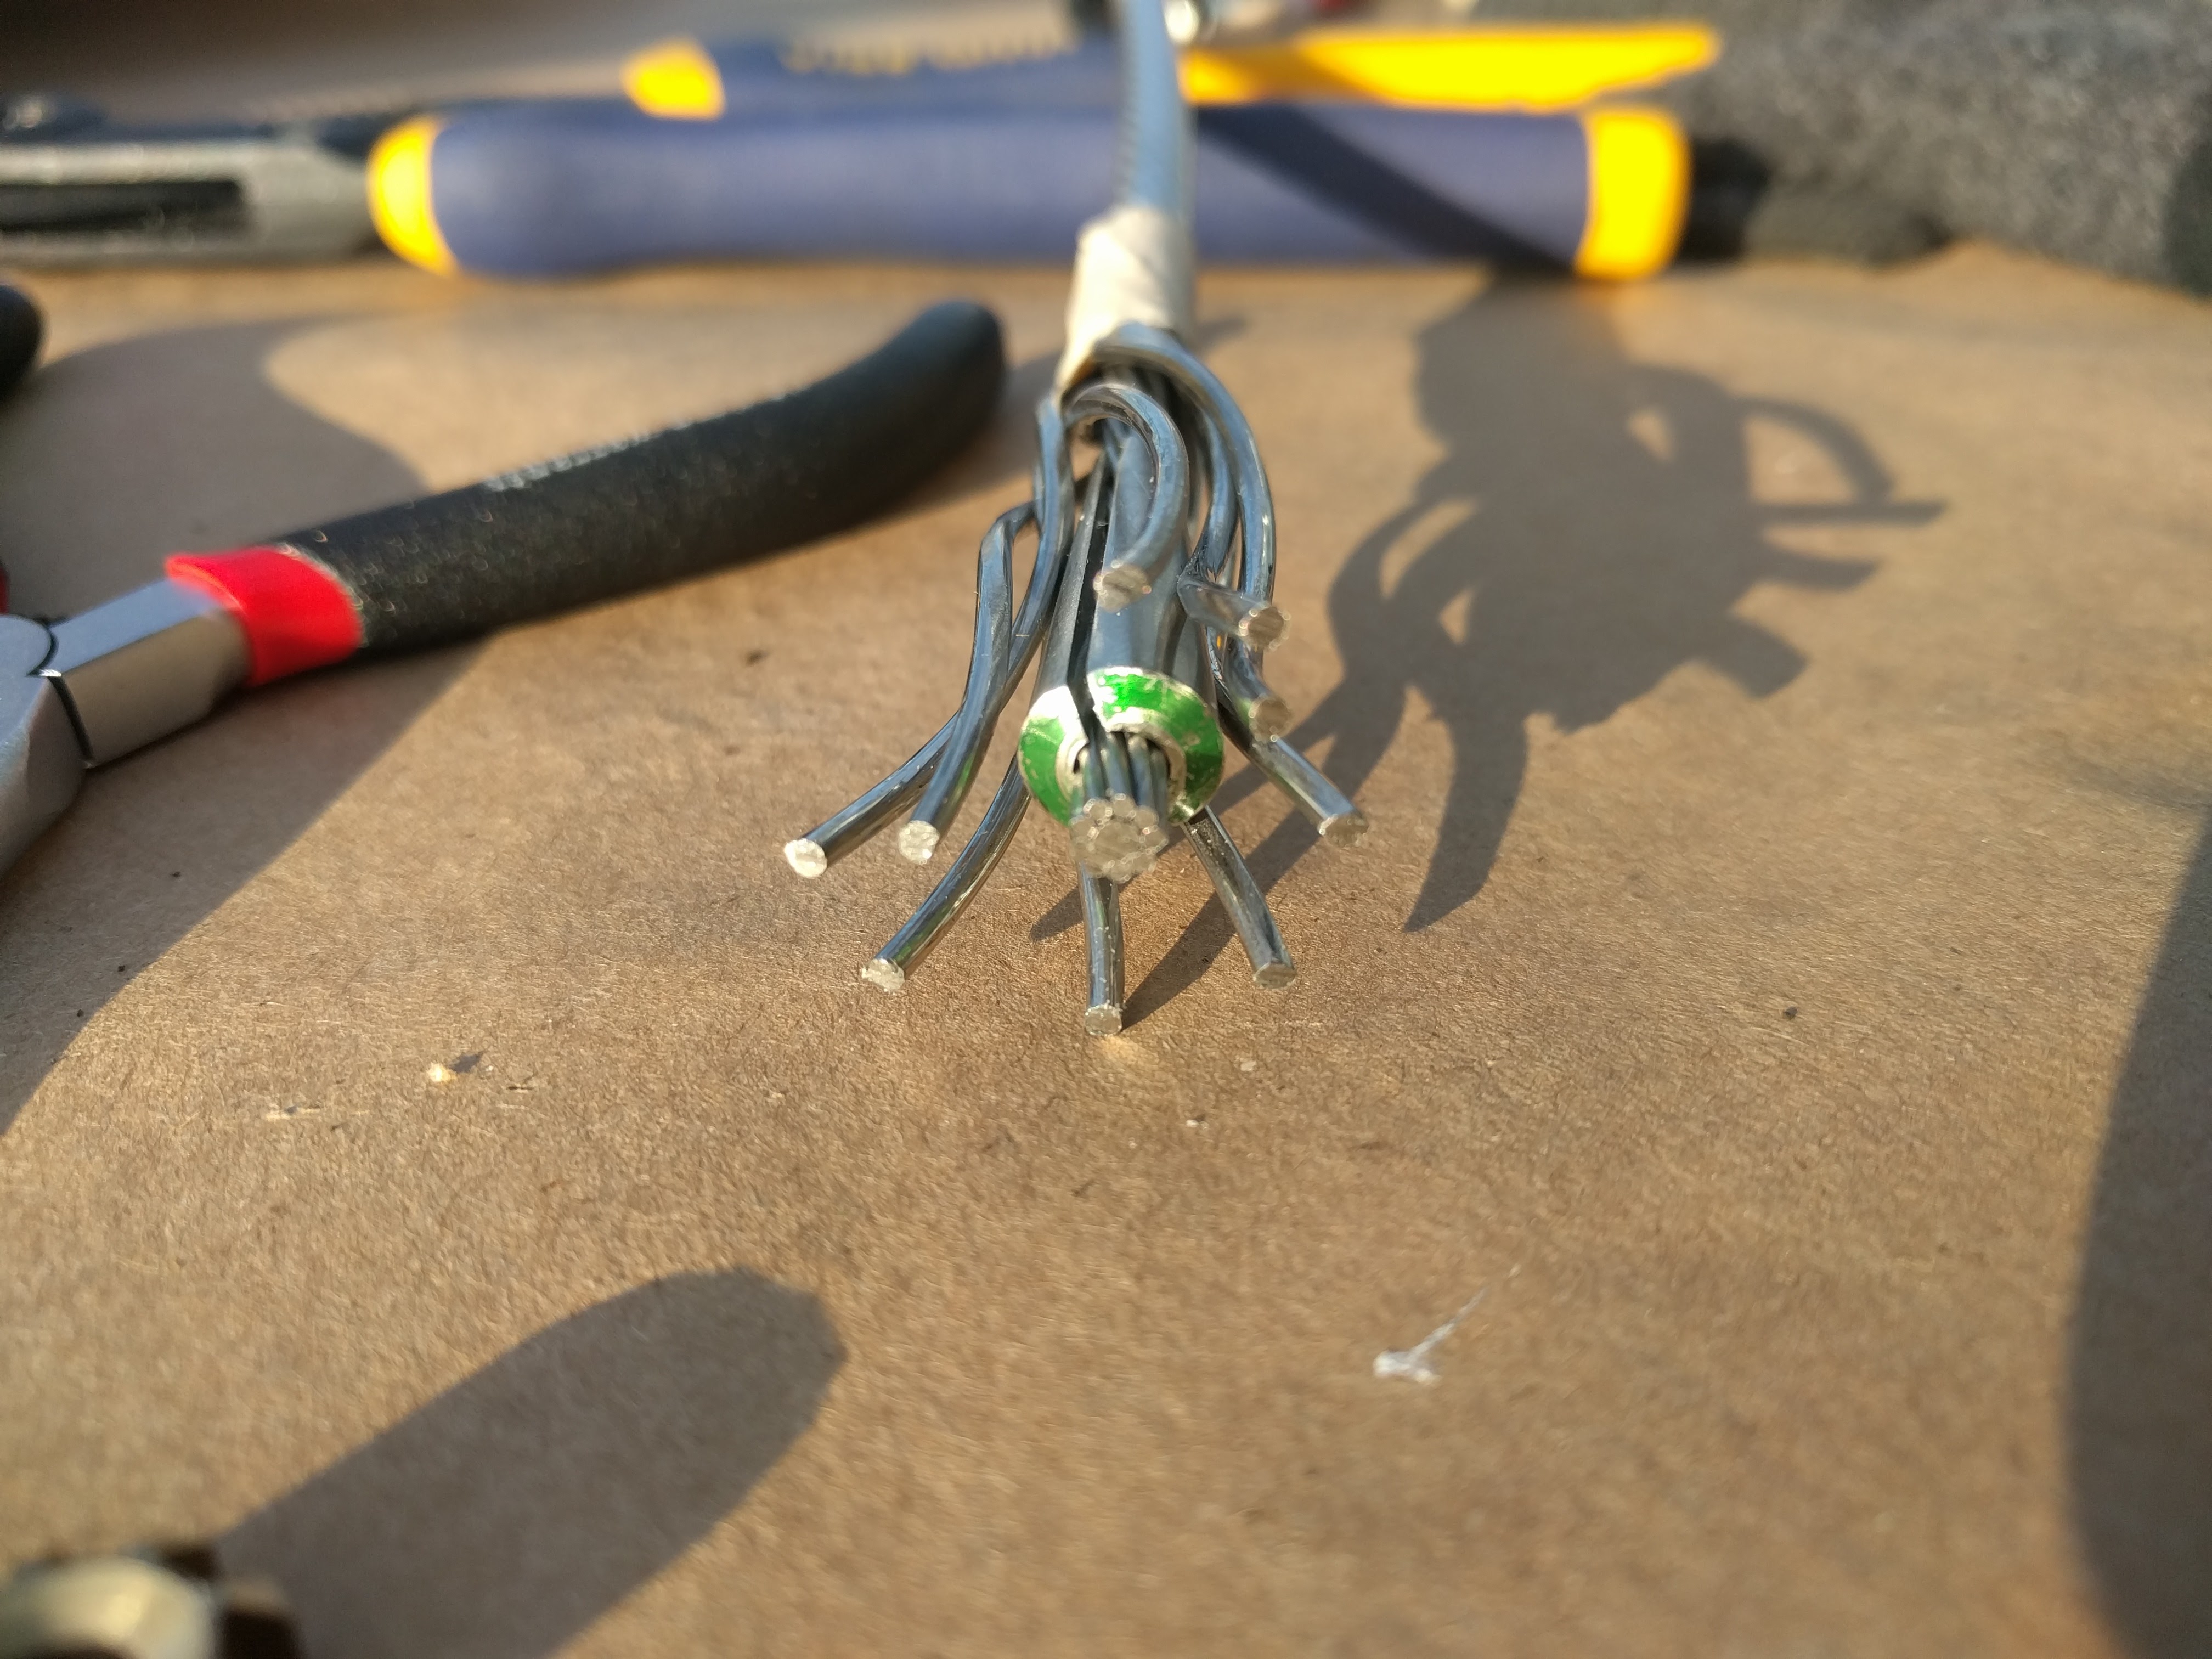
Hi-Mod cone installed on the core
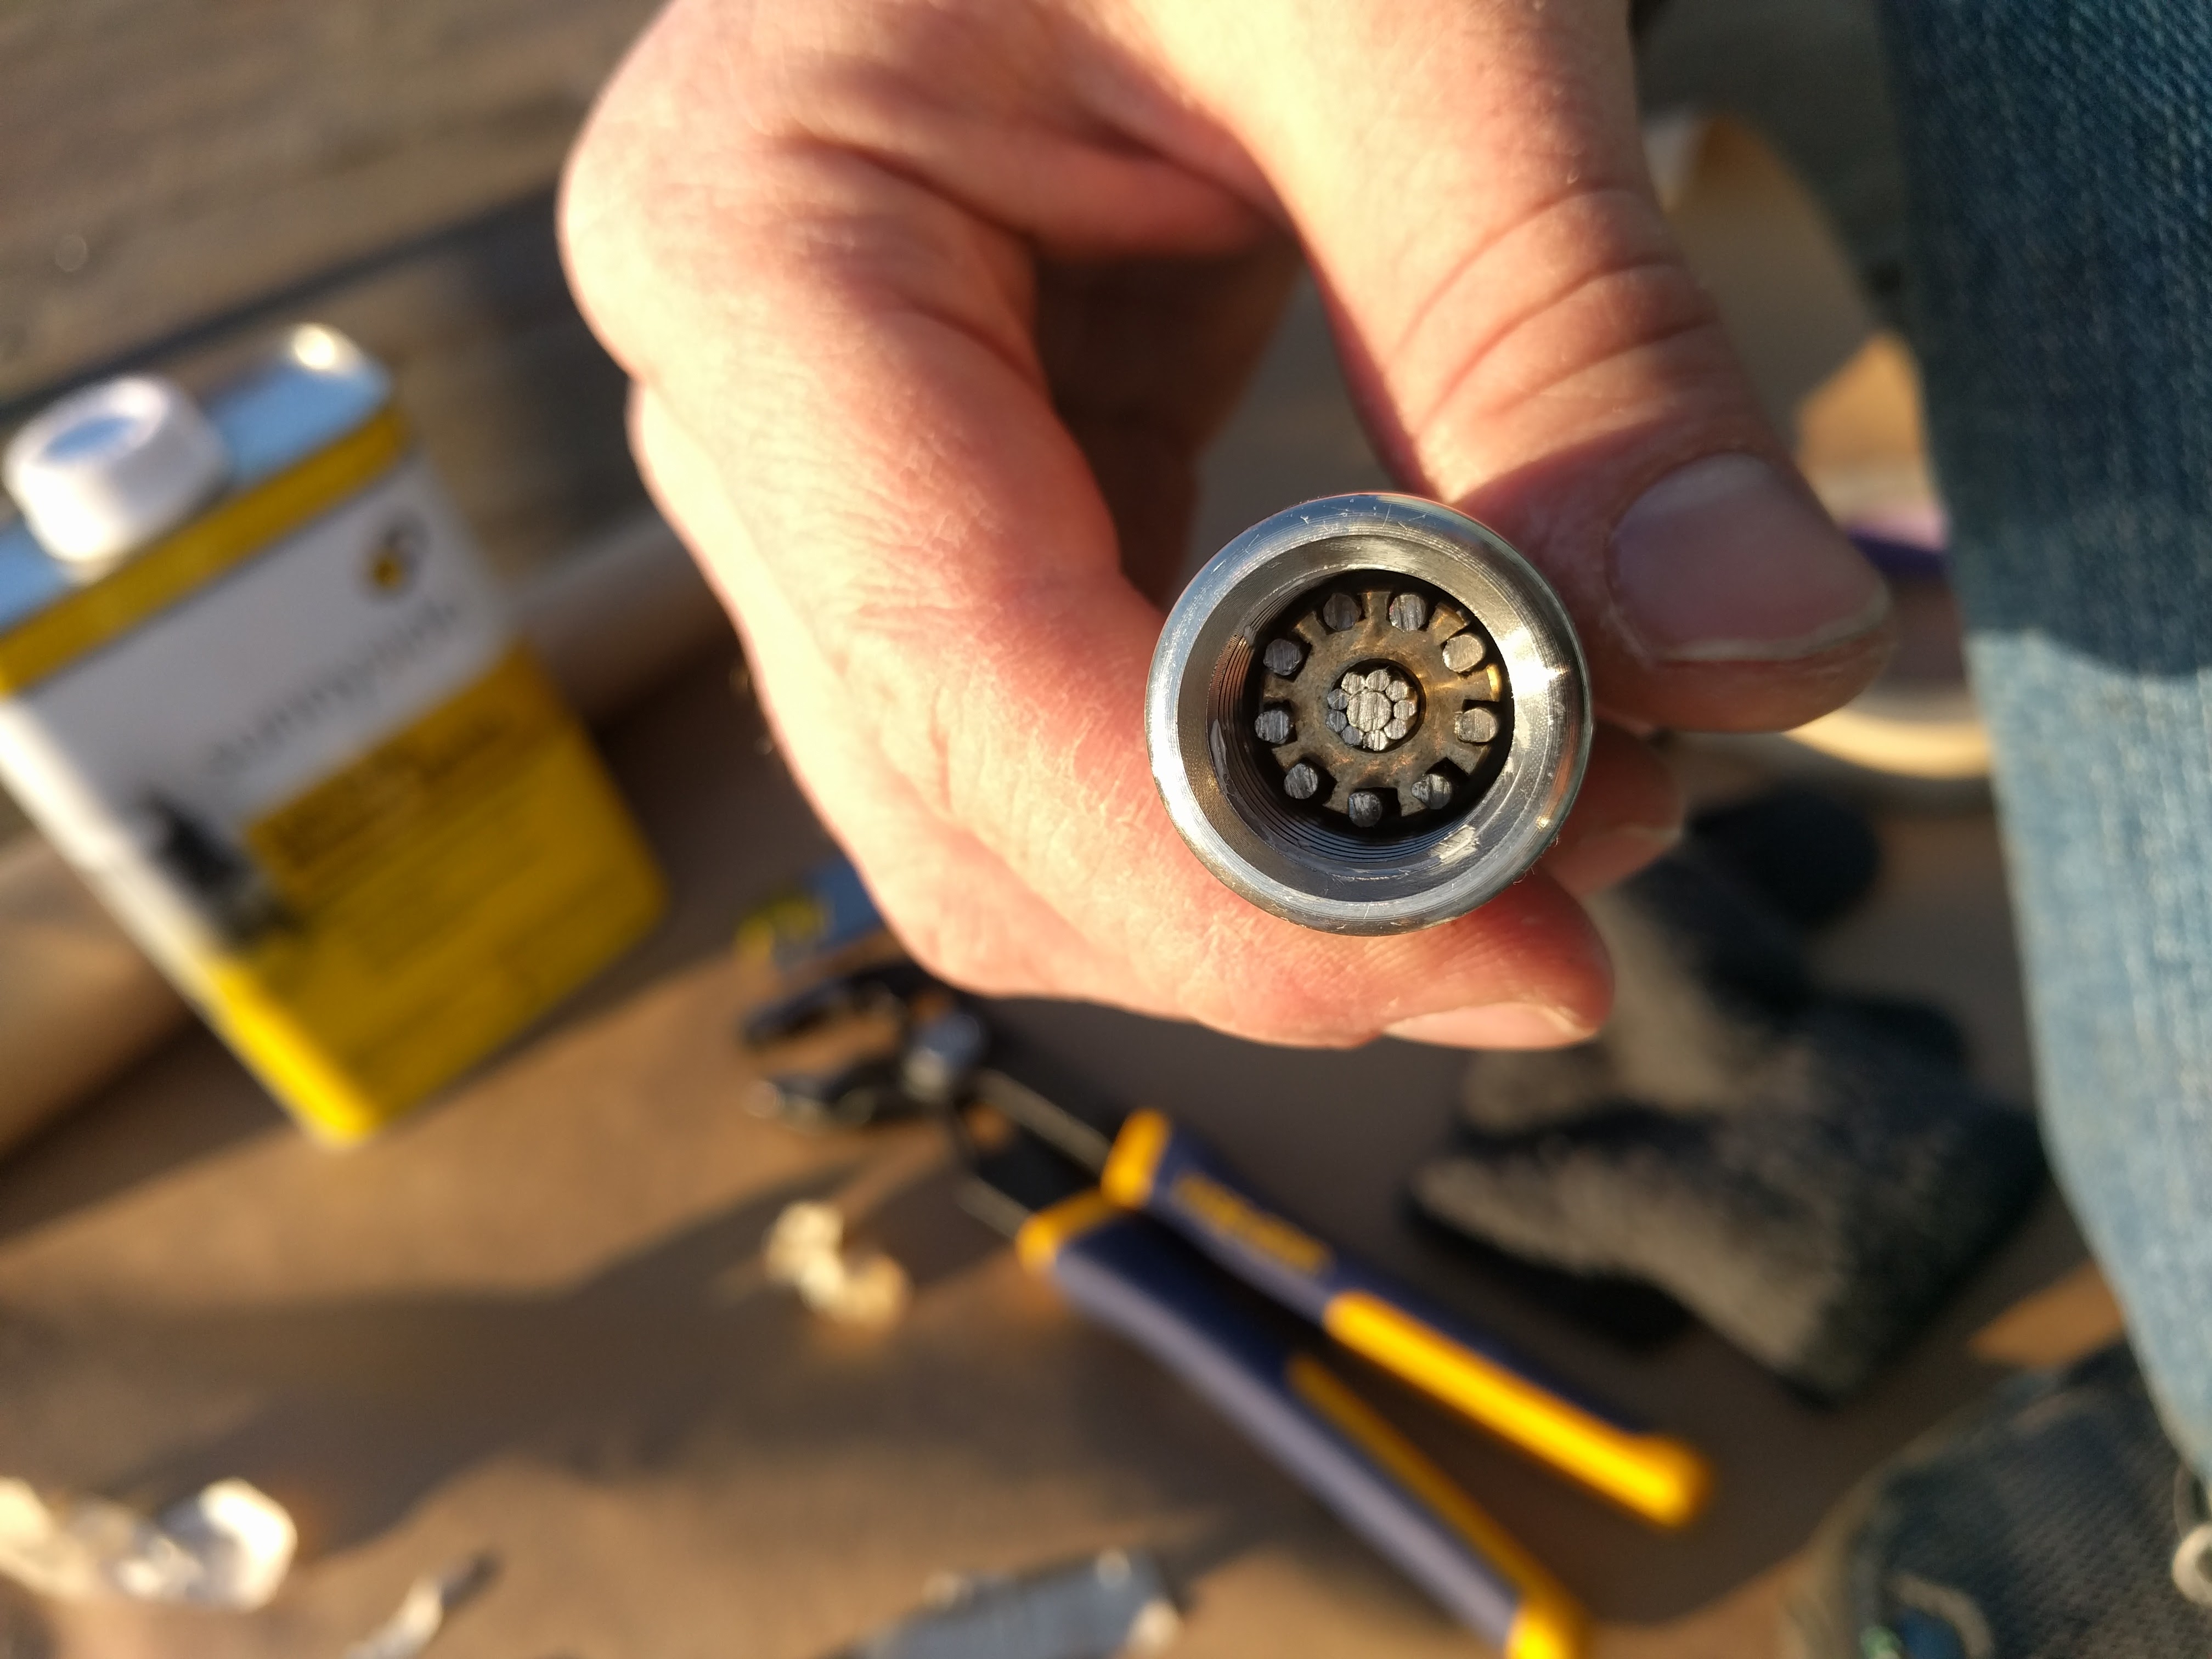
Cone and crown ring installed in the fitting
Project Time:
- 1 hour – planning, reading and watching YouTube videos.
- 1 hour – measuring, re-measuring and cutting forestay.
- 1 hour – assembling Hi-Mod.
Tips:
- The 7mm compact strand wire (distributed by Alps) was quite difficult to unlay. Since the strands are so tightly compacted together, it’s hard to pick them apart. Standard flat head screwdriver tips were too thick. A thin paint scraper works well, or perhaps my mini screwdriver set (like an eyeglass kit).
- The big debate with HiMod’s is whether to use sealant or not. Hayn says not to, in their instructions. They’re saying it’s not necessary but you can use it if you want to (they say it’s ok to use in this PDF). I wish there were a more scientific analysis of this.
I decided to use sealant for a couple reasons: Brion Toss, the rigger in Port Townsend, recommends using sealant in HiMods. And the HaveWindWillTravel sailors on YouTube had their HiMods show rust after just a few months in Florida. They believe it was from metal dust that got on their wire after cutting it with a grinder. That’s a plausible explanation, but perhaps sealant also would’ve helped prevent their issue. - Sealant is hard to inject into a Hi-Mod however. The body of the fitting is already on the wire. And the standard injection nozzle that comes with 3M adhesive tubes doesn’t fit in between the wire and the body. A typical syringe doesn’t fit either (the tip isn’t long enough to get past the threaded part of the body). I didn’t want to gunk up the threads, since those are supposed to be secured with Loctite, not 4200 goop. The best option was injecting sealant into the wire strands alongside the cone. I didn’t get sealant squeezing out the top at the end, so maybe didn’t use enough, but it should still be effective.
Assembling the Harken Mark IV Furler (Unit 1)
The instructions from Harken are very good, so I’m not going to rehash those. It’s clear Harken has been making engineering and process improvements to their furlers for 30+ years now, and the design is way nicer than the 1984 Mark I we had. If you’re good at assembling Ikea furniture from a 60 step manual, the Mark IV furler assembly will be a piece of cake in comparison.
I will mention a few tips / difficulties encountered.
Project Time:
- 2 hours – Measuring and planning (calculating forestay length and foils length)
- 4 hours – Furler foils assembly.
- 2 hours – Finishing / installing on boat.
Tips:
- I used 3M 4200 Fast Cure instead of the 5200 Harken provided, because I consider 5200 devil’s glue, and want to be able to disassemble the top foil on the off chance that I’ve made some mistake in the length measurement. The Harken manual says 4200 Fast Cure is acceptable, especially in cold temperatures, as was the case this January.
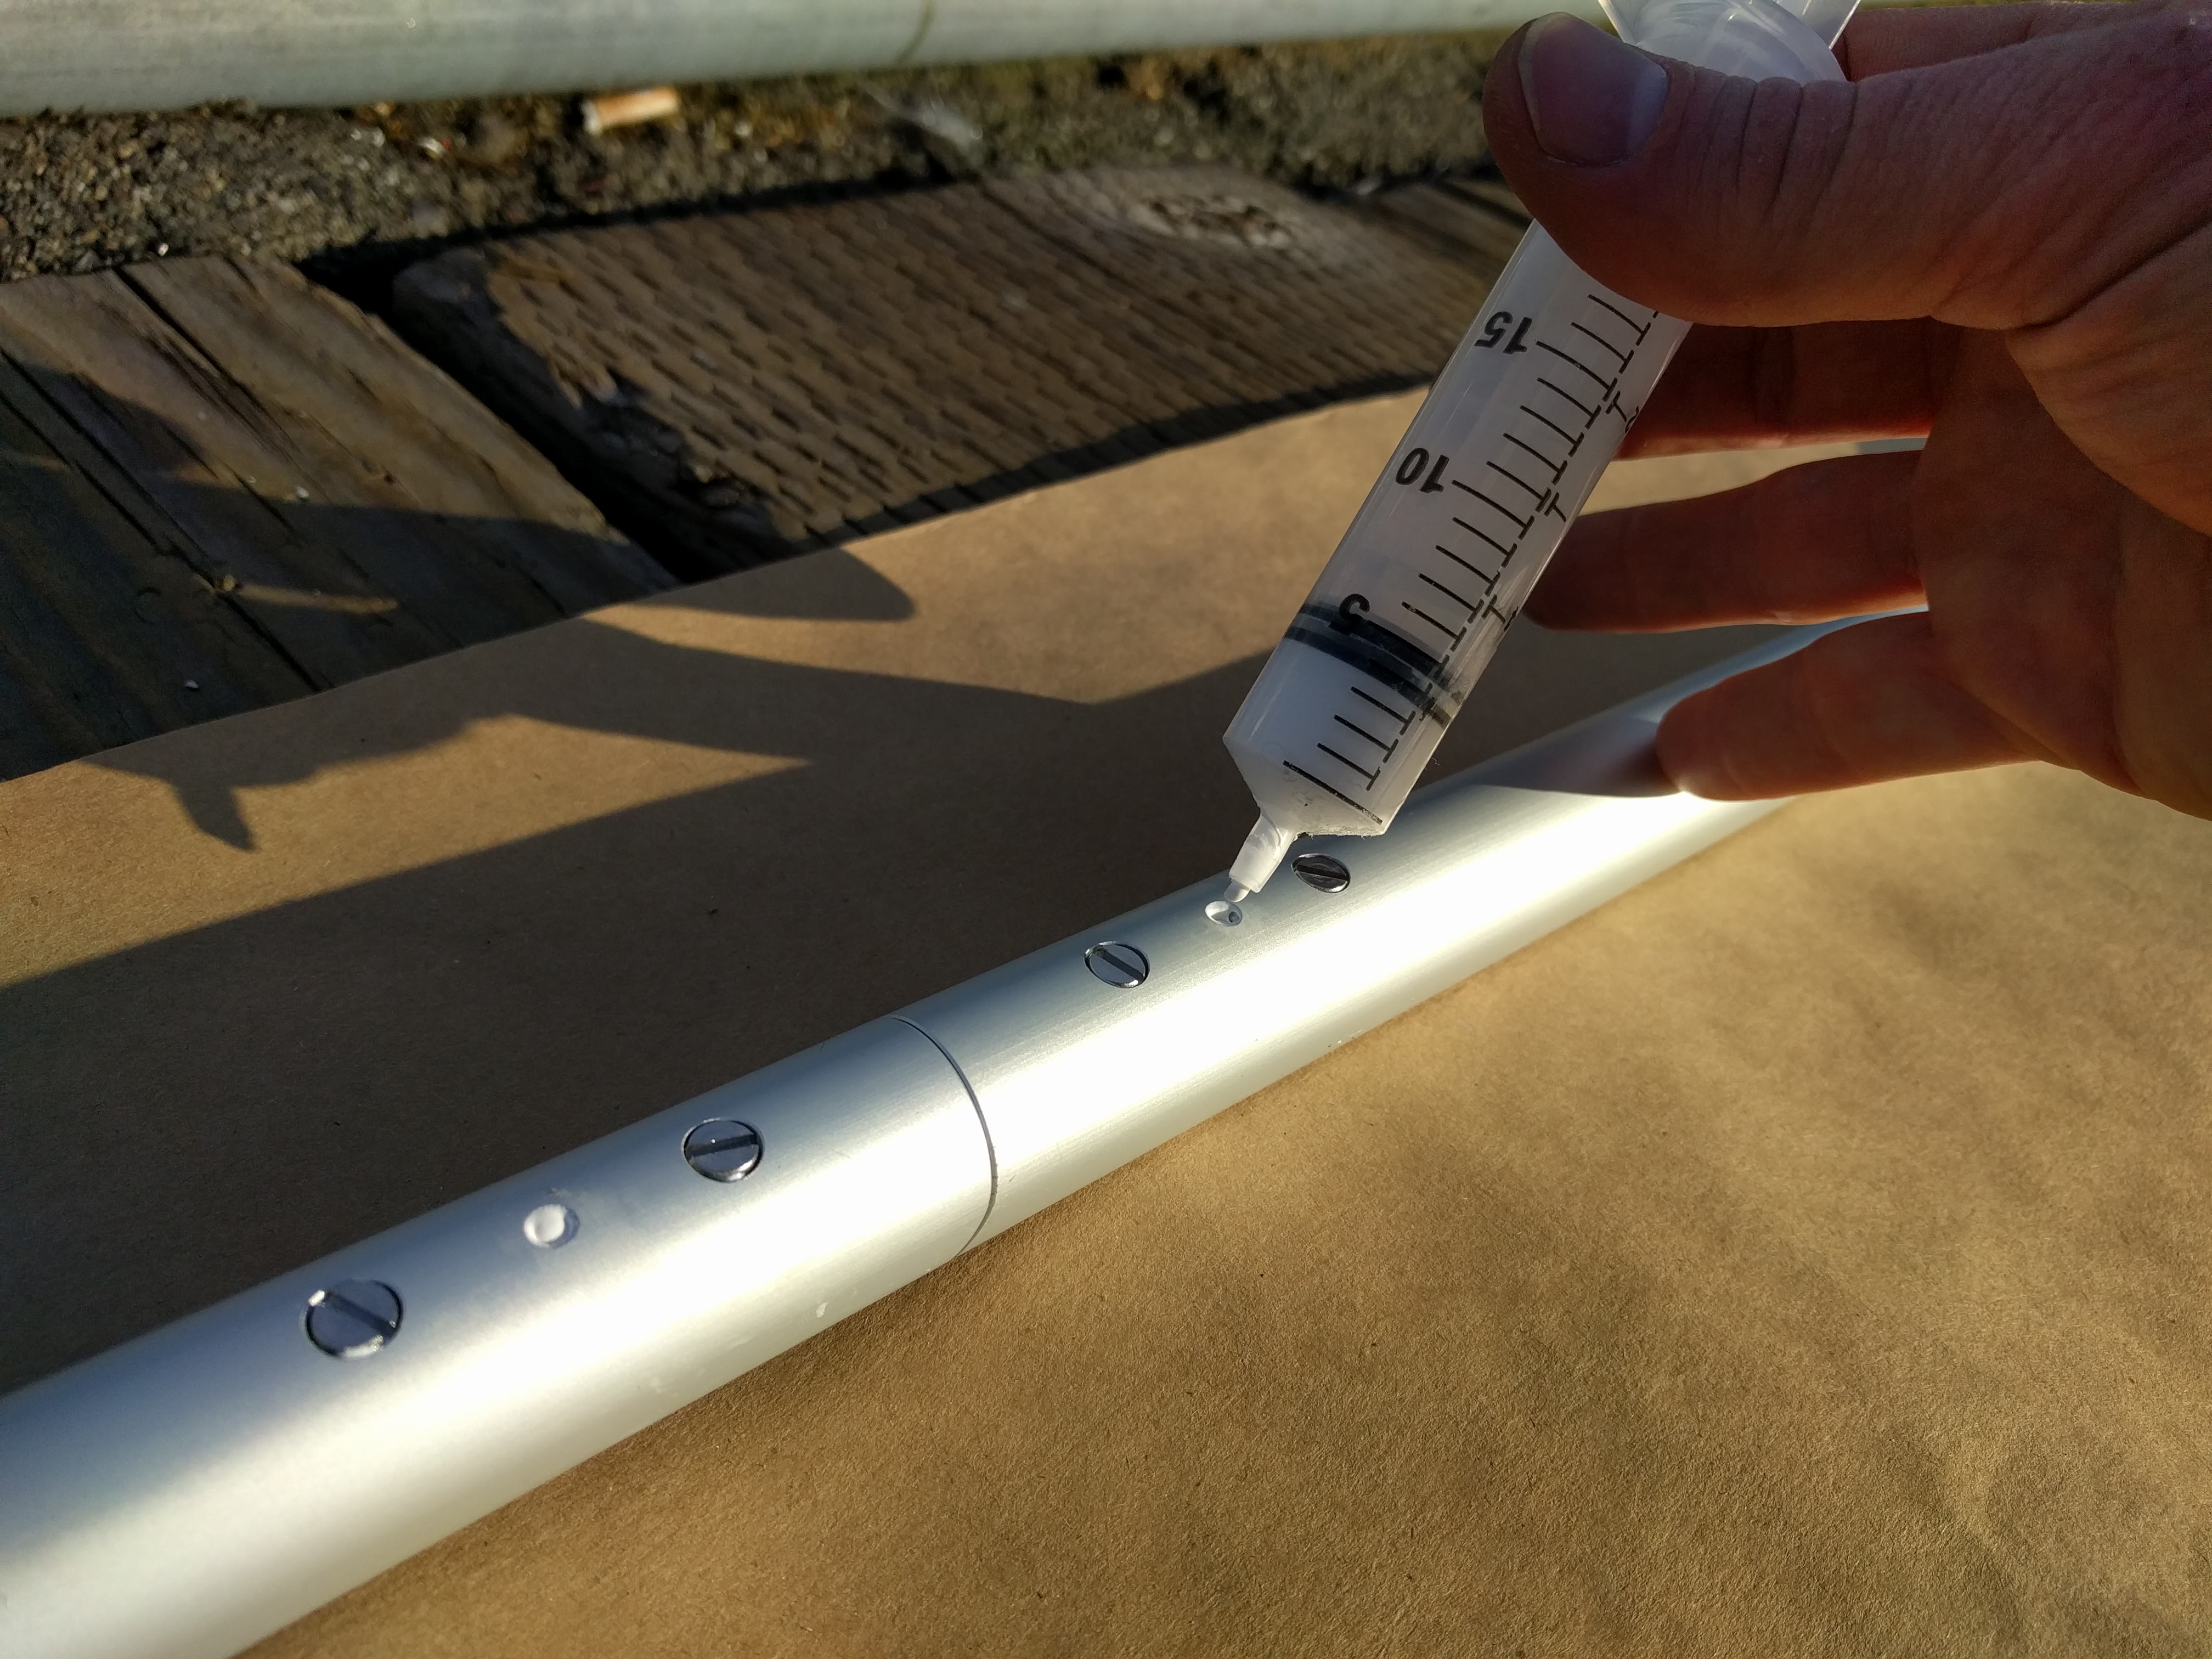
- The hardest part by far was injecting the sealant into the tiny injection holes. I was working in about 45F temperatures, but it felt much warmer with the sun out. I kept the sealant in my pants for about half an hour, but that wasn’t enough to get it really warm. Harken provides a syringe for injection, but I had to put a lot of force on it to get the sealant in. I tried heating the syringe with a heat gun. That helped, but also softened the plastic tip and I bent it on the next injection.
I’d recommend bringing an extra syringe with you, because if you break the one they provide, it’ll be a pain to go get a new one while your open sealant tube is getting cold / hardening up.
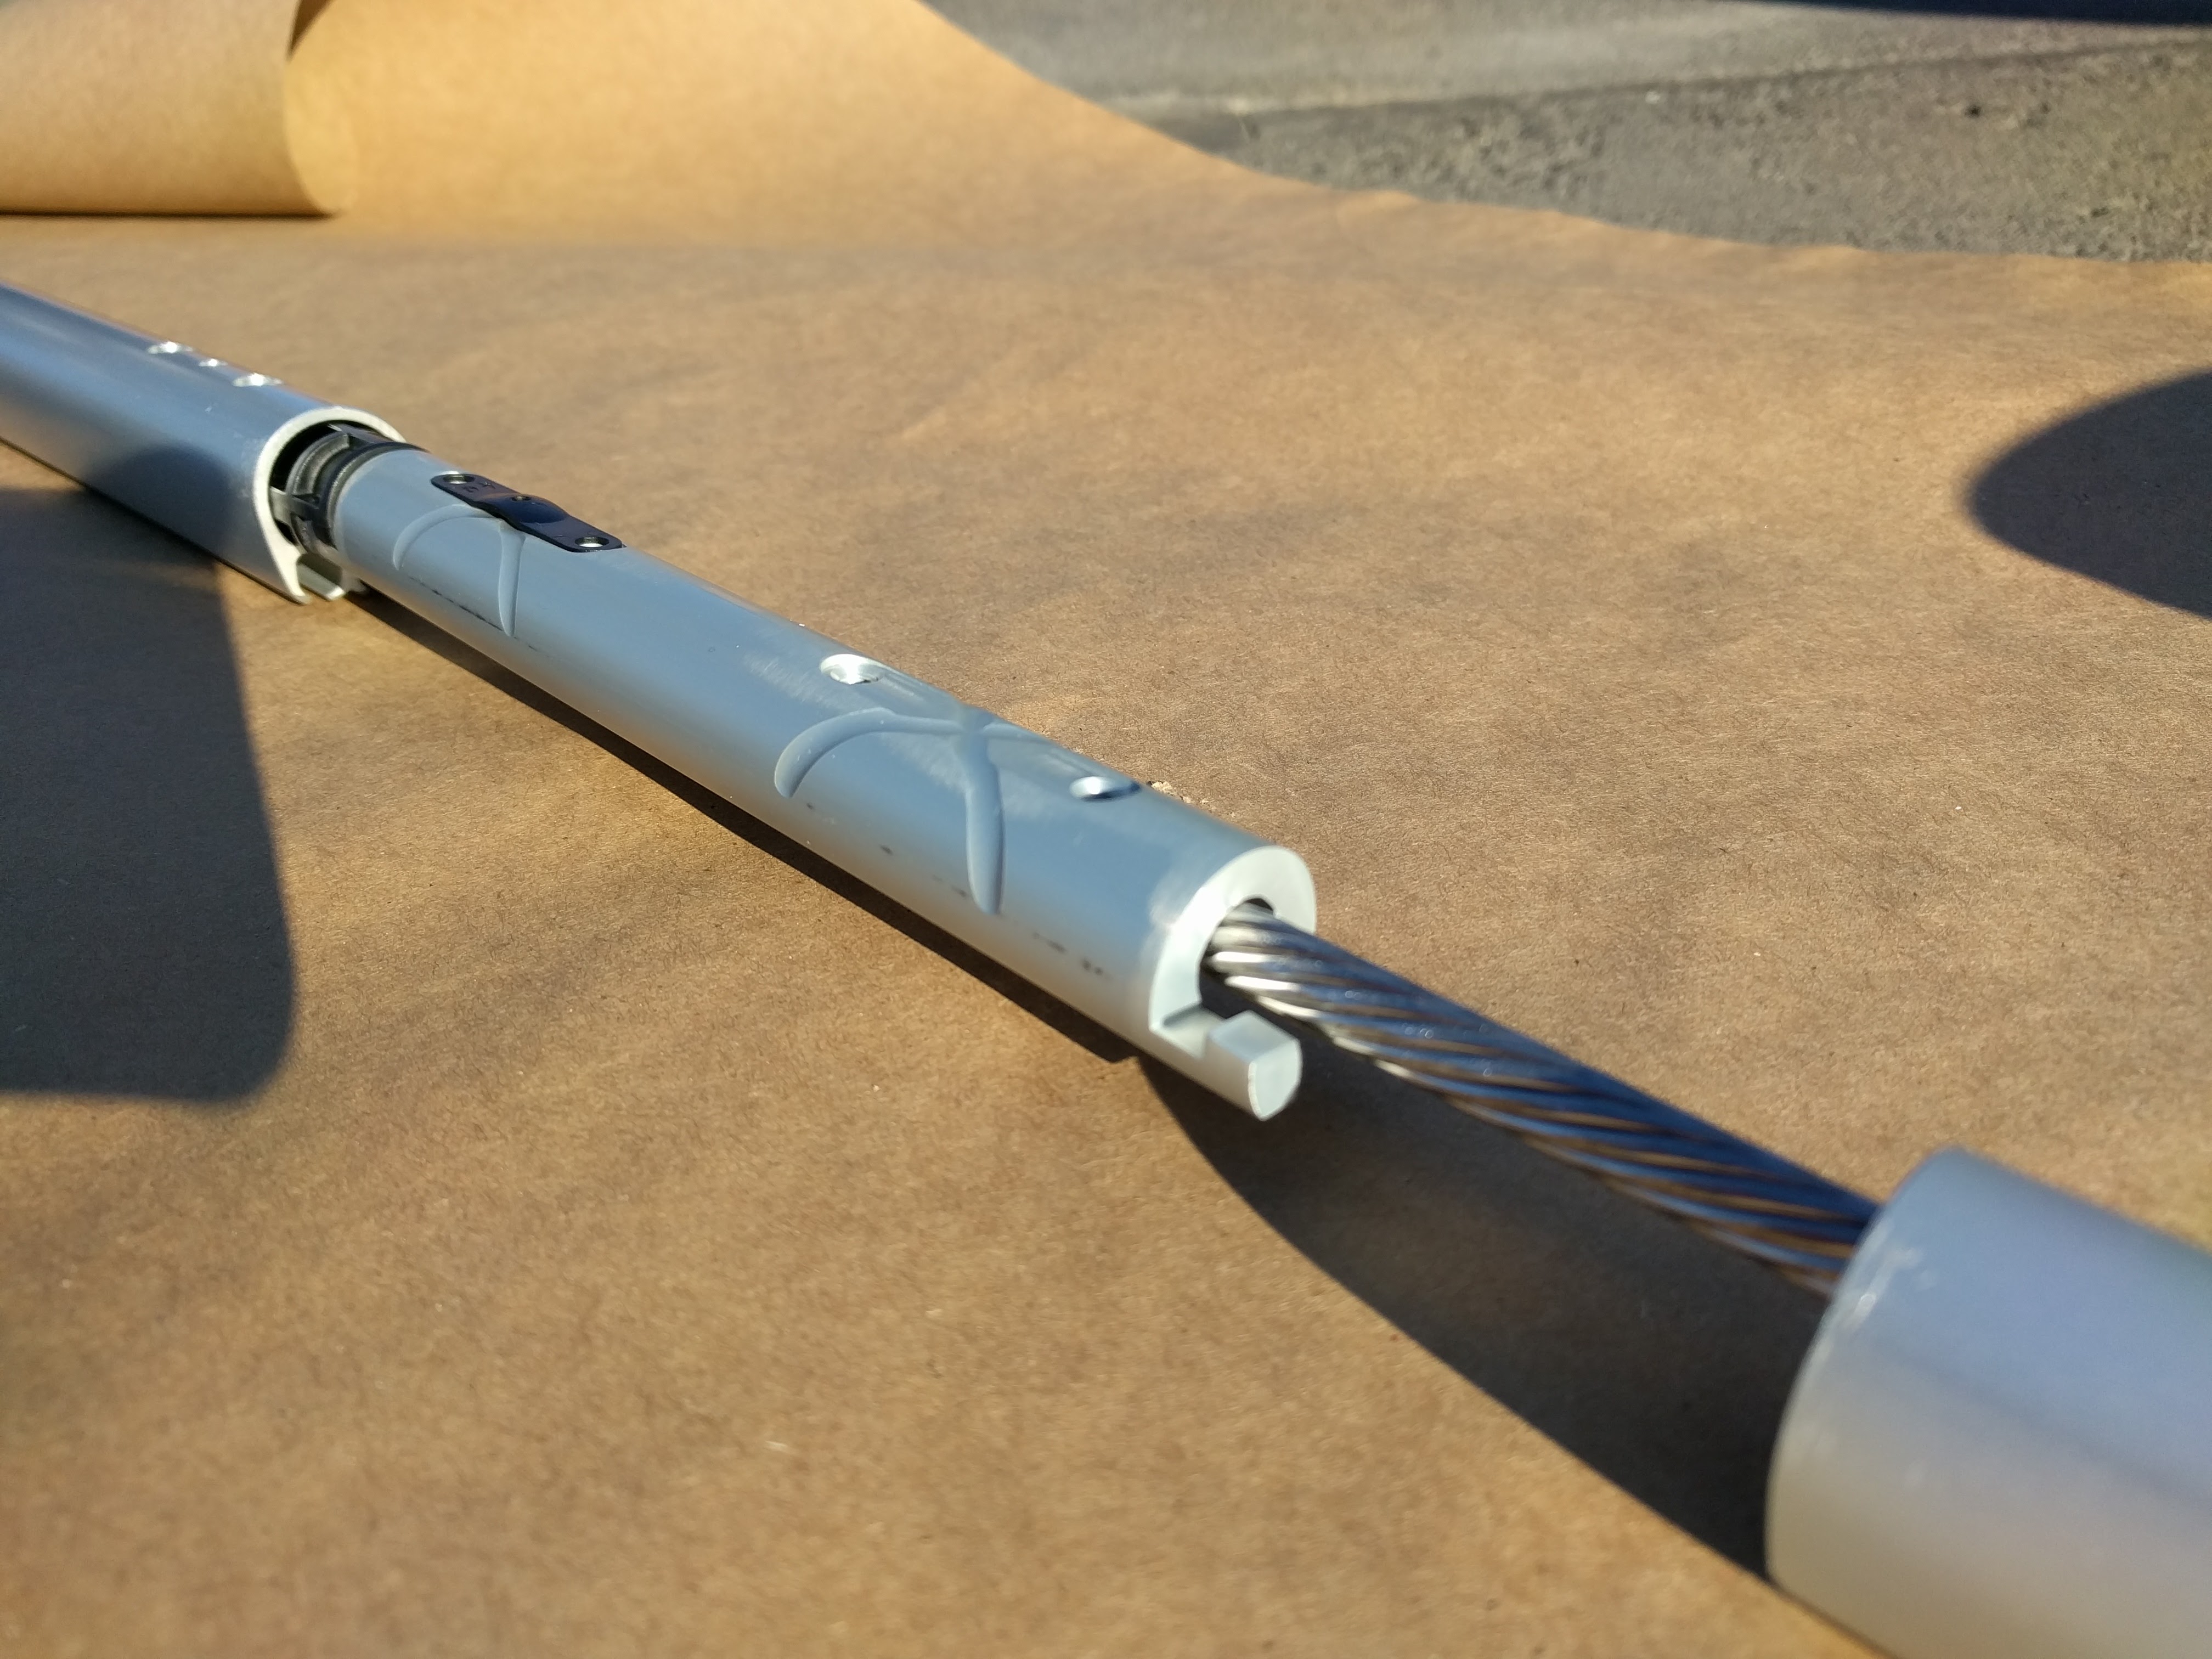
Harken foil connectors
Painting the Mast Collar
The mast collar on deck was looking pretty bad from paint that had worn off over the years. Natalie took on the project of sanding and repainting it. It looks much better now! The before and after pictures really tell the story:
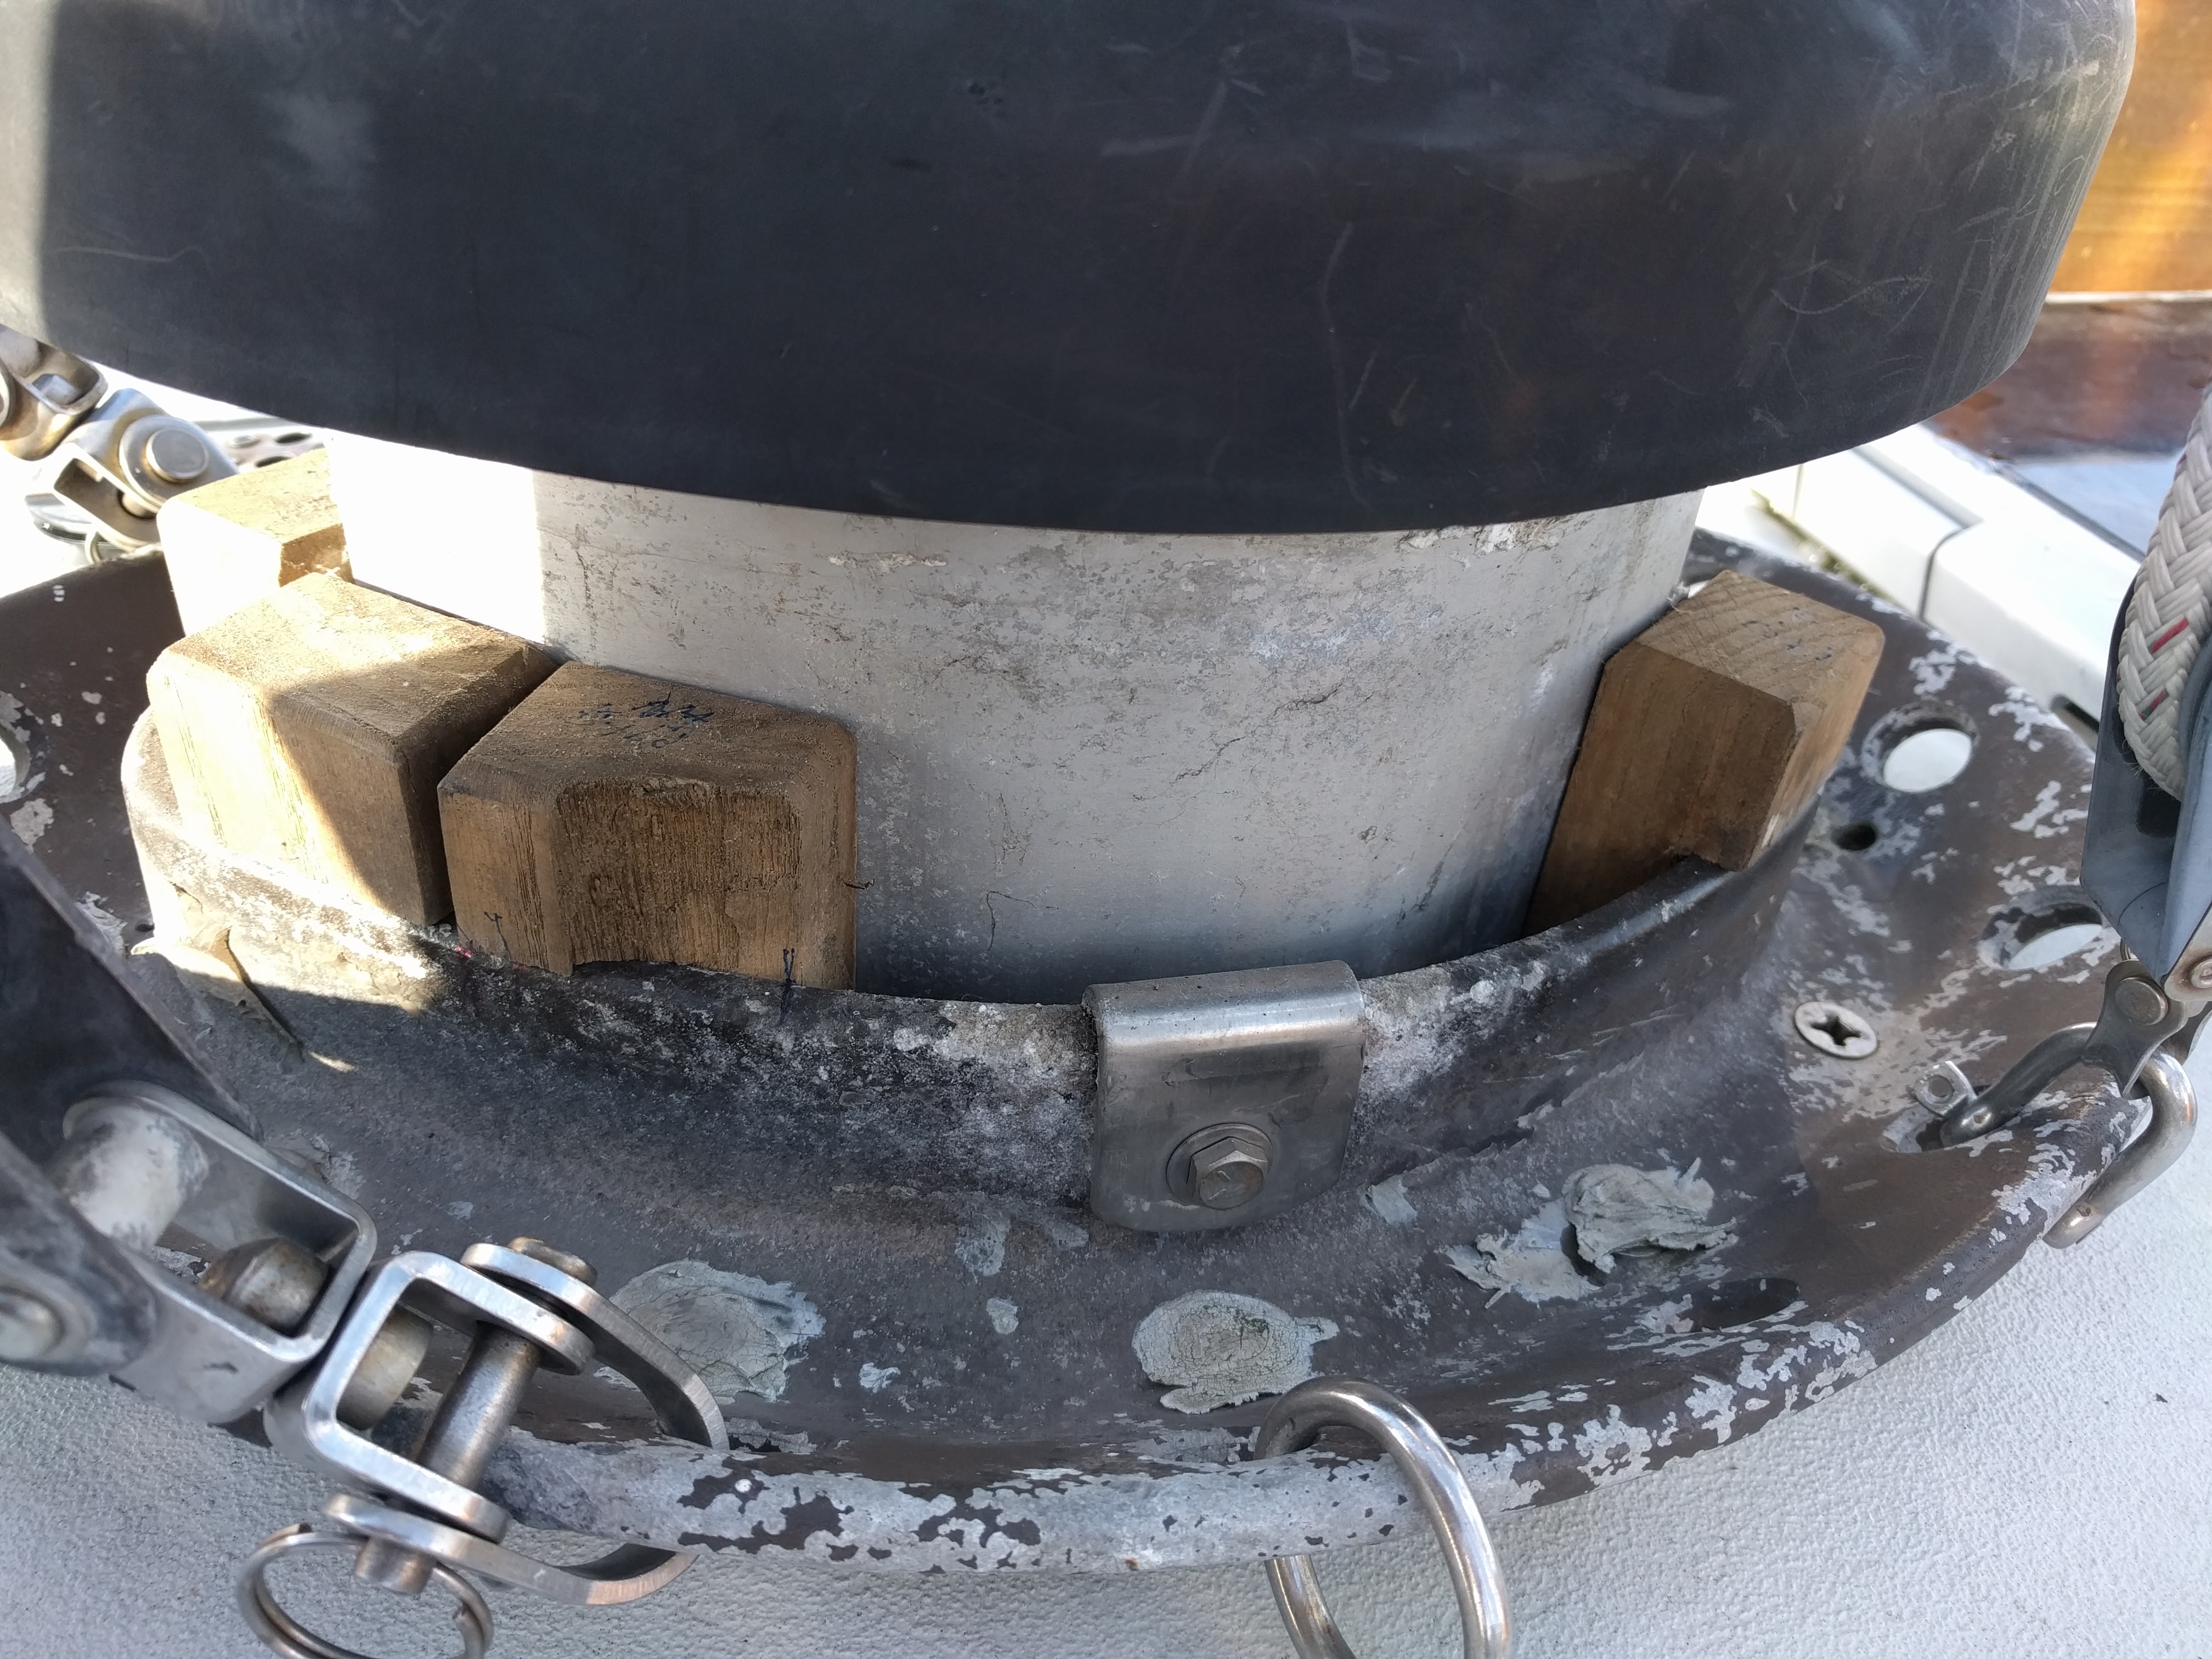
Before (with the mast still in)
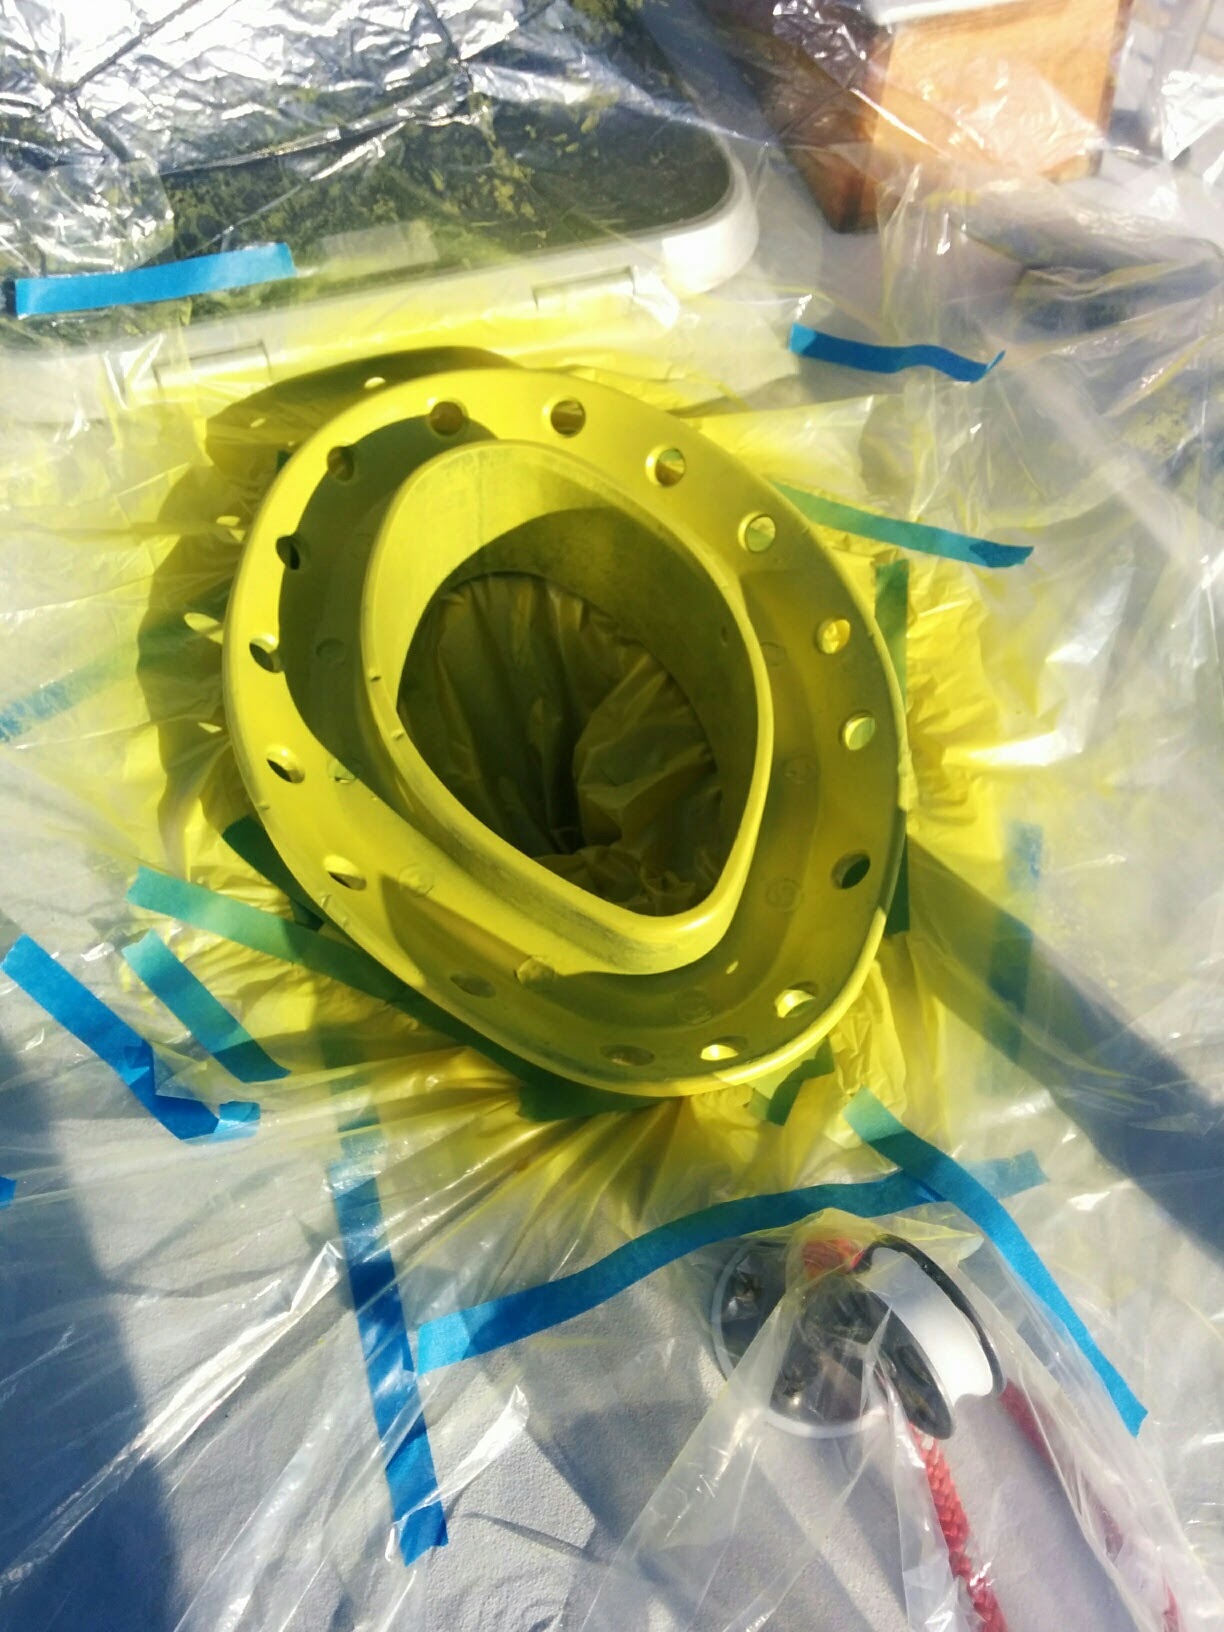
With the zinc chromate primer applied
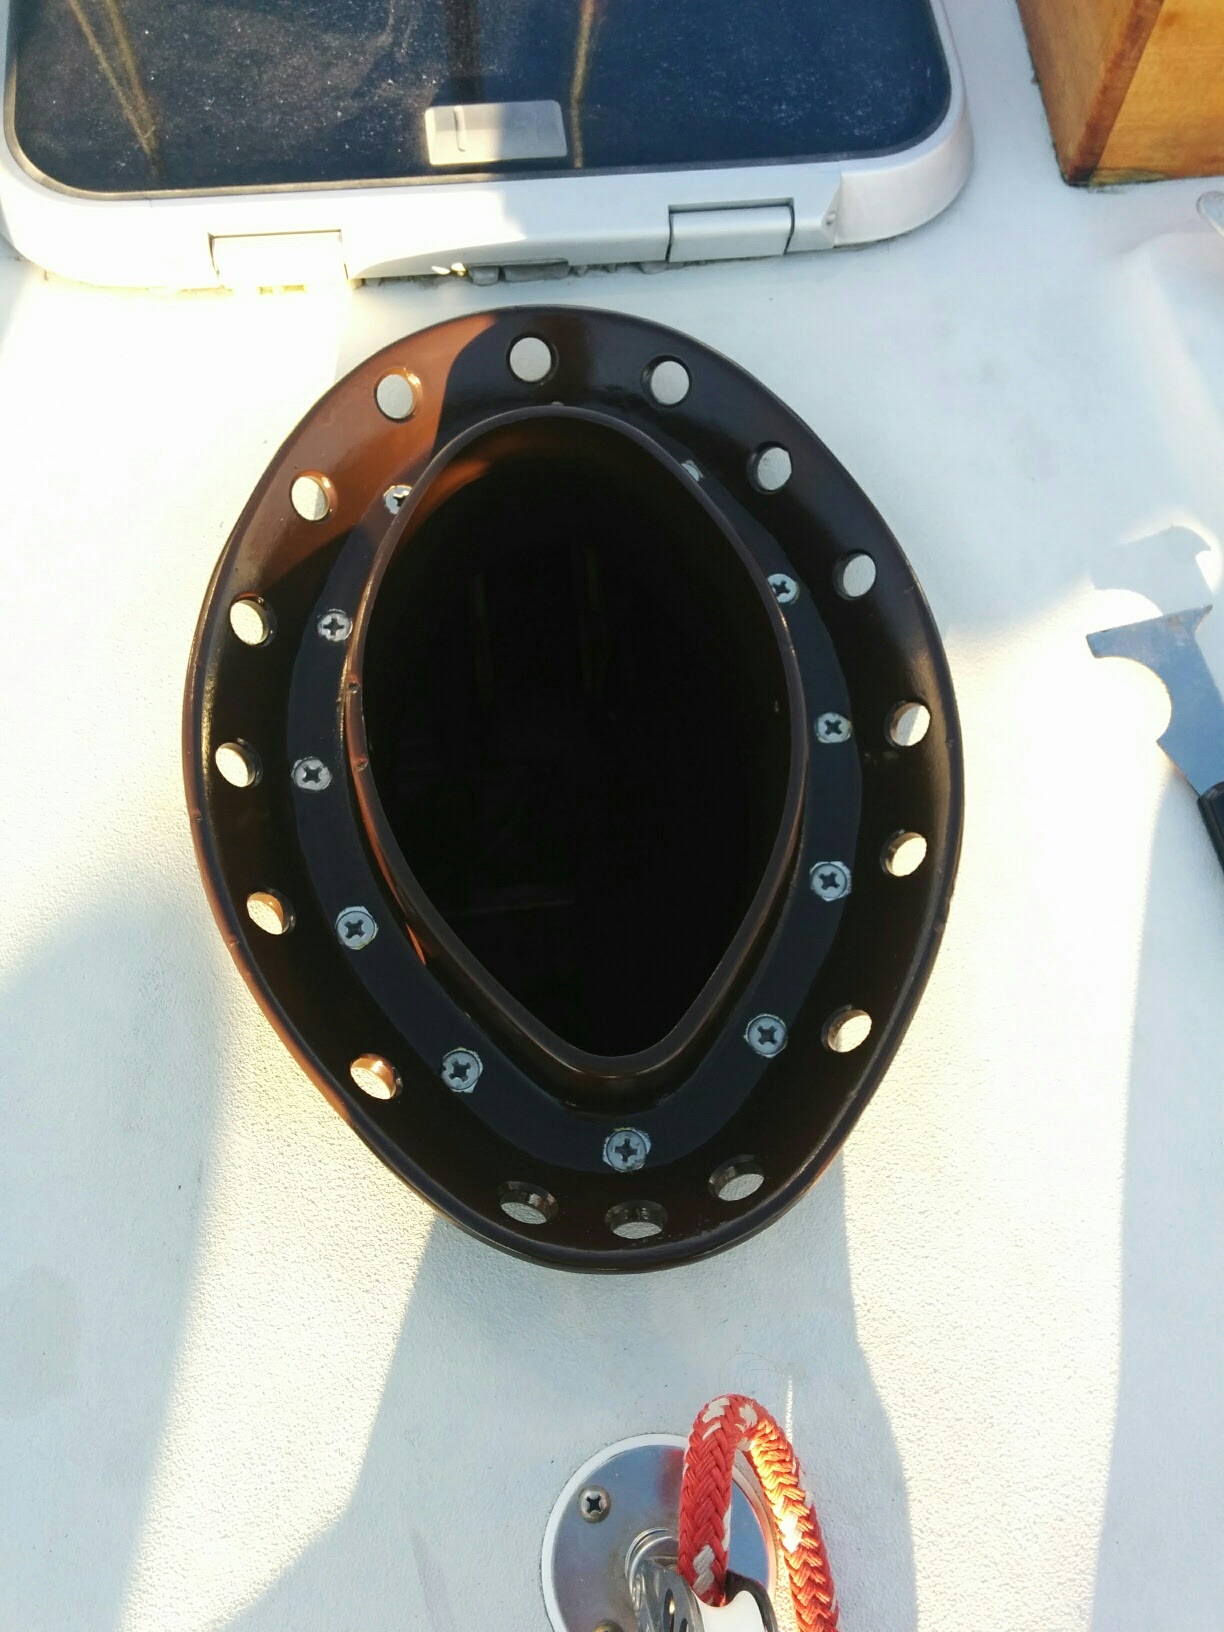
The finished product
Masthead Sheaves Clevis Pin
In the last post I mentioned how one of the masthead clevis pin cover plates had sheared off, due to the clevis pin being seized in the aluminum masthead fitting. The masthead fitting isn’t removable, and it’s difficult to gain access to the clevis pin. I had planned to drill and tap a hole in the end of the pin, so I could thread in a machine screw and use that to pull out the pin – plus use it to reattach the cover plate when I’m done.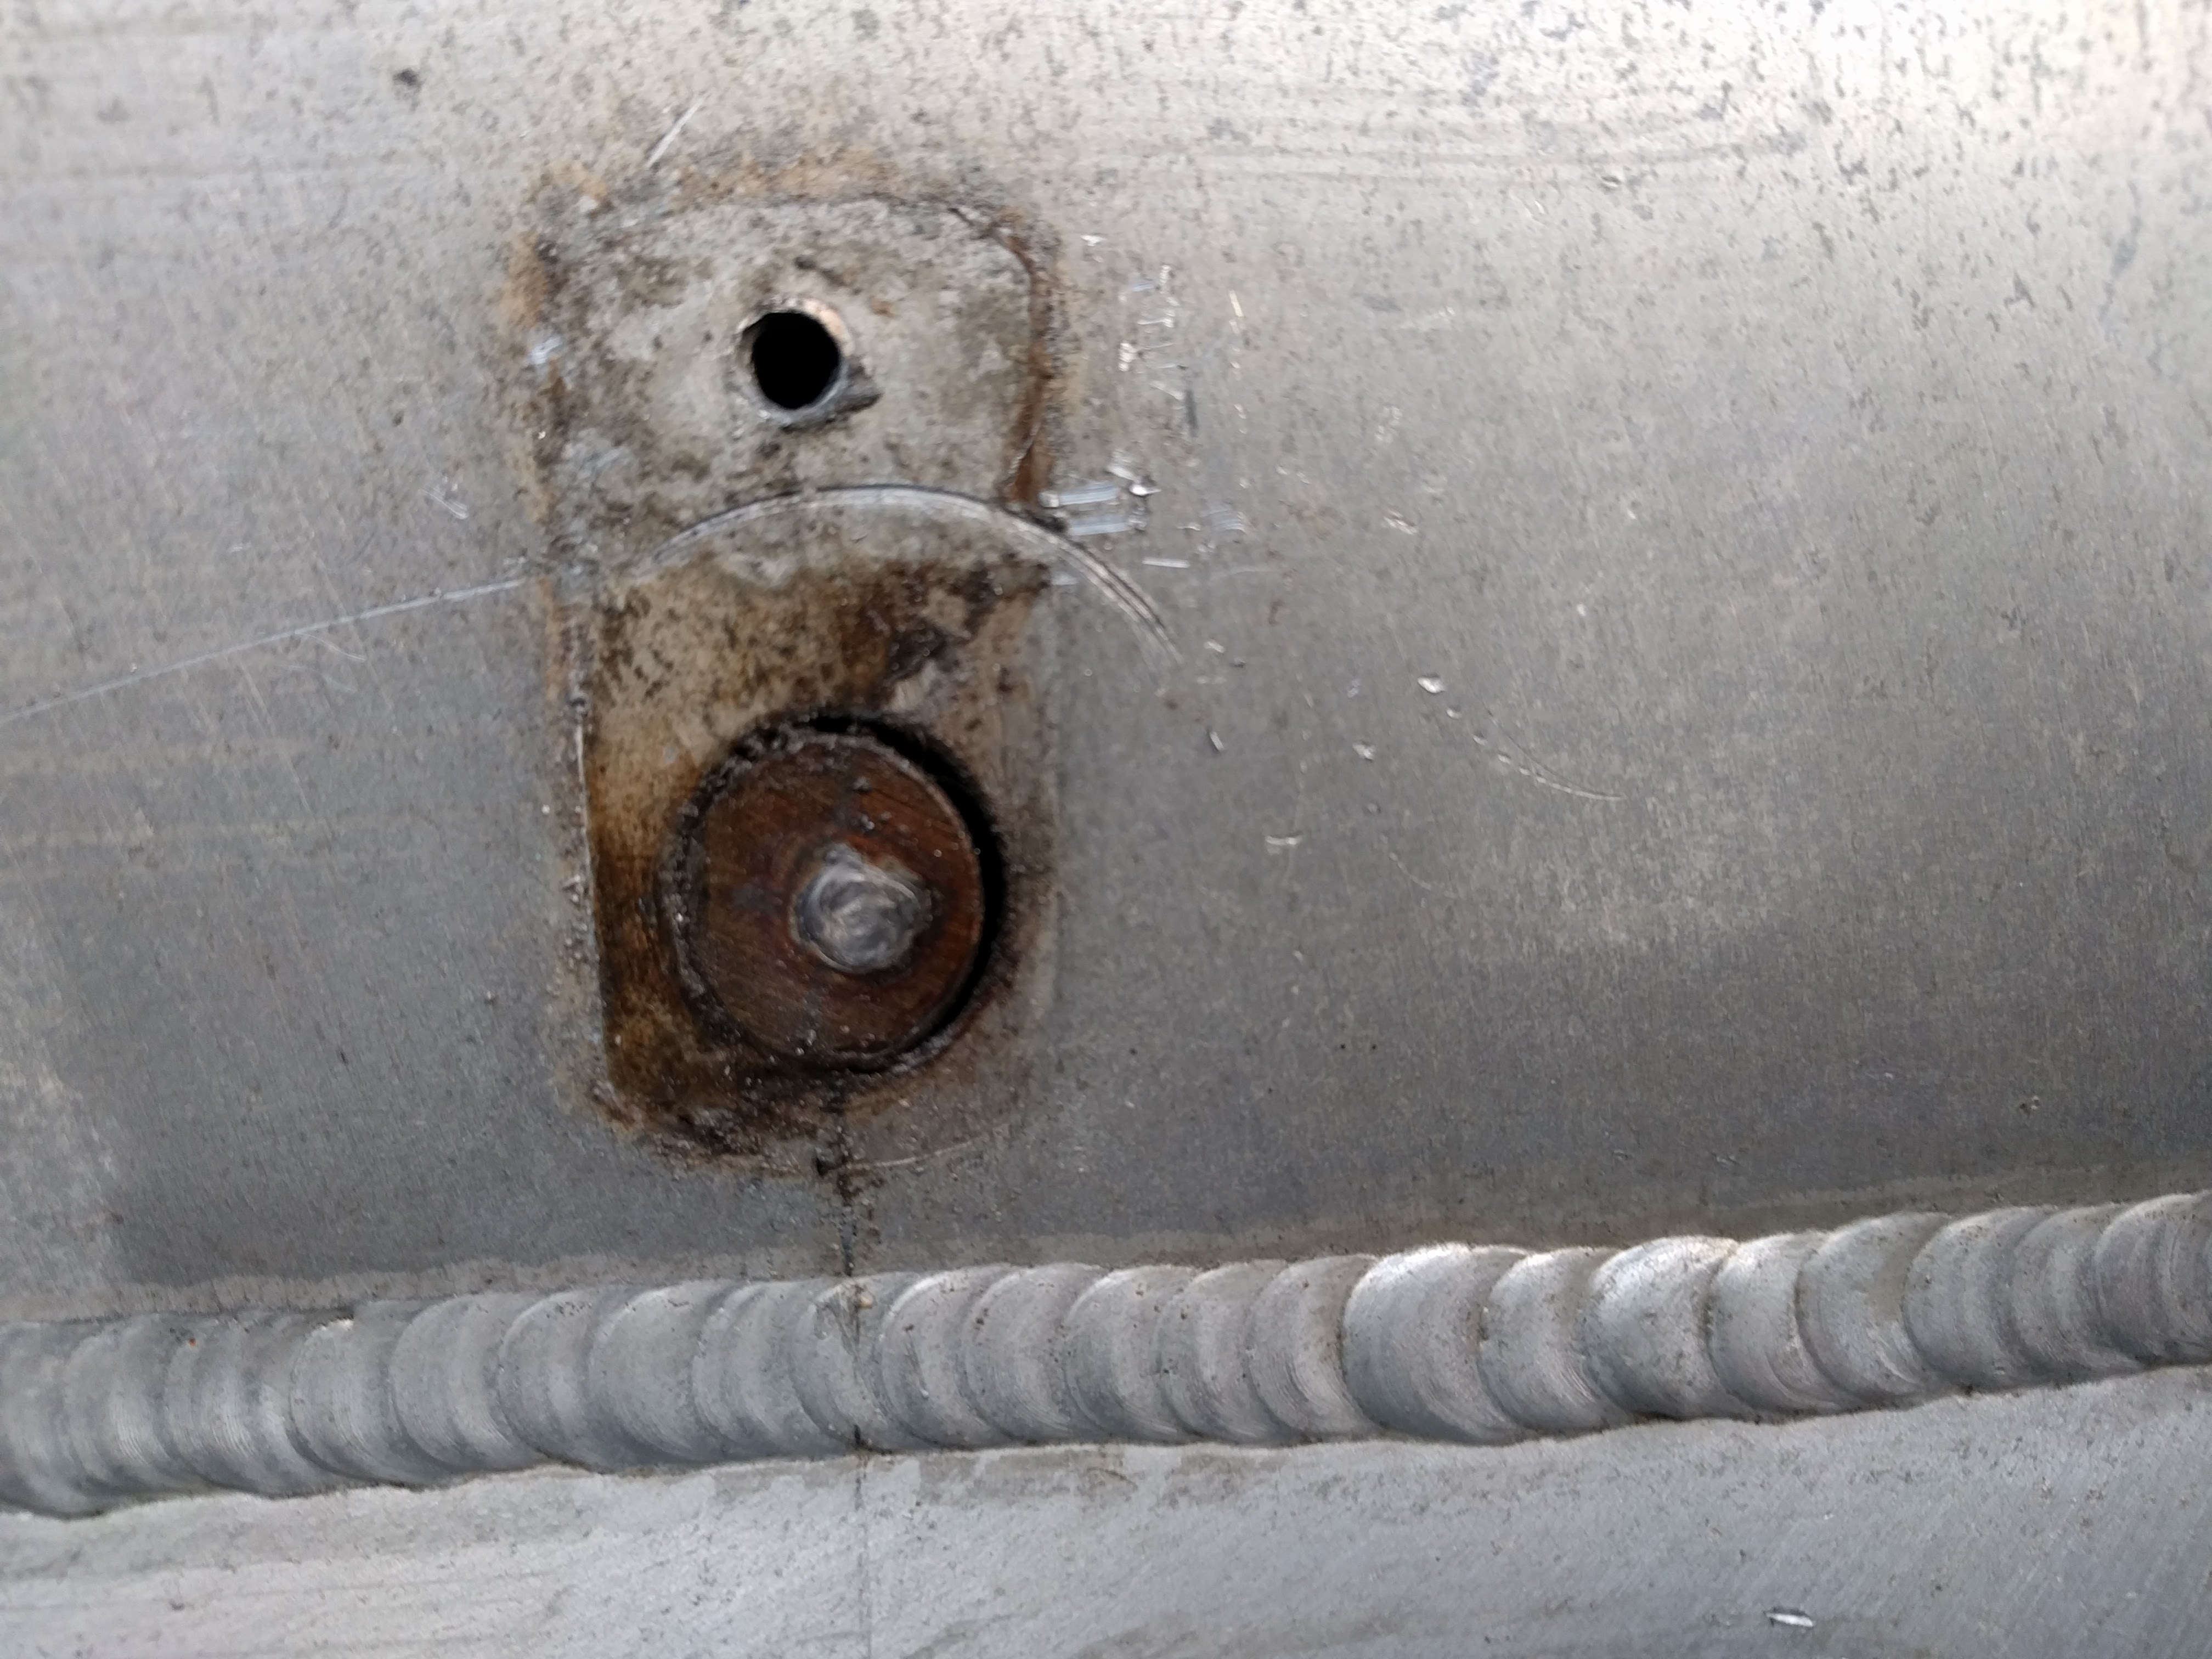
I quickly realized that was a stupid plan. 316 stainless steel is extremely difficult to drill, especially with a hand drill. I managed to get a 1/8″ deep hole, after quite a bit of effort going slowly with plenty of oil. I broke one drill bit and dulled another. But even if I managed to finish drilling deep enough, to tap it I would really need a tap for a blind hole (the threads go deeper) and a standard hardware store tap like the Irwin I have would just break.
I had tried all the other standard options: multiple corrosion release sprays (snake oil in my opinion), heating with a torch, hammering on it. In the end what worked was an idea my rigger suggested – drilling a small hole through the mast from the other side, to allow inserting a tool to punch out the pin. I used my broken drill bit to hammer out the clevis pin.
The hole I’ll seal with some 4200. The nice thing about the sheave pin cover plate design is that it keeps water out of the mast. A surprising amount of water can get in through a hole in a mast, and if your sheaves are on a standard rigging pin with cotter pins on each side, water can find its way in through those holes.
VHF Antenna
In many types of boat projects – especially a rerig – there are numerous difficult decisions where you’re basically weighing whether it’s worth spending money (and time) now to potentially avoid more work in the future. But you’re not sure the problem is actually a problem, and whether it’s worth spending the time now. A good example was the VHF antenna cable running through our mast – the connections looked pretty old / possibly corroded, but the VHF still works. Or does it? We’ve never really done a good test of it, with a friend confirming reception at various distances, so we don’t really know. And we have a handheld VHF as backup, but actually use it as the primary and only VHF most of the time.
Then I had a realization – Is the VHF antenna even connected? Of course it’s connected you say, we’re using the VHF radio! Oh, but there’s another VHF antenna mounted on the stern rail. Why is that there anyway? The obvious explanation: A prior owner had disconnected the masthead VHF antenna and installed a new one on the stern rail. That could explain why our ship’s VHF had worse range than our new handheld VHF – the stern rail mounted antenna was no higher.
How could I be so dumb as to not know the masthead VHF antenna isn’t connected to anything, after 2 years owning the boat? It seems crazy, but these kinds of things happen all the time – boats have many complex systems, so you focus on whichever one is causing the biggest problem or risk at the time. Our handheld VHF worked, and the backup VHF (the boat’s) sorta worked, so it wasn’t a high priority to investigate.
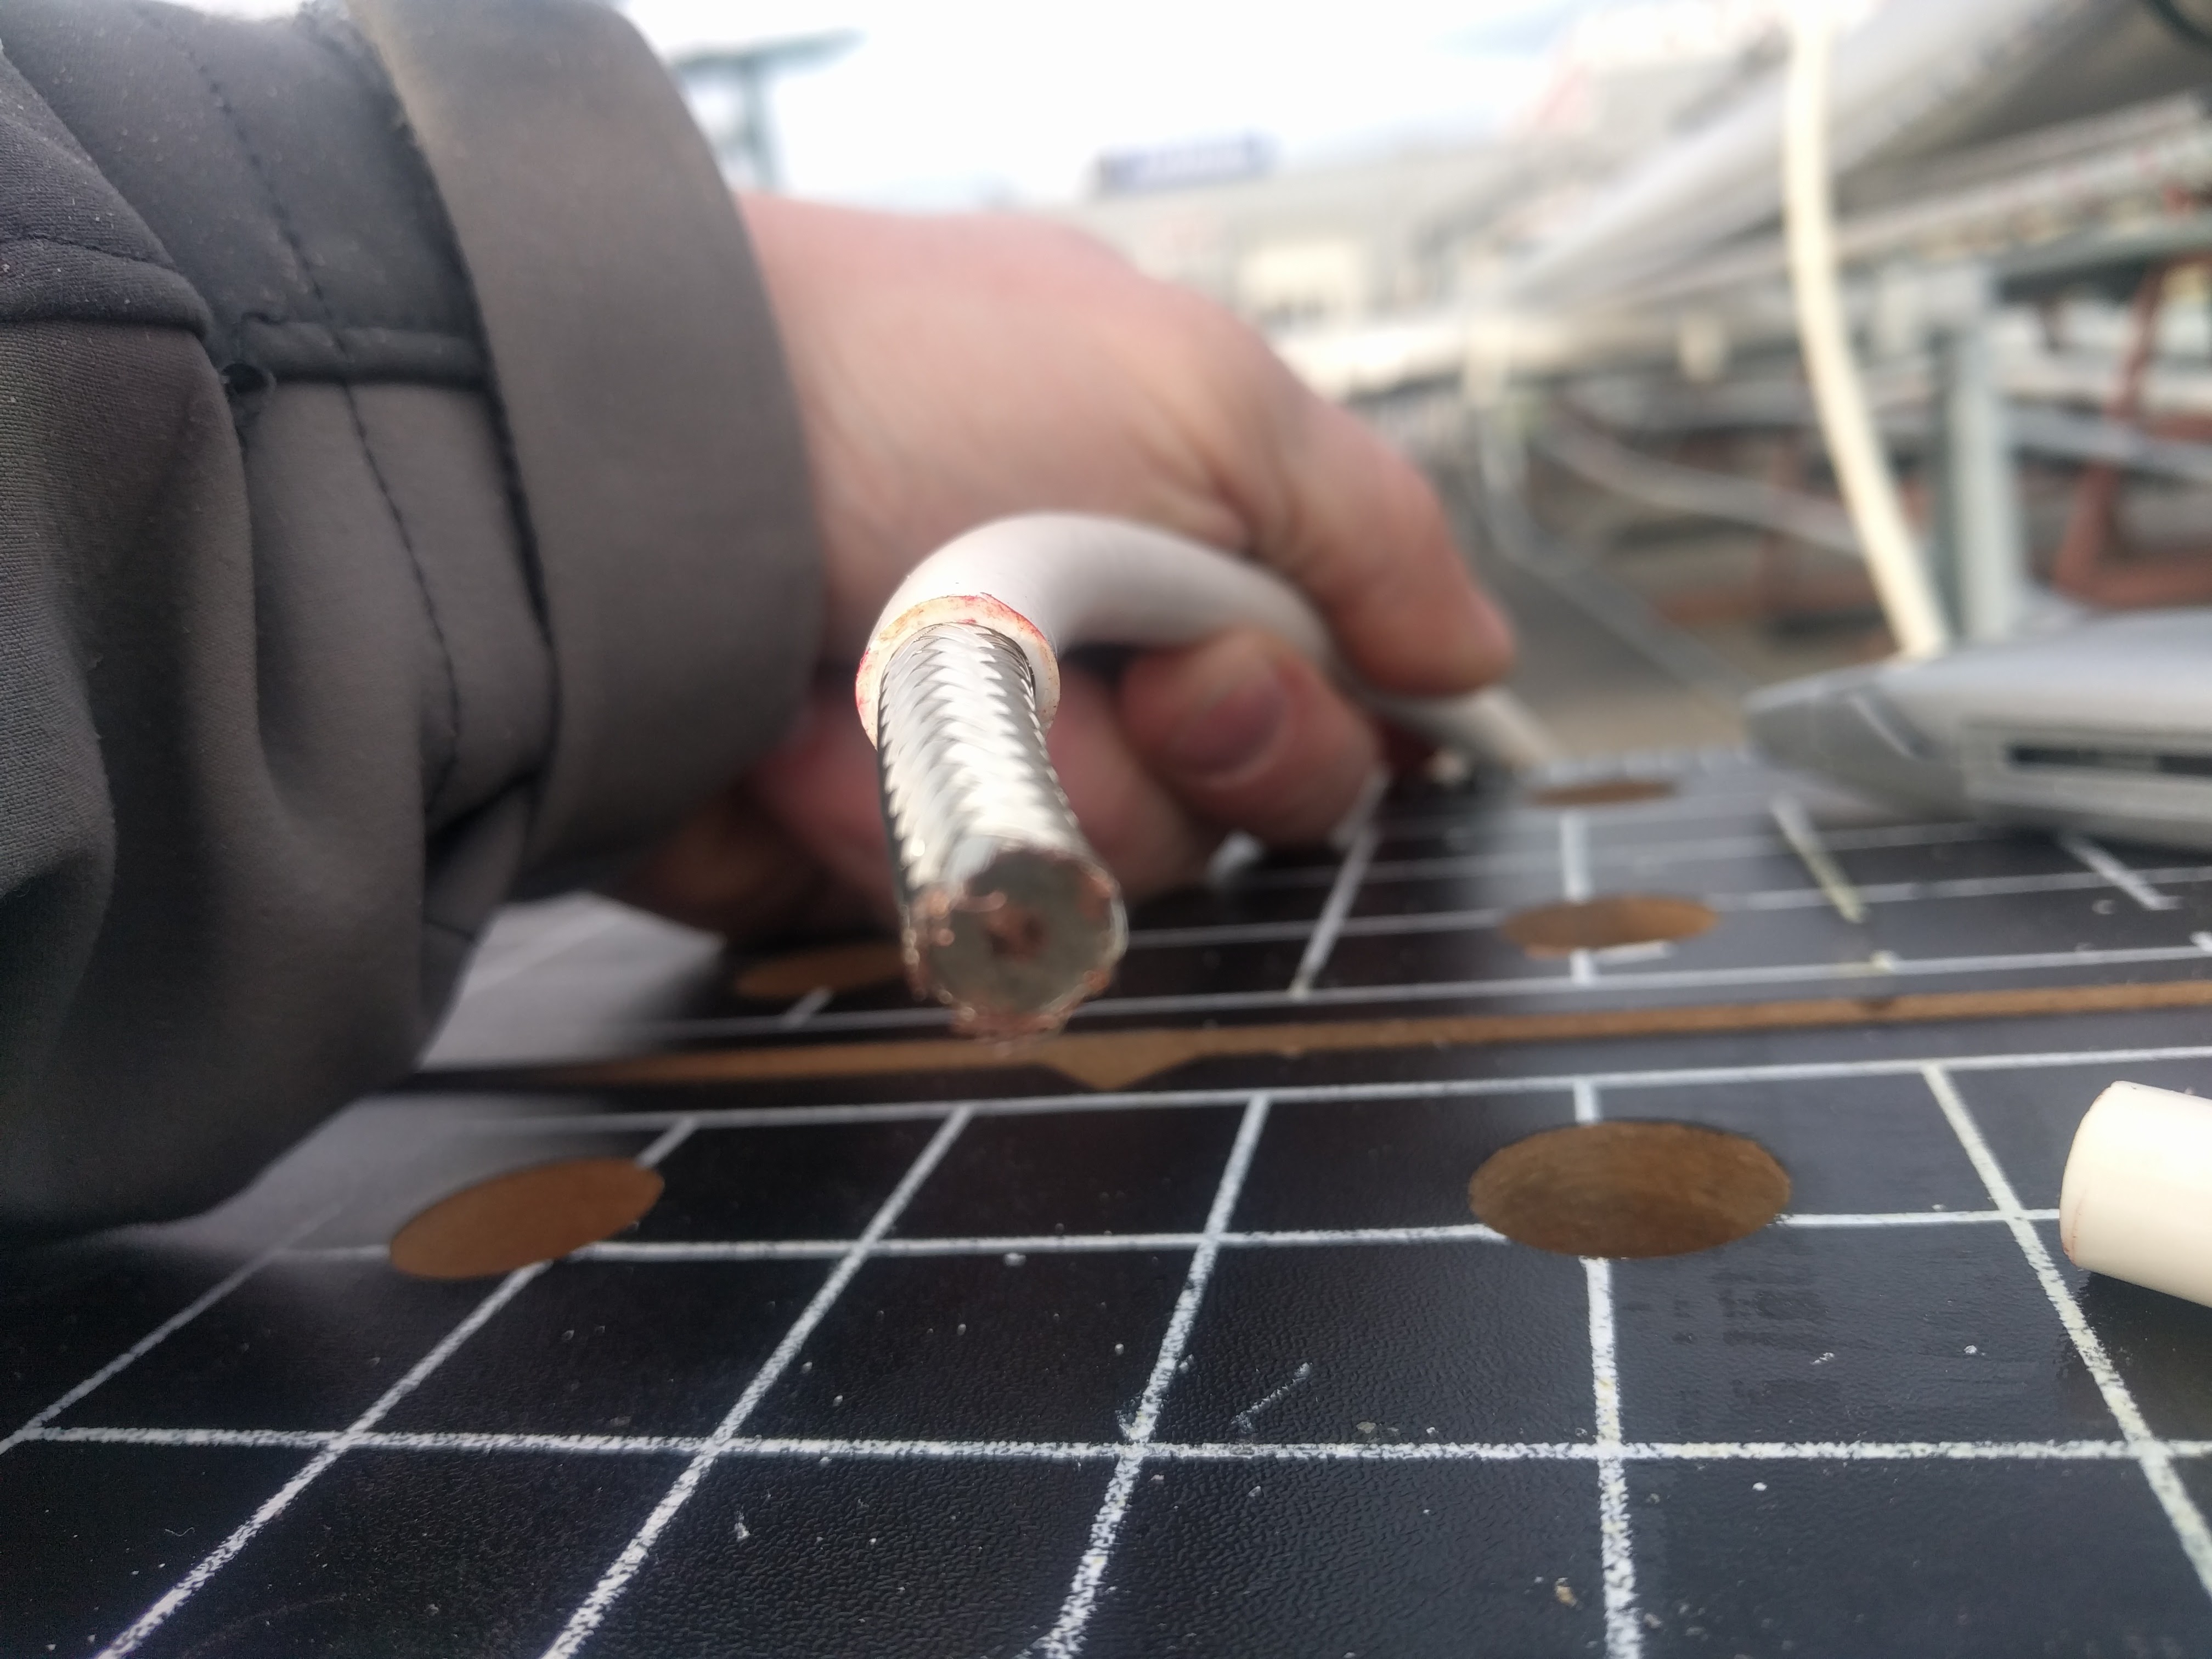
Coax Cable
More and more now I’m finding Amazon carrying marine products at a lower price and faster delivery (2-day Prime) than marine stores. I do support my local Fisheries Supply a lot, and Defender, but in this case Amazon had marine grade Ancor coax cable (RG213, 100-feet) much cheaper than marine suppliers – for $86 rather than Fisheries’ $109 (on sale, and they were out of stock on all lengths) or Defender’s $133. Pretty happy to save $20 to $50, with greater convenience too.
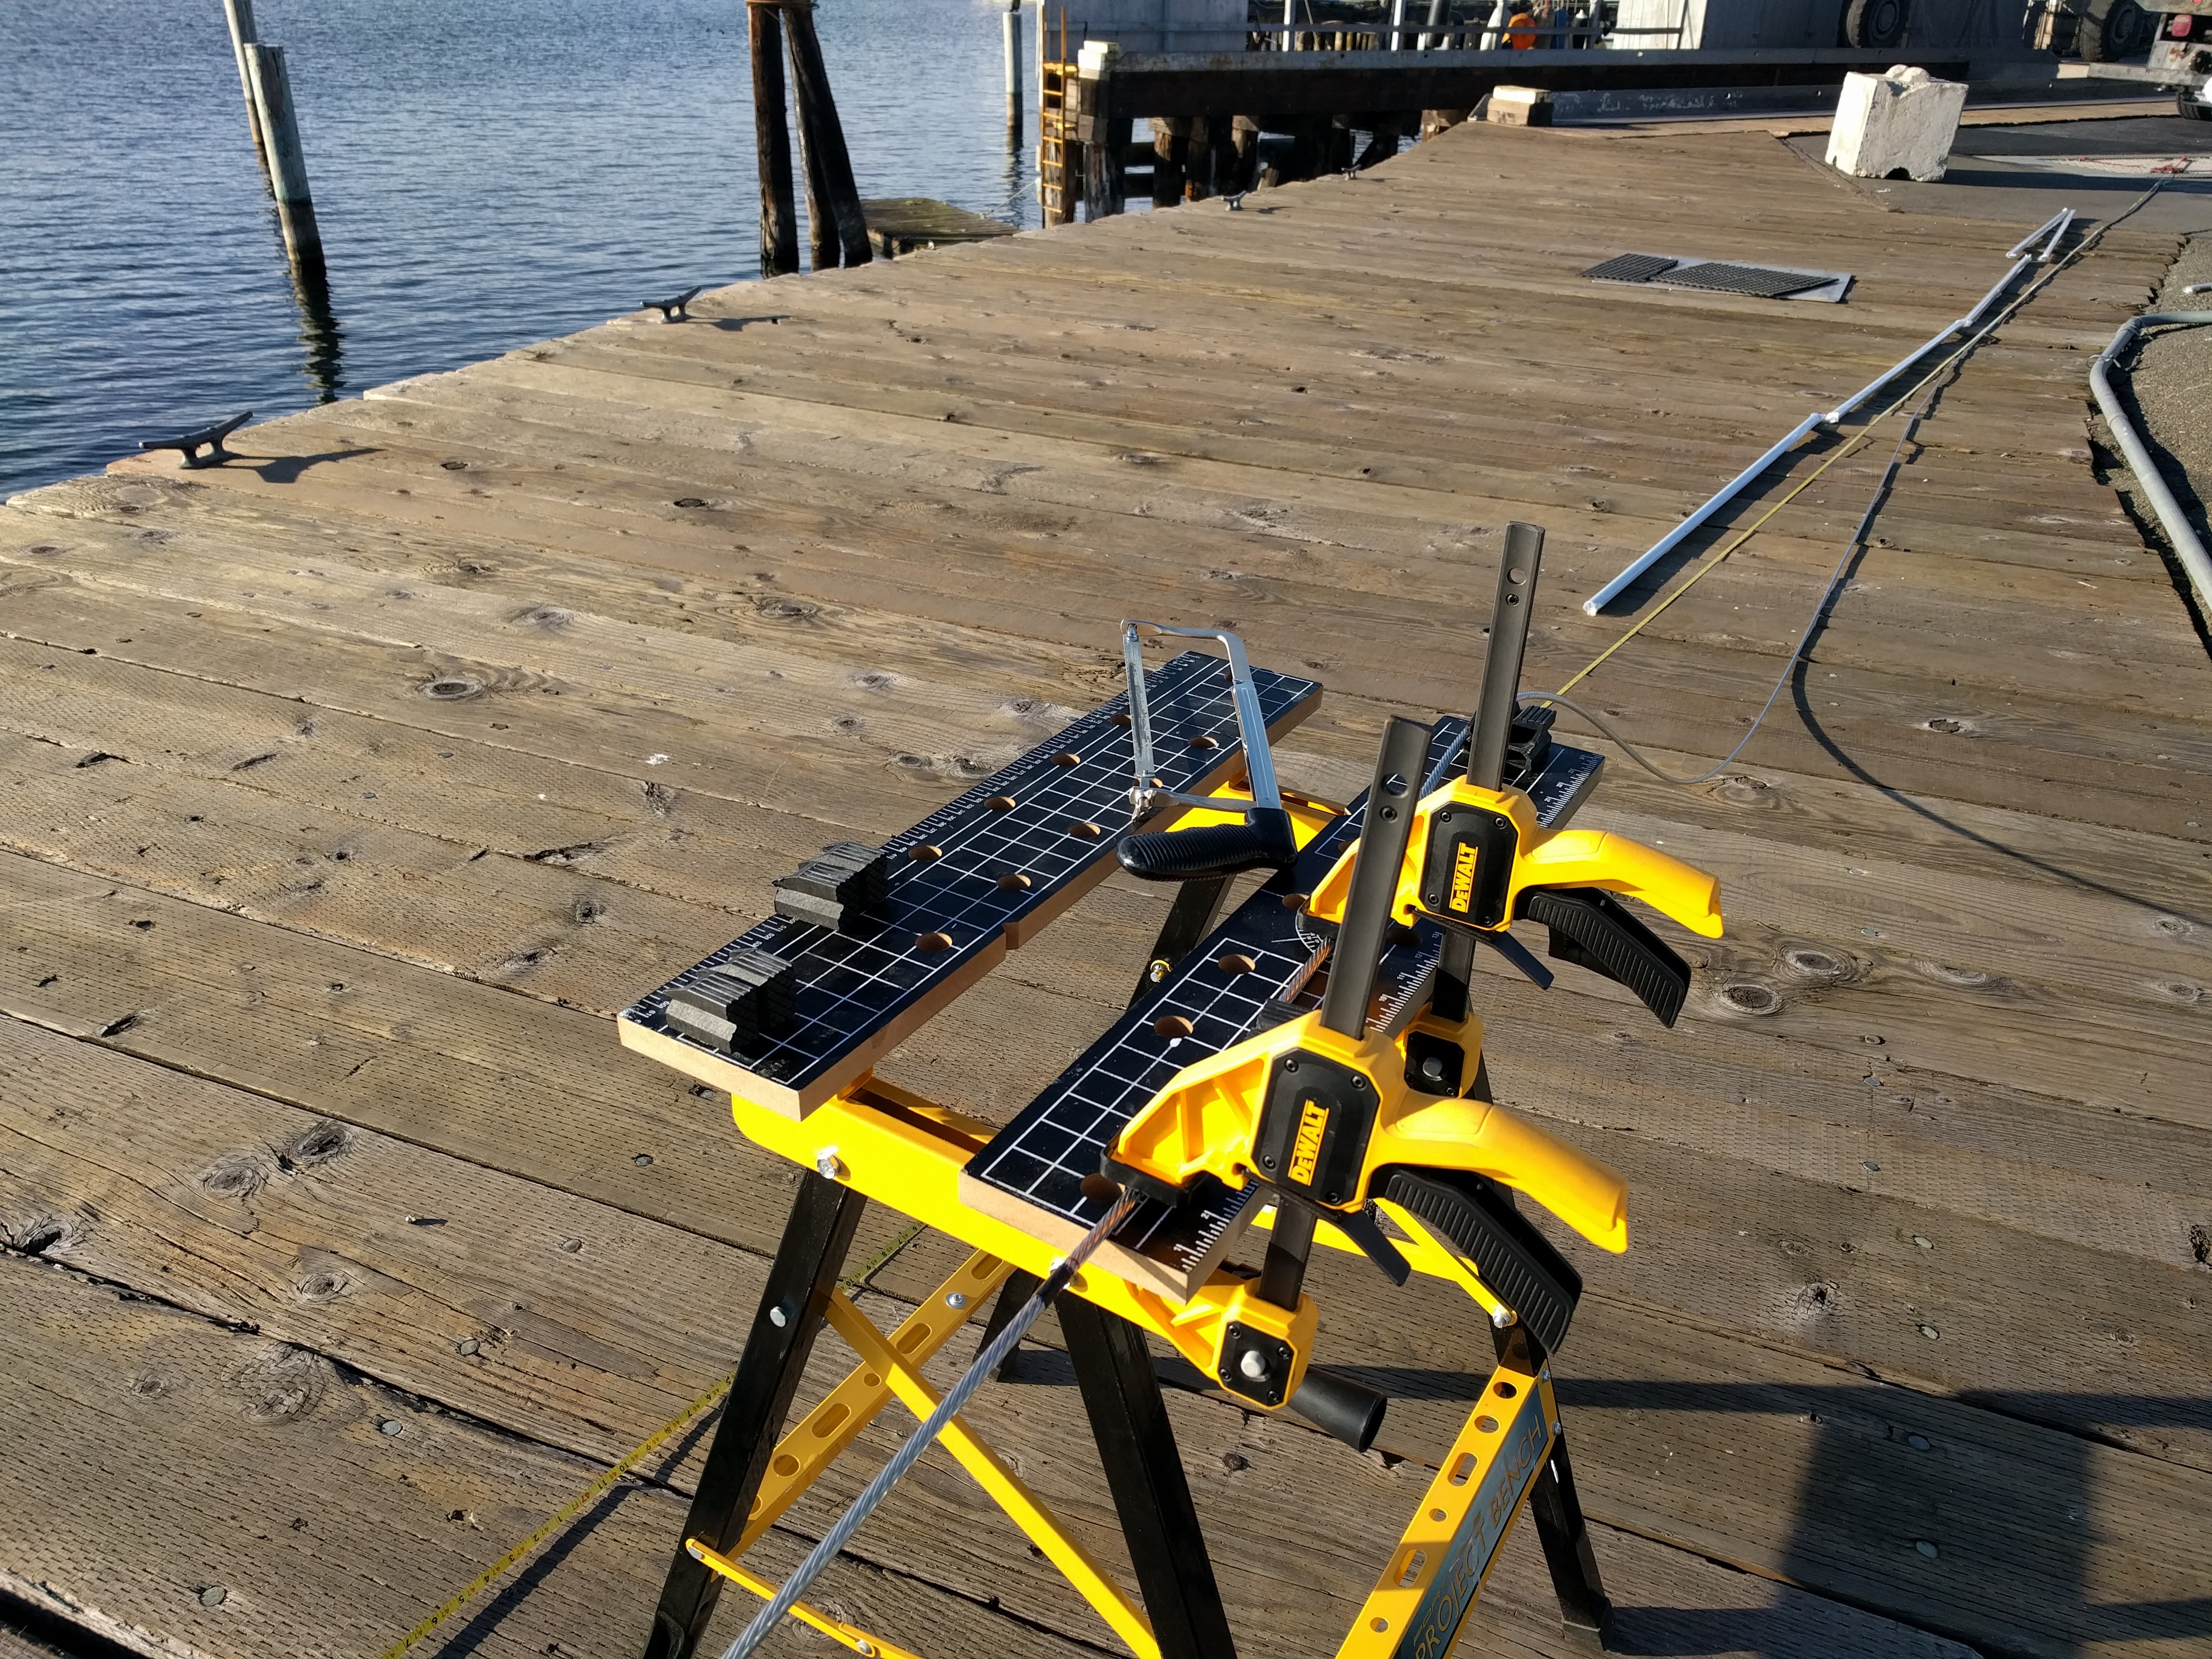
The cool thing about working in a boatyard at the mast racks rather than on a hauled out boat, is the great view right next to the water. It really makes a difference in morale.

Wow there is so much more to re-rigging that I ever knew! Thanks again for these great posts. I now have a better idea of what we have got on our hands when we do it later on this year. By the way I have nominated you for a Sunshine Blogger Award, if you have any spare time in amongst all your jobs I would love to hear your answers! https://astrolabesailing.com/2017/01/19/the-sunshine-blogger-award/
Great write up! Thanks for stepping us though the details and the decisions you made.
For people considering re-cabling a VHF antenna on top of a sailboat mast, many experts recommend using LMR400 coax due to its low loss characteristics. Or RG213 as second best choice. Never use RG58, too lossy. (LMR400=1.6dB/100feet vs. RG213=2.6dB/100ft at 160MHz) LMR400 is stiffer and therefore a bit of a bear to work with but you will get max power out into the air, and therefore max range.
Thanks for the note. I did read up on the RG213 vs LMR400 debate, and from what I could tell, the signal improvement with LMR is relatively small, and the “stiffer / bear to work with” downside was a concern for me. The difference between old, partially corroded VHF wire that many older sailboats are still using is probably an order of magnitude greater than the delta between new RG213 + connections and new LMR400. I’m also learning to always prefer the more common / popular component when possible, since the common choice is much more likely to be available in remote areas if repair is needed. That’s not to say you shouldn’t use it if you really want to though!
Thanks for the series on rerigging. I, too, am in the throes of re rigging my C&C30-2. My mast collar looks BAD, and I like what you did with yours. What was final coating? Thx!!
It’s Rust-Oleum Satin brown. Pretty inexpensive. We’ll see how long it lasts.